|
*Note: This integration is a legacy integration provided only for historical purposes. Please see here for instructions on how to use our full featured integration. |
Overview
This post describes the steps to set up the Sophos Central Deployment Addon from the ConnectWise Automate Solutions Center.
Note: Sophos ConnectWise Automate Plugin is certified via the ConnectWise Invent Program. If you need assistance with plugin implementation, please contact MSP.SE@sophos.com for support.
What to do
Step one: Download the Customer CSV File from the Partner Dashboard.
Please review the Central Partner - Customer CSV section under Integrations if you don't know how to find this.
Step two: Clean up virus scan definitions for Sophos.
Note: Don't do this after installing the Addon from the Solutions Central.
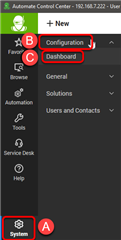
- In the ConnectWise Automate Control Center, click on System > Configuration > Dashboard.
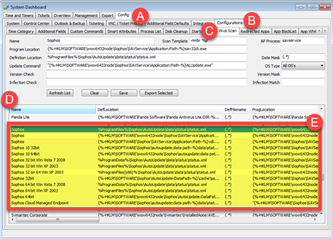
- In the System Dashboard, go to the Config tab > Configurations tab > Virus Scan tab.
- Sort by Name and scroll to Sophos.
- Highlight all the listed Sophos definitions then right-click and select Delete. If the Sophos Central Addon is already installed, do not delete the Sophos Central Viruses Definitions.
Note:
- Software inventory runs every 24 hours by default. So it might take a day for existing workstations and servers to be listed correctly.
- You can remove all of the other Sophos virus definitions prior to installing the Sophos Central Deployment Addon.
Step three: Install the Sophos Central Addon from the Solutions Center.
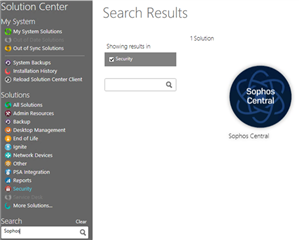
- Search and click on the Sophos Central Addon or look for it under Security.
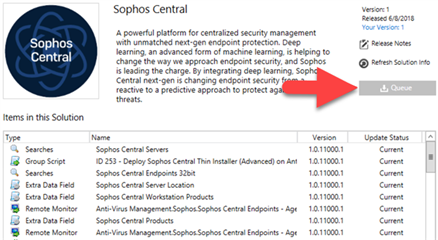
- At the top right corner, click on Queue to install the addon.
Step four: Enabling the Sophos Central Deployment process.
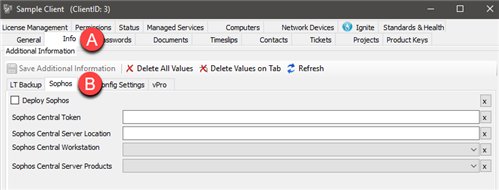
- Open a client.
- Click the Info tab > Sophos tab.
- Fill in the Sophos Central Token and Sophos Central Server Location fields.
- Click the drop-down for Sophos Central Workstation and Sophos Central Server Products.
- If you want to start the deployment now, tick the Deploy Sophos checkbox then click the Save Additional Information button.
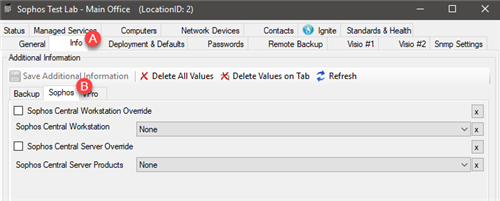
- Open the Location > Info tab > Sophos tab.
- Tick on the checkbox of what you need to override then select the products from the drop-down list. The Sophos Central Add-on gives the ability to override the client level products at both the Location and Workstation/Server level.
- Open the workstation or server where you need to apply this.
- Click the automation gear icon at the top.
- Click on the Extra Data Fields tile.
- Select Sophos on the left side > tick on Sophos Central Product Override > select the product from the drop-down list. If you select None, it will stop Sophos from installing on the workstation/server.
- Click on Save.

