

Check out Sophos Techvids for video help guides!
Overview
below are the steps to generate a Self-Signed Certificate using IIS in Windows Server 2012.
Applies to the following Sophos products and versions:
Windows Server 2012+
How to create and bind an SSL certificate using Windows Server
How to bind the Self-Signed Certificate
Create the SSL Certificate
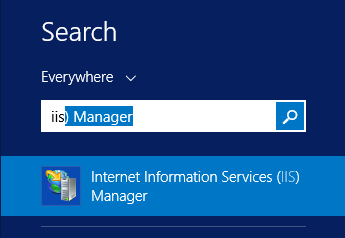
- Click the Windows icon in the taskbar, Search for IIS, and open Internet Information Services (IIS) Manager.
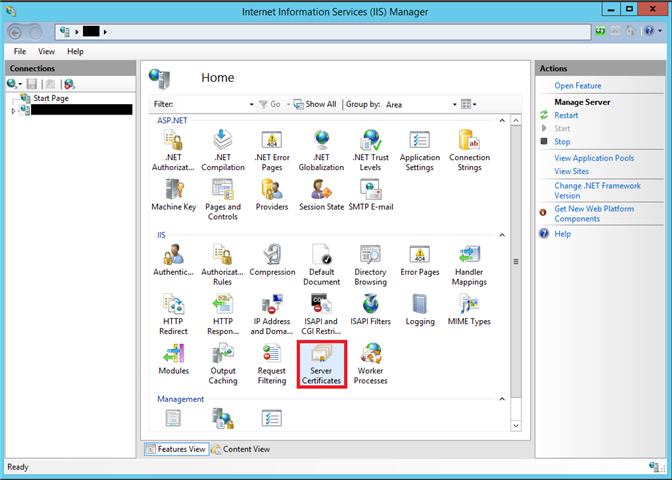
- Click the server's name in the Connections column on the left—Double-click the Server Certificates icon.
- In the Actions column on the right-hand side, click Create Self-Signed Certificate.
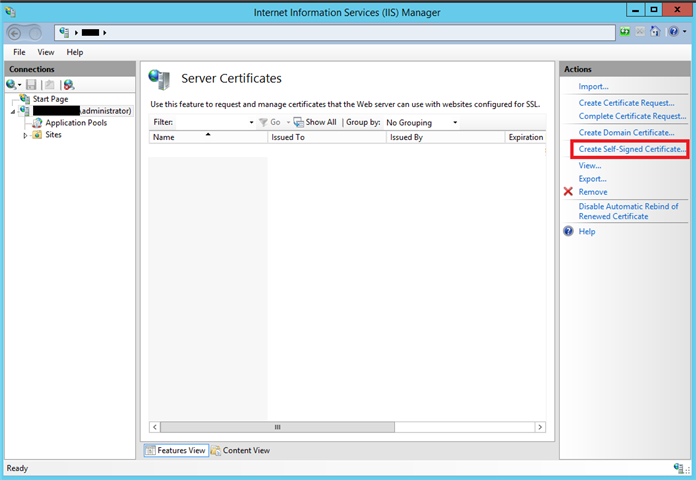
- Enter the friendly name you wish to use to identify the certificate, and then click OK.
- You now have an IIS Self-Signed Certificate, valid for one year, which will be listed under Server Certificates. The common name is the server name.
How to Bind the Self-Signed Certificate
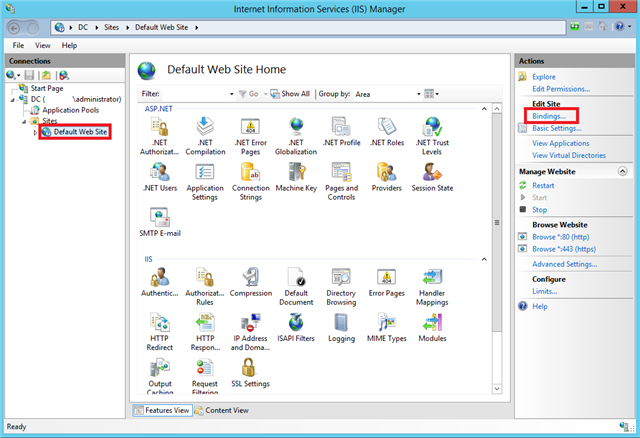
- Browse to the Connections column on the left-hand side, expand the Sites folder and click the website you wish to bind the SSL certificate. Once you've done that, on the right-hand side, click Bindings in the Actions column.
- Click the Add.. button.
- Click the Type drop-down menu. Select HTTPS. Click the SSL Certificate drop-down, choose the newly created SSL certificate. Click OK.
- You should now see the bindings for port 443. Click Close.
- To test the new Self-Signed SSL Certificate, open up a browser, and go to the website. If the certificate has been installed and created correctly, depending on the browser you are using, you will see a lock icon next to the URL, or it will say Secure. This is an example of how it would look in Google Chrome.
- Chrome

- Opera

- Internet Explorer

- Chrome
Sign up to the Sophos Support Notification Service to get the latest product release information and critical issues.
update article for community
[edited by: Jan Michael Jayme at 5:21 AM (GMT -7) on 19 Jul 2021]