

Disclaimer: This information is provided as-is for the benefit of the Community. Please contact Sophos Professional Services if you require assistance with your specific environment.
Table of Contents
- Overview
- Configuration
- Step 1: Take a backup
- Step 2: Turn off the Sophos Firewall VM Instance
- Step 3: Delete the Sophos Firewall VM
- Step 4: Go to Deployment Option
- Step 5: Redeploy
- Step 6: Change Image SKU
- Step 7: Validation
- Step 8: Register your Sophos Firewall
- Step 9: Check the device registration details
- Step 10: Backup & Restore
- Related Documentation:
Overview
The Recommended Read describes the Steps to convert Sophos Firewall from PAYG to BYOL on Azure.
Configuration
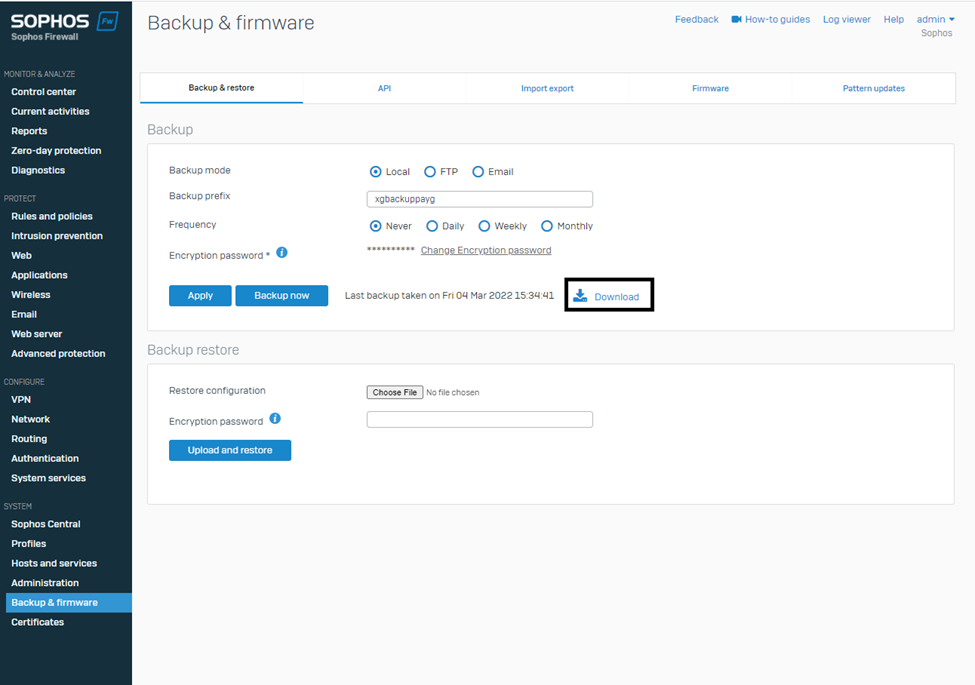
Step 1: Take a backup
Take a backup of your PAYG Sophos Firewall VM instance
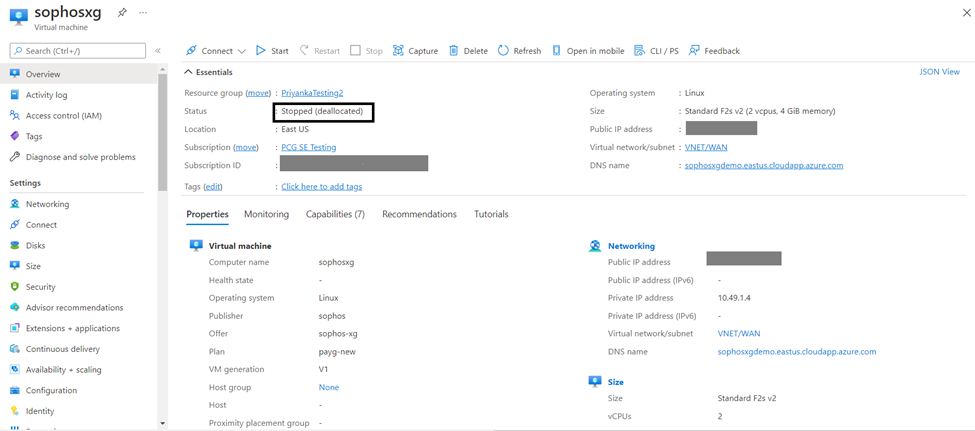
Step 2: Turn off the Sophos Firewall VM Instance
In Azure, turn off the Sophos Firewall VM Instance
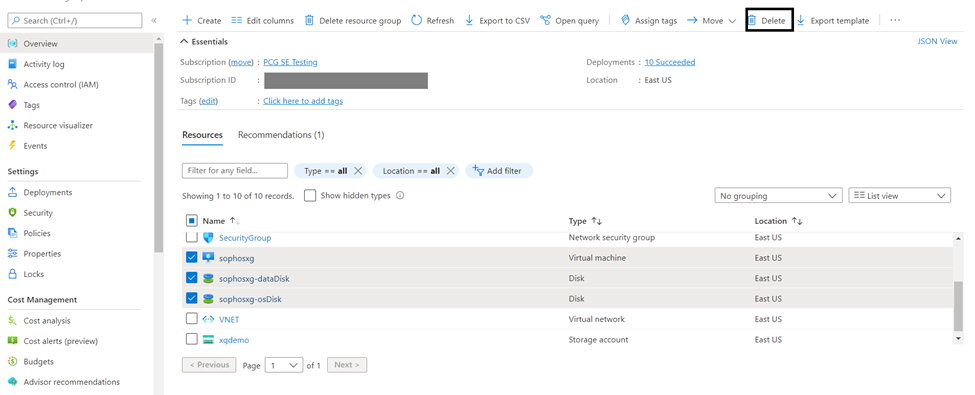
Step 3: Delete the Sophos Firewall VM
Now go to the resource group in which Sophos Sophos Firewall has been deployed, select the Sophos Firewall Virtual Machine, Data disk, and OS disk, and click on Delete to completely delete them. (In the case of HA deployment, select both the Sophos Firewall Virtual Machine Instances and respective Data disk and OS Disk, so there would be 2 VM Instances and 4 disks to be selected.)
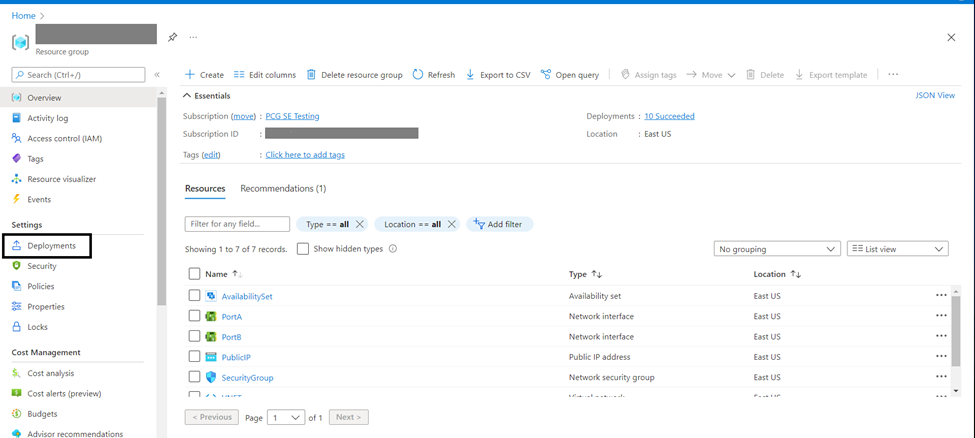
Step 4: Go to Deployment Option
Once the selected resources have been deleted, go to the same resource group and go to the Deployment option on the left-hand side pane under Settings.
Step 5: Redeploy
Select the option of SettingUpVM and click the option of Redeploy. (In the case of HA, select the option of SettingUpVm0 and SettingUpVm1, they need to be deployed one after another)

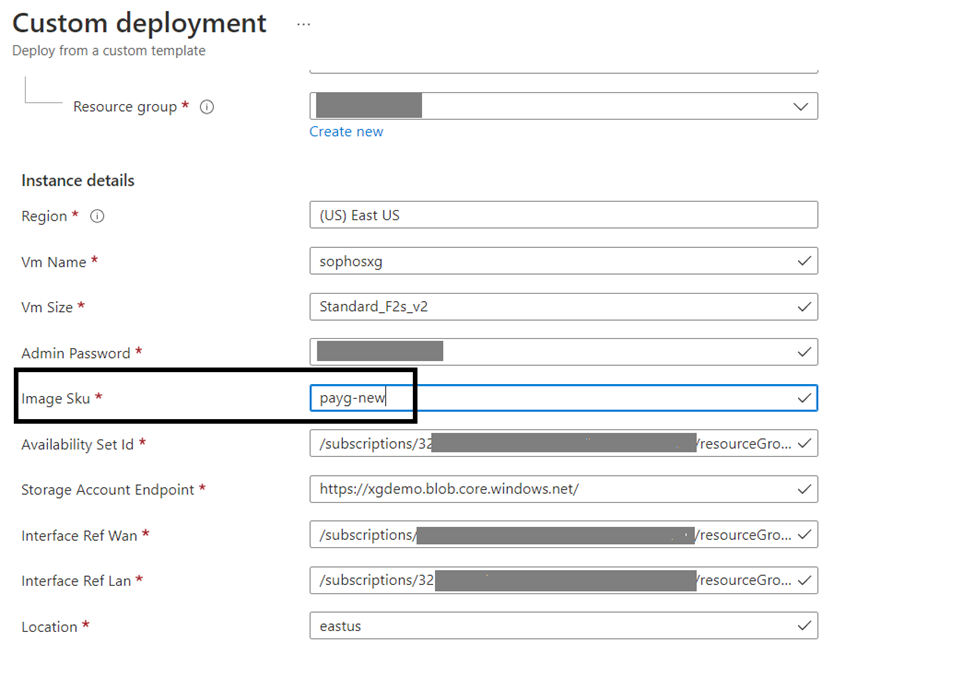
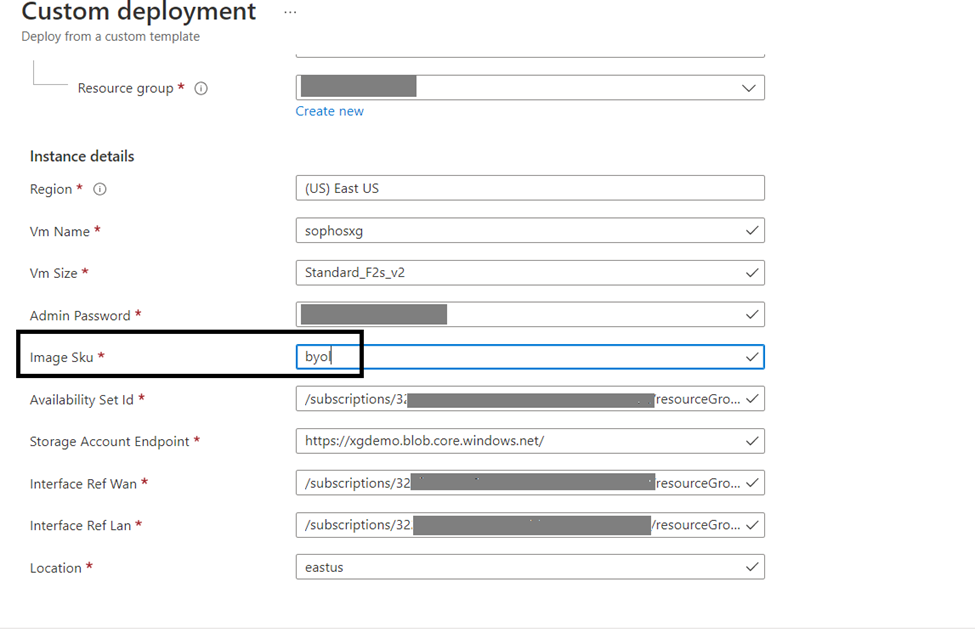
Step 6: Change Image SKU
It will prepopulate details of the previously deployed Sophos Firewall. Here, you must change Image Sku from payg-new to you, click review, and create (For HA deployment, perform this step for both the Sophos Firewall VM instances).
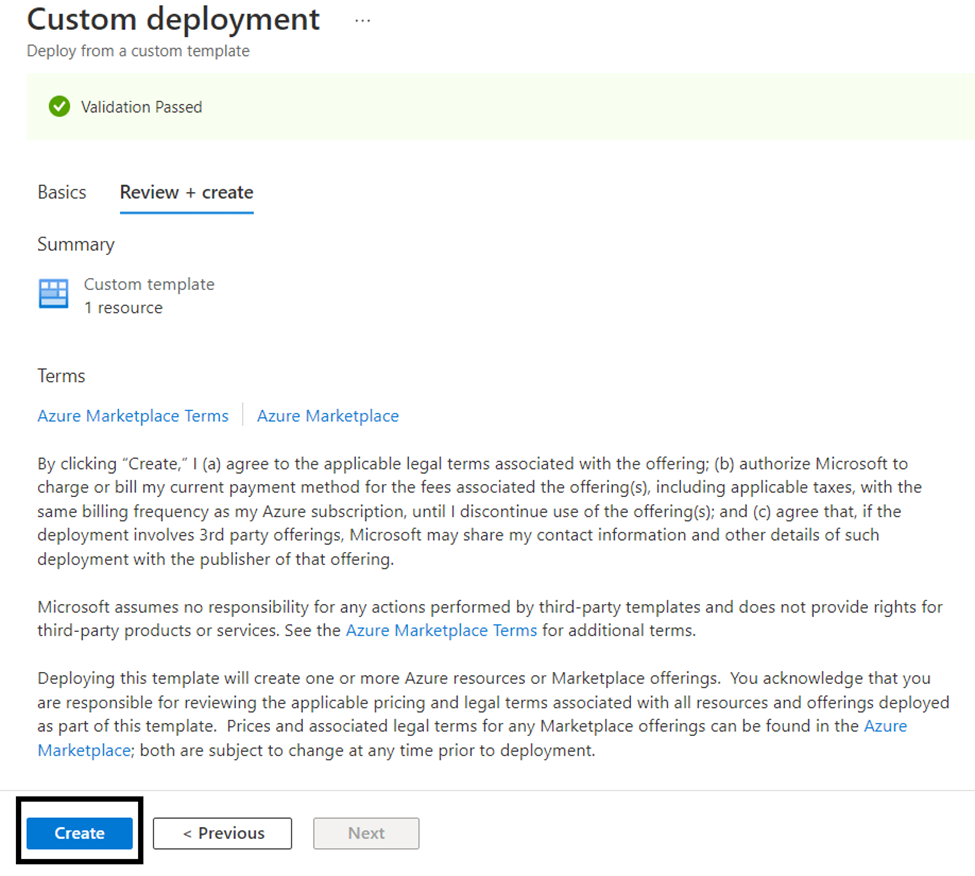
Step 7: Validation
If the details for the selected VM are correct, it’ll pass the validation, and then click Create option
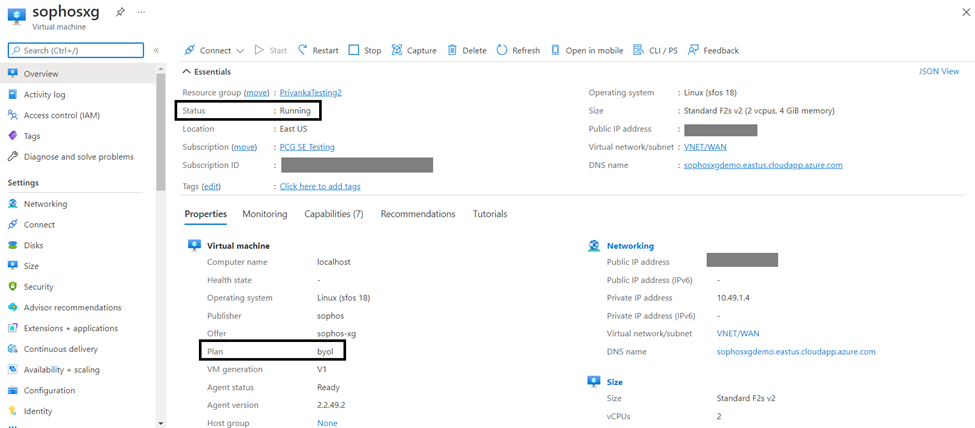
After the deployment is successful, you can see a new Sophos Firewall VM instance deployed with the same Public IP address and Plan showing as byol
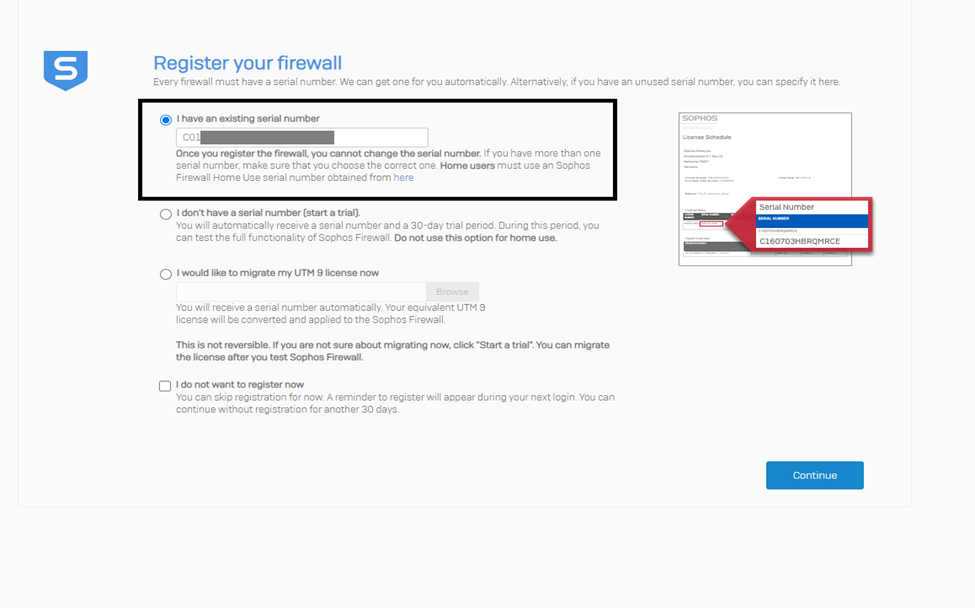
Step 8: Register your Sophos Firewall
Please access the web GUI of the firewall; it’ll have a factory reset configuration without any registration details. Enter your received serial number on the registration page, and the license server will automatically synchronize to show the correct details. You can start a trial from the registration page if you don't have a serial number. (For HA deployment, perform this step for both the Sophos Firewall Virtual Machines)
Step 9: Check the device registration details
Once logged in, you can see on the Dashboard that it’ll show the Serial key. And you can also go to System>Administration>Licensing to check the device registration details.

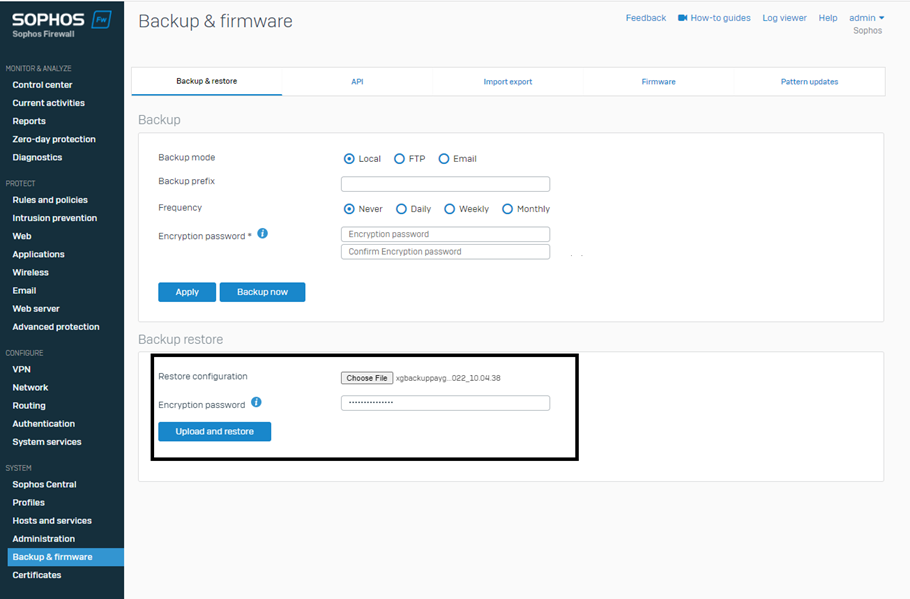
Step 10: Backup & Restore
After that, go to System>Backup&Restore and restore the backup you took in Step 1. (For HA deployment, the backup needs to be restored on both devices)
Note: After the redeployment, the backup restore must work if the firmware version of the new VM is the same as the old VM.
Related Documentation:
- Sophos Firewall on Azure: How to Deploy
- Recovery steps of the Sophos Firewall VM in Azure
- Sophos Firewall: How to implement a full HA (inbound/outbound) on Azure
- Sophos Firewall: Deploying standalone firewalls in Microsoft Azure
Revamped RR
[edited by: Erick Jan at 3:49 AM (GMT -7) on 9 Oct 2024]