

Disclaimer: This information is provided as-is for the benefit of the Community. Please contact Sophos Professional Services if you require assistance with your specific environment.
Table Of Contents
- Overview:
- Configuration
- Step 1: Backup a previous good-known config
- Step 2: Turn off Sophos Firewall VM Instance
- Step 3: Deleting Firewall VM Instance Completely
- Step 4: Deployment
- Step 5: SettingUPVm option
- Step 6: Initiate Deployment Process
- Step 7: Validation then proceed to Creation
- Step 8: Post-Deployment
- Step 9: Registration
- Step 10: Restore Configuration
Overview:
Traditionally in hardware firewalls, if the device is corrupted and can't be recovered by any means, they’re generally declared as RMA and the customer receives a replacement device.
In cloud deployments, the firewalls are deployed as Virtual Machines(VM), so RMA isn’t an option here.
Hence this document shows the steps that the users can perform to redeploy the Sophos firewall VM instances in the Azure platform, in case the existing firewall VM gets corrupted.
Configuration
Step 1: Backup a previous good-known config
Make sure that you have the previous good-known config backup file of the Sophos Firewall VM that was downloaded when the VM instance was working well. This will help to get the firewall VM redeployed to that state.
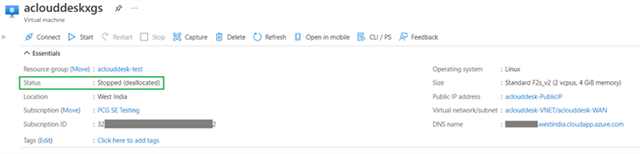
Step 2: Turn off Sophos Firewall VM Instance
In the Azure portal, turn off the Sophos Firewall VM instance.
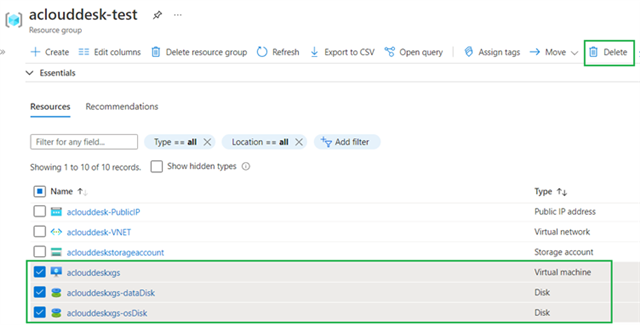
Step 3: Deleting Firewall VM Instance Completely
Go to the resource group that contains the disks and VM instances. Select the VM instance, OS disk and data disk (for HA deployments it would be 2 VMs and 4 Disks) and click Delete to remove the firewall VM instance completely.
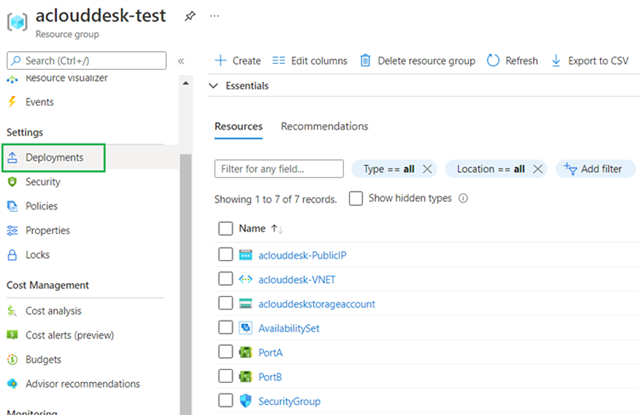
Step 4: Deployment
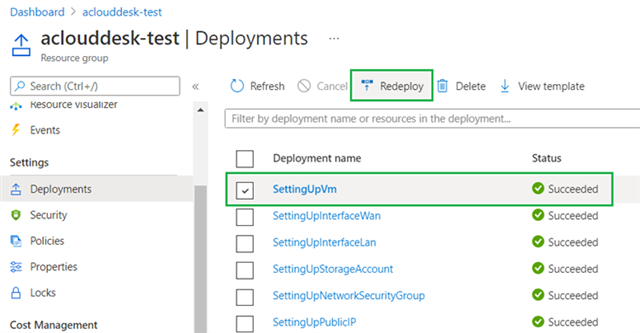
Once the selected items are removed, in the same resource group click Deployments option that is located on the left side, under the Settings menu.
Step 5: SettingUPVm option
Select the SettingUpVm option (for HA deployments it would be SettingUpVm0 and SettingUpVm1) from the list and then click Redeploy so that it’ll initiate the redeployment process for the Sophos Firewall.
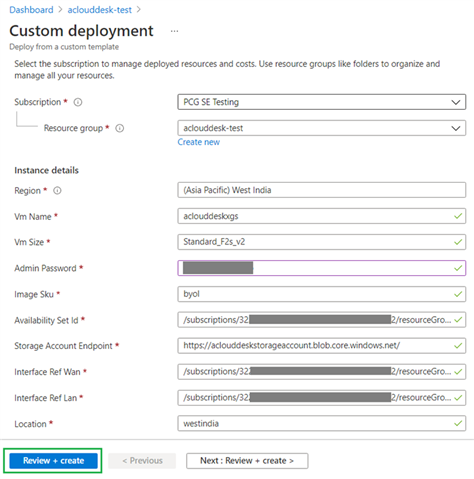
Step 6: Initiate Deployment Process
It’ll show the prepopulated deployment details, location and other relevant information specific to that VM instance. Click Review + Create to initiate the deployment process.
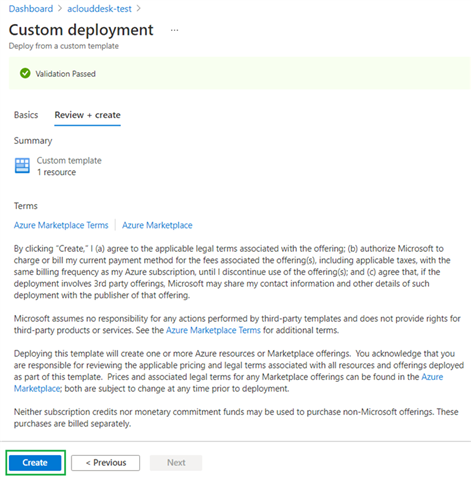
Step 7: Validation then proceed to Creation
If the details are correct for the selected VM instance, the validation will be a success and then click Create.
Step 8: Post-Deployment
After the deployment process is completed, it’ll show the firewall VM instance with the same IP address and other details that were used for the previously deleted VM instance.

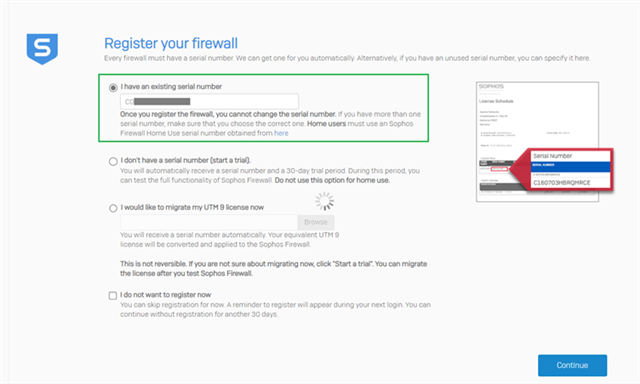
Step 9: Registration
Access the WebUI of the firewall instance(https://<IP address or DNS name>:4444) and it would be having factory reset configuration without any registration details. Enter the serial number of the previously deleted firewall VM instance on the registration page and it’ll automatically synchronize with the licensing server to display the correct subscription/renewal license with the expiry dates.
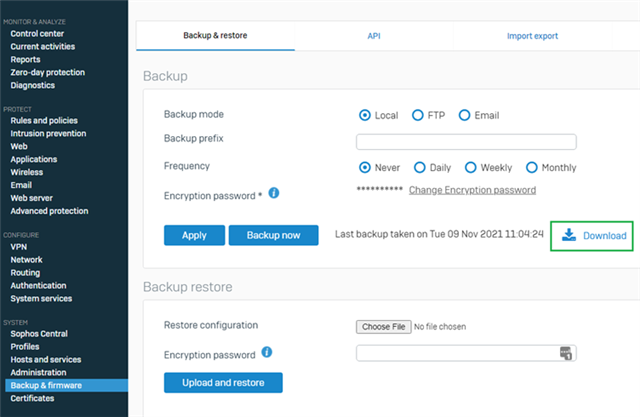
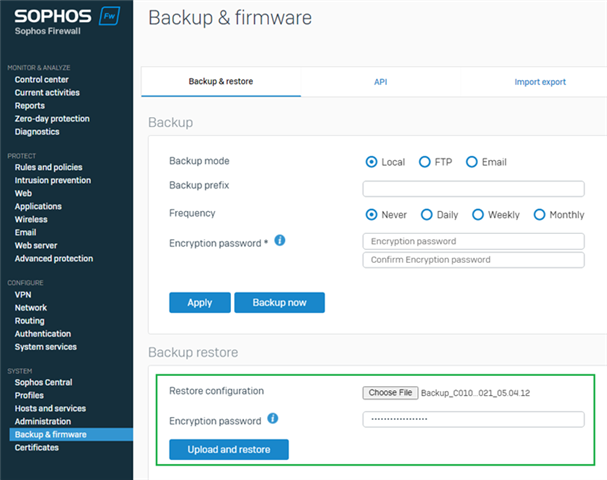
Step 10: Restore Configuration
Once you’re logged into the device with admin credentials, navigate to Backup & firmware > Backup & restore > Backup restore and upload the previously downloaded config backup (mentioned in step 1) so that the device will be restored to that good state.
For any additional queries, please get in touch with publiccloud@sophos.com
______________________________________________________________________________________________________________________________________
Added TAGs
[edited by: Raphael Alganes at 5:48 AM (GMT -7) on 18 Sep 2024]