

Disclaimer: This information is provided as-is for the benefit of the Community. Please contact Sophos Professional Services if you require assistance with your specific environment.
Table of Contents
- Overview:
- Azure portal configuration steps
- Sophos Sophos webUI configuration steps
- (Optional configuration) Routing the LAN subnet traffic to the internet via the Sophos firewall
Overview:
This Recommended Read describes how to deploy Sophos Firewall on Azure
Azure portal configuration steps:
- To deploy the Sophos on Azure Firewall, you will first need to login to the Azure portal (https://portal.azure.com) and then visit the Marketplace.

- Search for Sophos Sophos firewall and then it will show the Sophos firewall in the result section. Click on it.
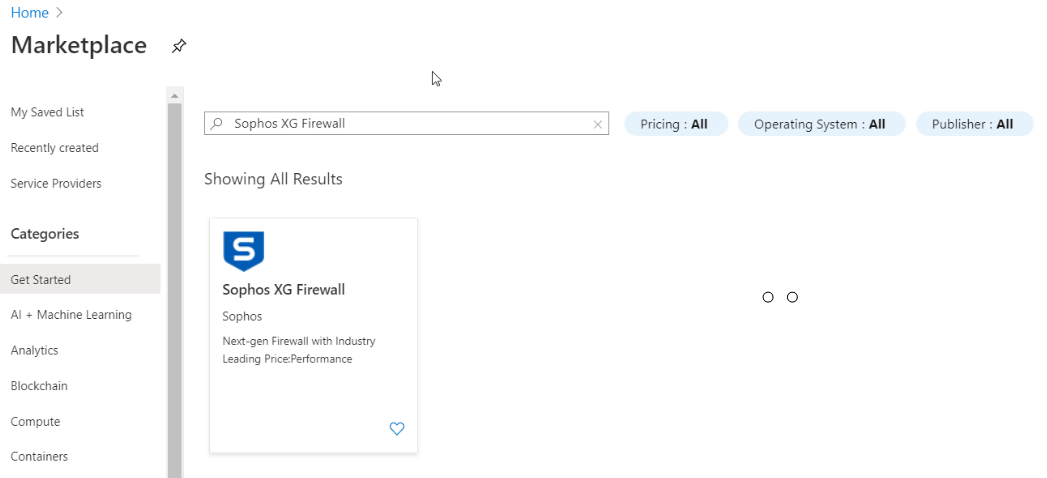
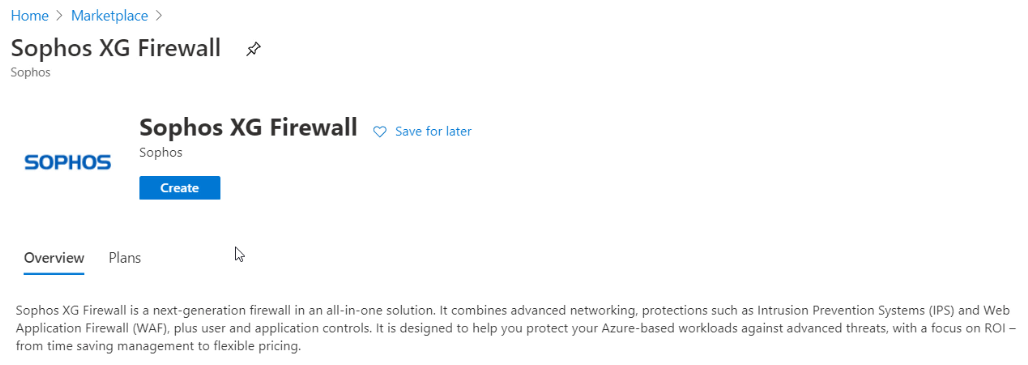
- Click on the Create button to proceed with the deployment.
- Select the subscription associated to the Azure portal account.
- Resource group: You may select the existing resource group or create a new one by clicking on the Create new option.
- Region: Select the region closest to you as per your preference.
- VM Name: Enter an appropriate name that will be used for Sophos firewall.
- Password / Confirm password: This is the password that will be used by username admin to login to the Sophos firewall. Make sure to enter the same password in both fields and then click on the Next button.

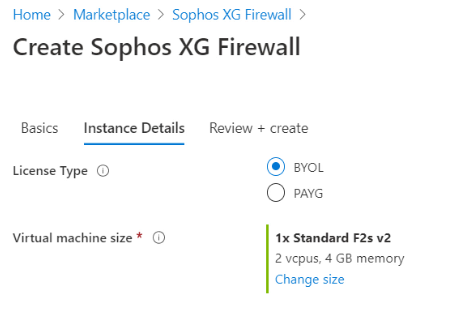
- In the License Type option, you can either select BYOL or PAYG for the Sophos firewall instance.
- PAYG licensing enables consumption based hourly billing through the Azure Marketplace.
- BYOL licensing requires you to acquire a license from a Sophos reseller, contact your Sophos account rep or publiccloud@sophos.com for more information.
- Virtual machine size: This would be the size of the Sophos firewall VM instance. The default size selected is Standard F2s v2 (2 virtual CPUs, 4 GB memory) as it is the minimum requirement for the Sophos firewall. You may change this size as per the requirement, by clicking on the Change size option.
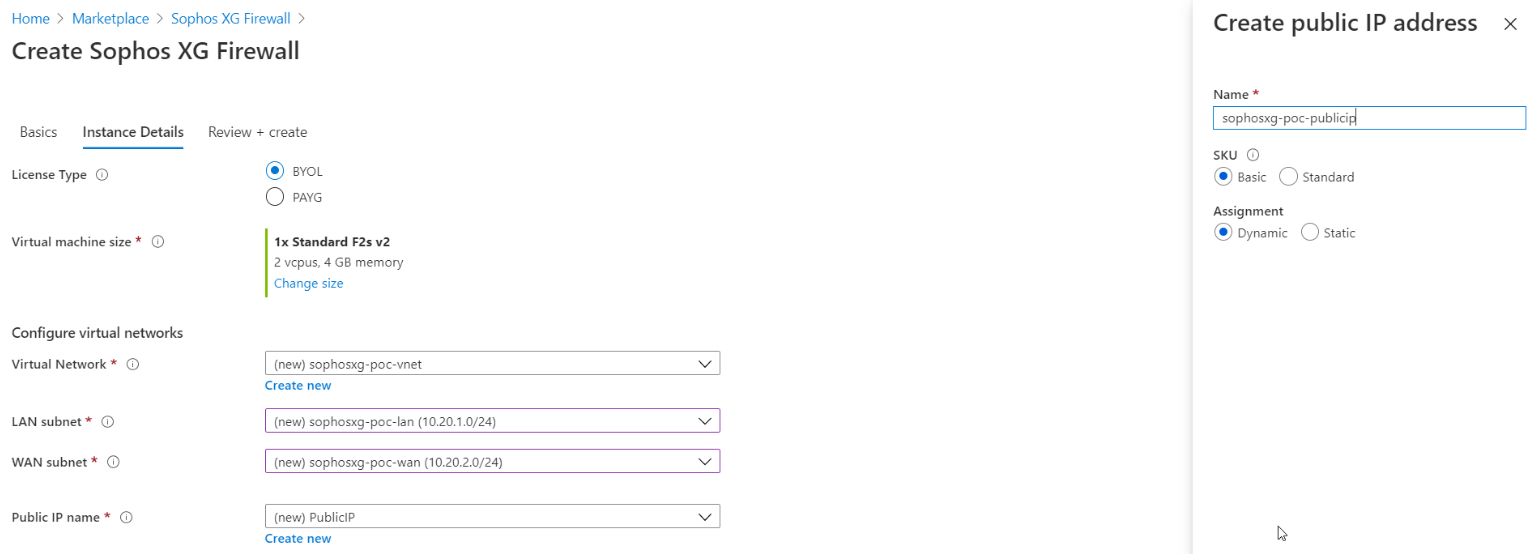
- In the Virtual Network section, you can choose the existing virtual network or create a new one.
- Once you click on the Create new option, a new pop-up window will appear. Enter an appropriate name for the virtual network.
- Address range: This will be the IP address subnet of the entire virtual network and usually configured with a /16 CIDR.
- In the Subnets section, you can give a name for the LAN and WAN networks and accordingly assign the IP address range to both those subnets from the virtual network address range network. This is generally configured with a /24 CIDR.
- Once this is done, click on the OK button.

- Select the newly created subnets for the LAN subnet and WAN subnet of the Sophos firewall.

- For the Public IP name, you can either select an existing public IP, or create a new one.
- Upon clicking the Create new option, a new pop-up window will appear and there you need to give an appropriate name of the new public IP address, select the required SKU and then select the IP assignment type either as Dynamic or Static and then click on the OK button.
- Configure a unique domain name that will be used to access the webUI and SSH console of the Sophos firewall VM instance.

- In the Storage Account section, you can choose the existing storage account or create a new one.
Once you click on Create new option, a new pop-up window will appear. Enter a unique name for the storage account.- Account kind: Various types of storage accounts are available that you can use. The default selected option is Storage (general purpose v1).
- Performance: You can either select Standard or Premium option for the associated storage account.
- Replication: For the replication of the storage account, you can either select locally-redundant storage or geo-redundant storage. The default selected option is Locally-redundant(LRS).
- Once these parameters are selected, click on OK and then click on Next: Review + create button.

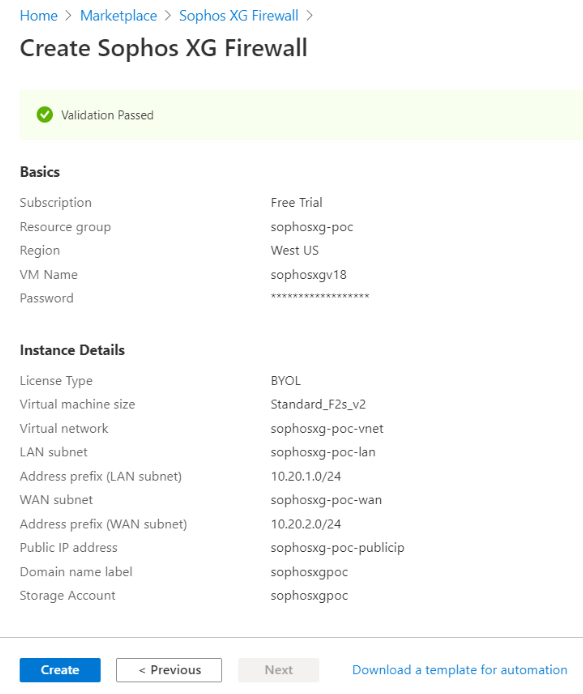
- After the validation check is successful, it will show a summary of all the parameters associated to the Sophos firewall instance and once they have been reviewed, click on the Create button to initiate the deployment of the Sophos firewall in your Azure portal account.
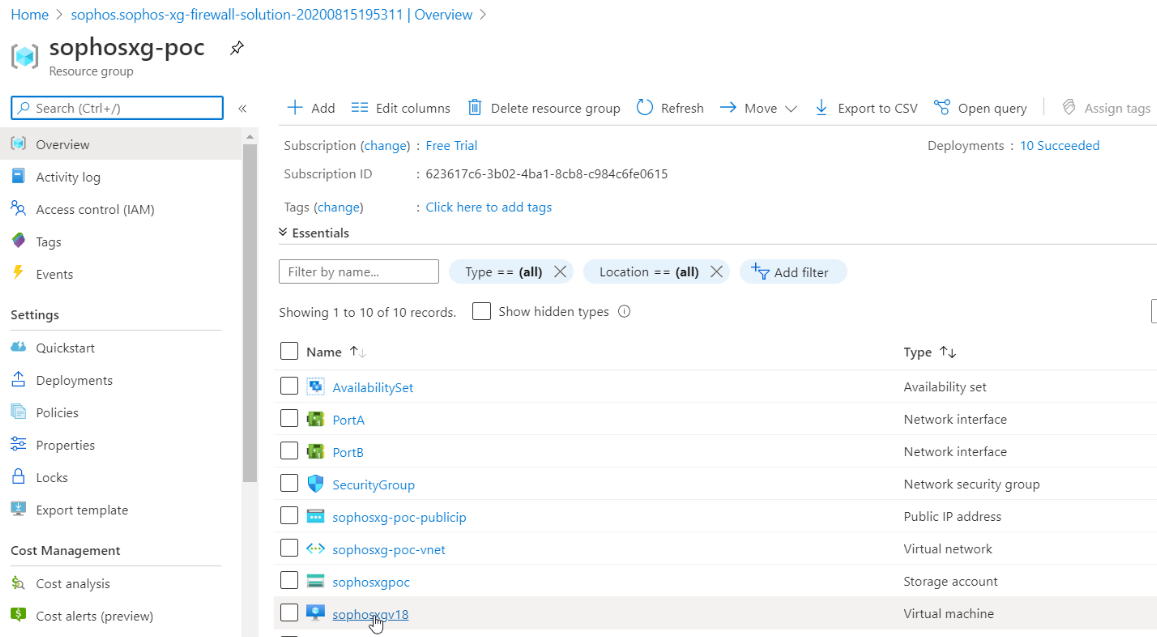
- The deployment process will typically take a few minutes and once it is successful, it will show the confirmation message and then click on Go to resource group button, to see the resources that have been deployed in your account along with the Sophos firewall VM instance.

- Click on the Sophos firewall VM name to see its properties.
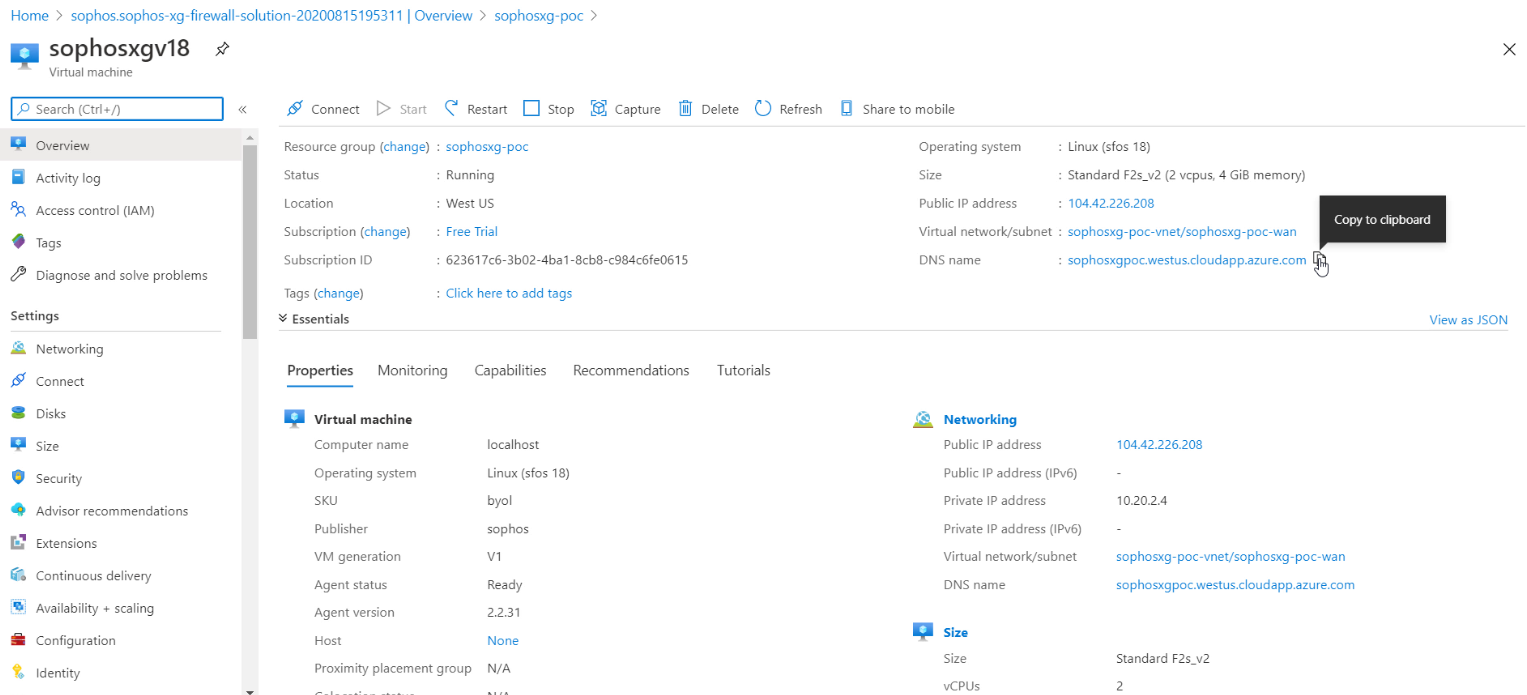
- You can see the Public IP address and the DNS name associated with the Sophos VM instance. Copy the DNS name by clicking on the copy icon.
Sophos Sophos webUI configuration steps:
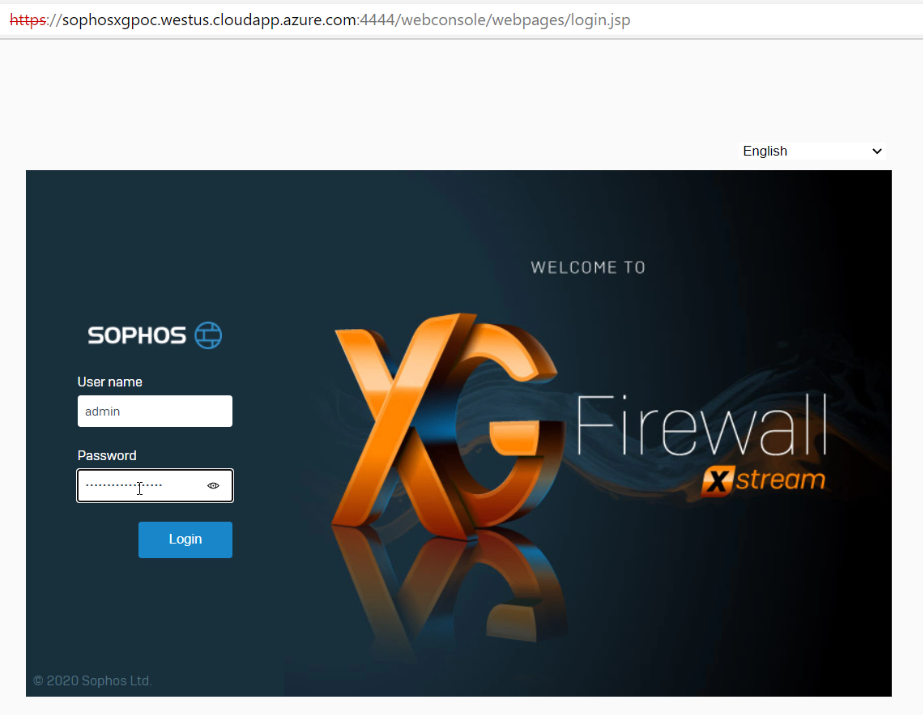
- Open a new browser window and try to access the Sophos firewall on HTTPS port 4444 with the DNS name.
Example: https://<DNS name>:4444- Enter the username as admin and the password that was initially setup in step 4 and then click on the Login button.
- Read the Sophos EULA (End-User License Agreement) and then click on the I accept button.

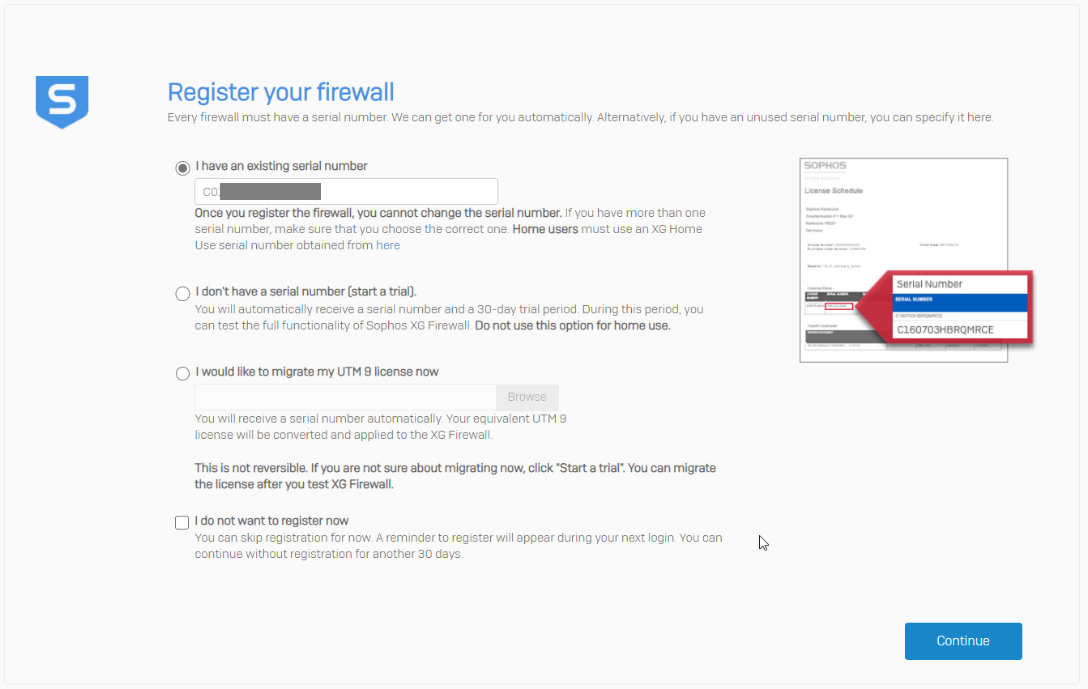
- If you have selected BYOL in step 5, then it will show the various options available to register your Sophos Firewall by entering an existing Sophos serial number or starting a 30-day trial which will automatically generate an Sophos serial number or by migrating an existing UTM 9 license.
- After selecting an appropriate option, click on the Continue button.
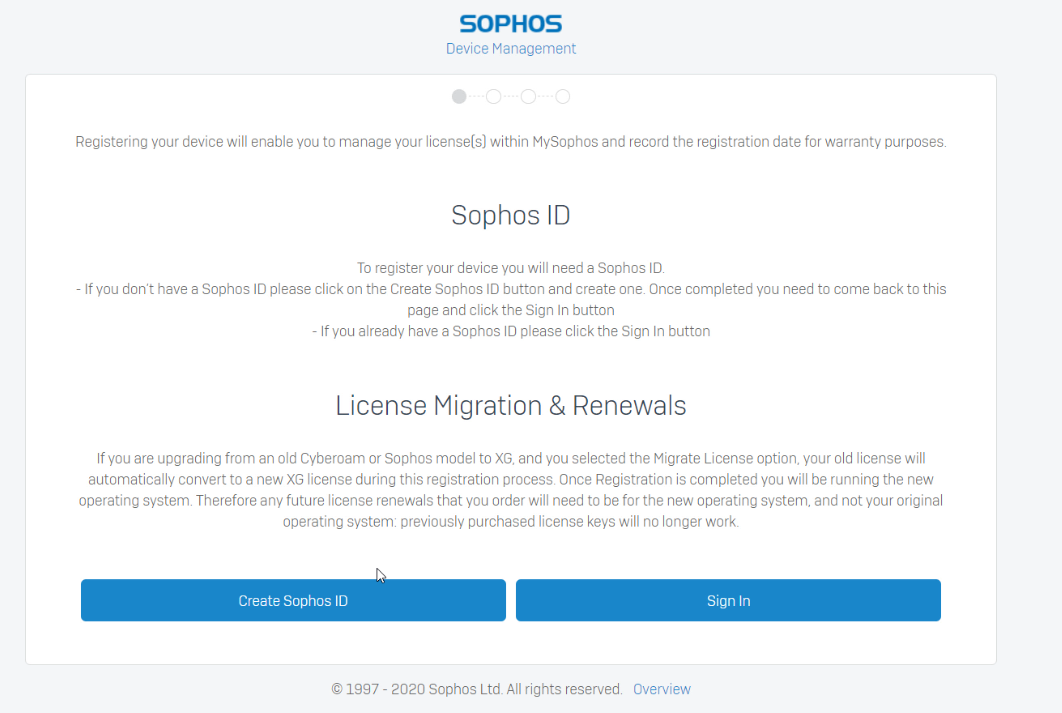
- It will redirect you to the MySophos portal for the Sophos firewall registration process wherein you can select the create Sophos ID option for a new account or use the Sign In button to use an existing account.
In this article, we have shown the steps of selecting the Sign In button.
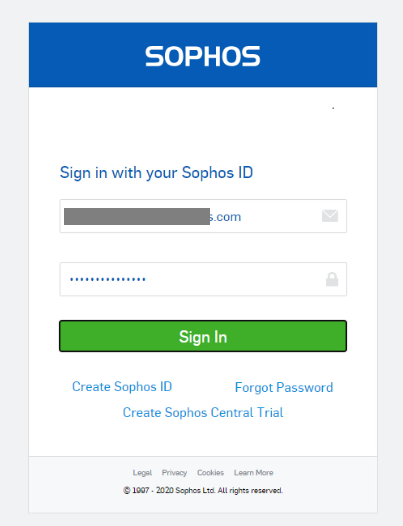
- Enter the email ID and password of the existing MySophos account.
- After verifying the captcha, click on the Continue

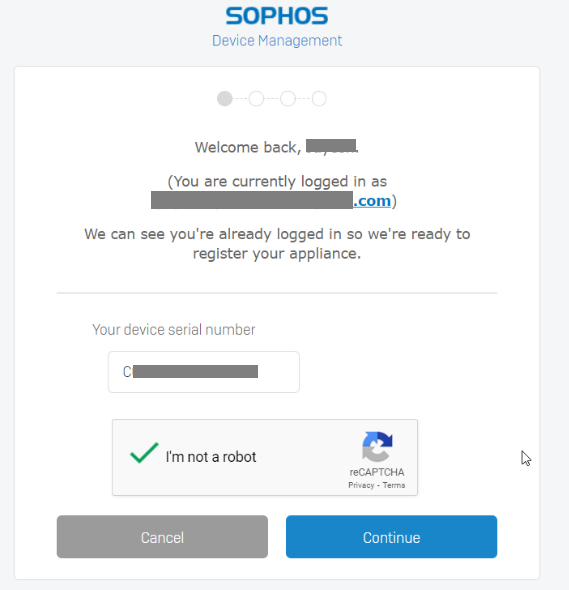
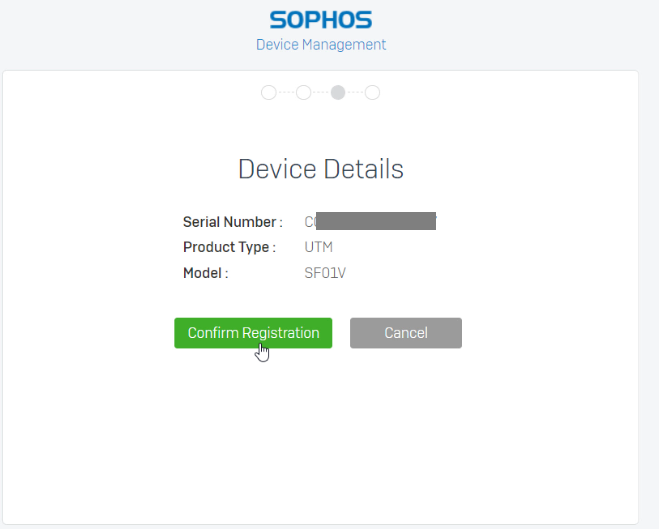
- It will show the serial number and the Sophos firewall model. Click on the Confirm Registration button to initiate the license synchronization.
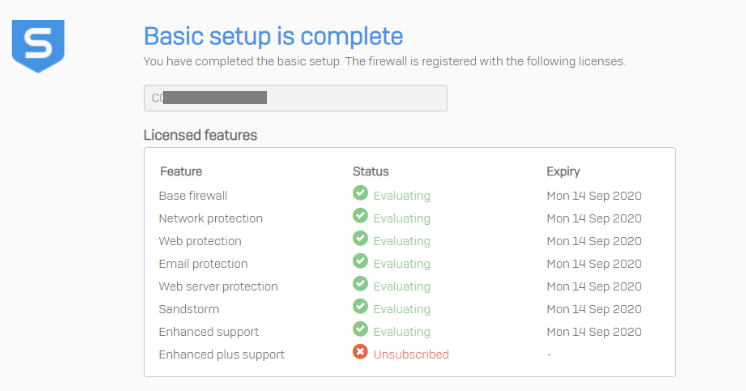
- Once the license synchronization process is completed, it will show various modules that are subscribed along with its expiry dates. Click on the Continue
button.
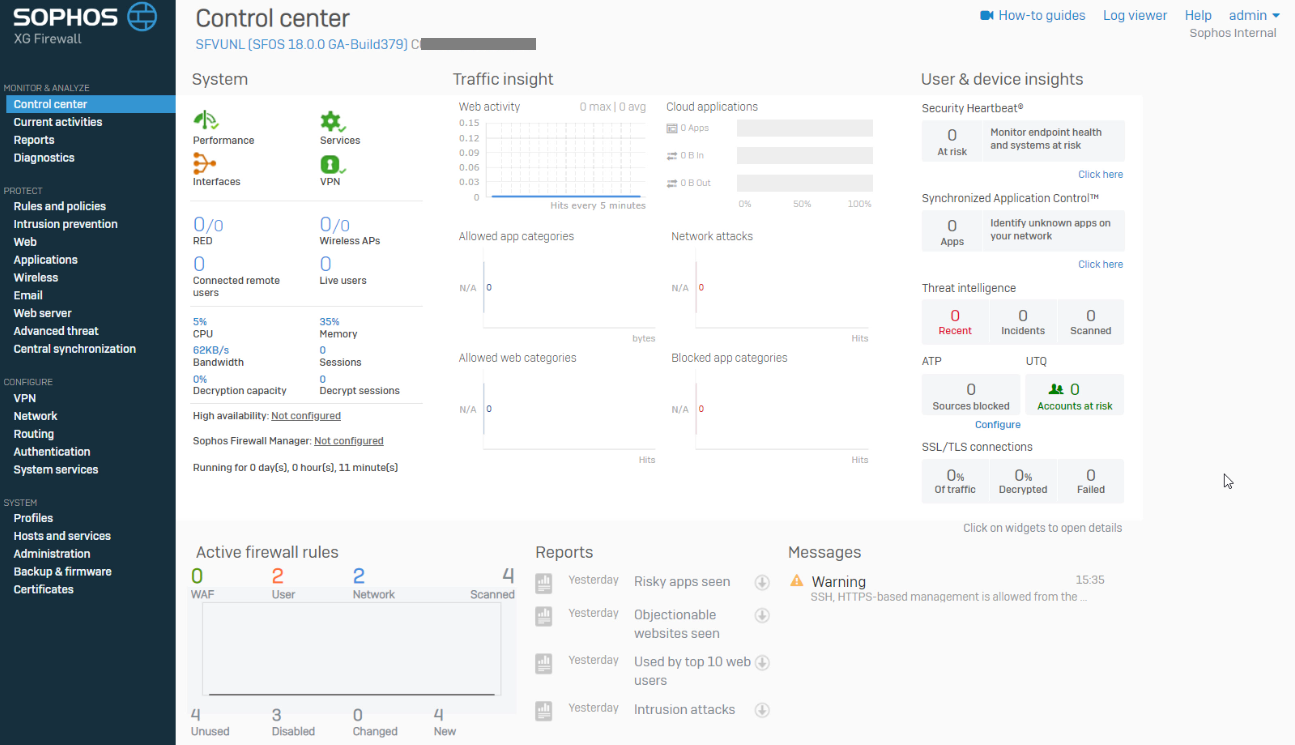
- This will finish the deployment and it will redirect you to the dashboard page of the Sophos firewall.
(Optional configuration) Routing the LAN subnet traffic to the internet via the Sophos firewall.
Note: Make sure that the Sophos firewall VM instance is turned off, before making the following changes.
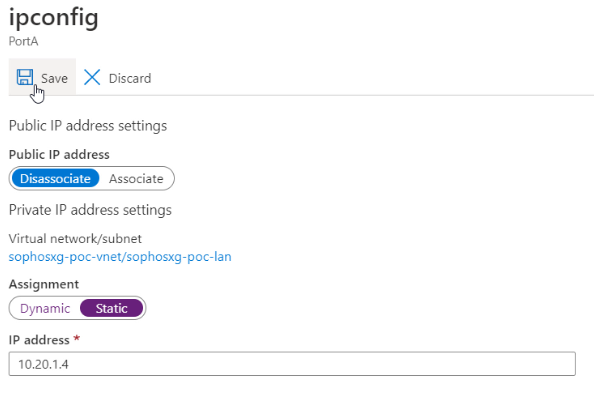
- In the Azure portal, navigate to the same resource group and then click on the Sophos Lan interface PortA. Go to Settings > IP Configurations and then click on ipconfig.
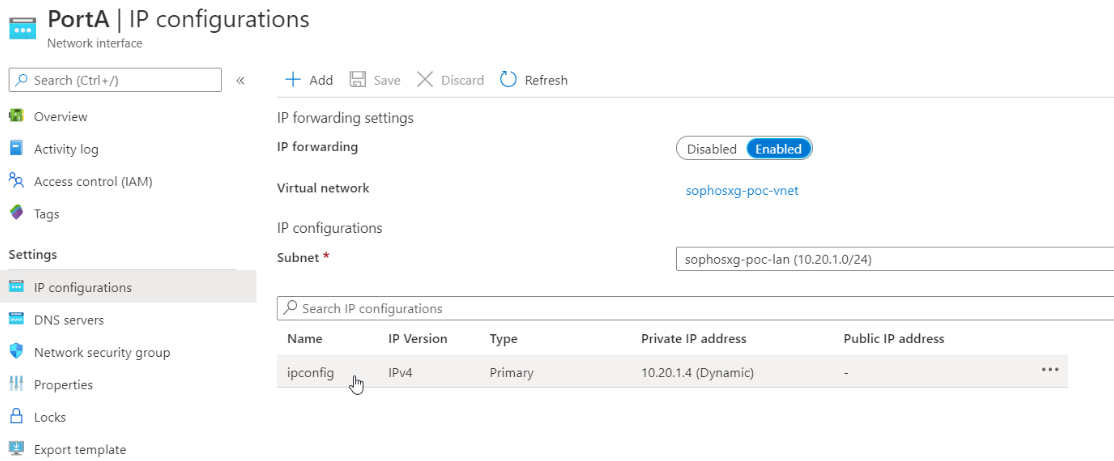
- Make sure to select the Assignment type as Static and then select the Save

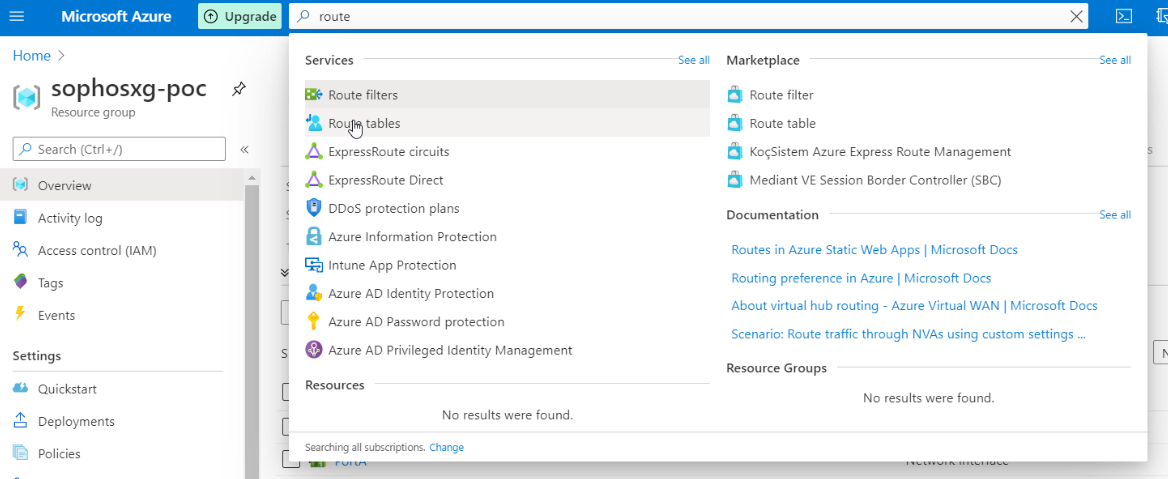
- In the Azure portal, search for Route table, select it and then click on the Add button.
- Select the subscription associated with your azure account.
- Select the same Resource group that was configured in step 4 having the Sophos firewall VM instance.
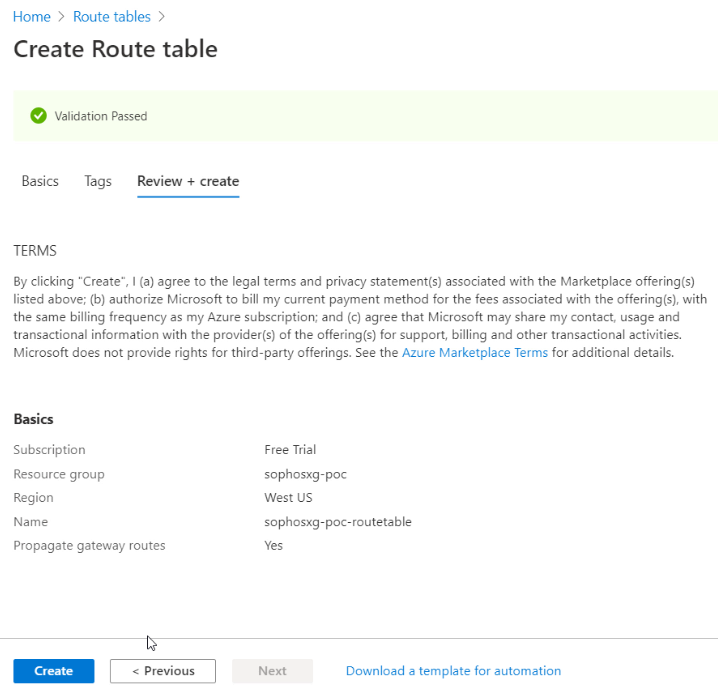
- Select the associated Region and mention an appropriate name for the Route table.
- Then click on the Review+Create button.

- Once the validation check is passed, click on the Create button.
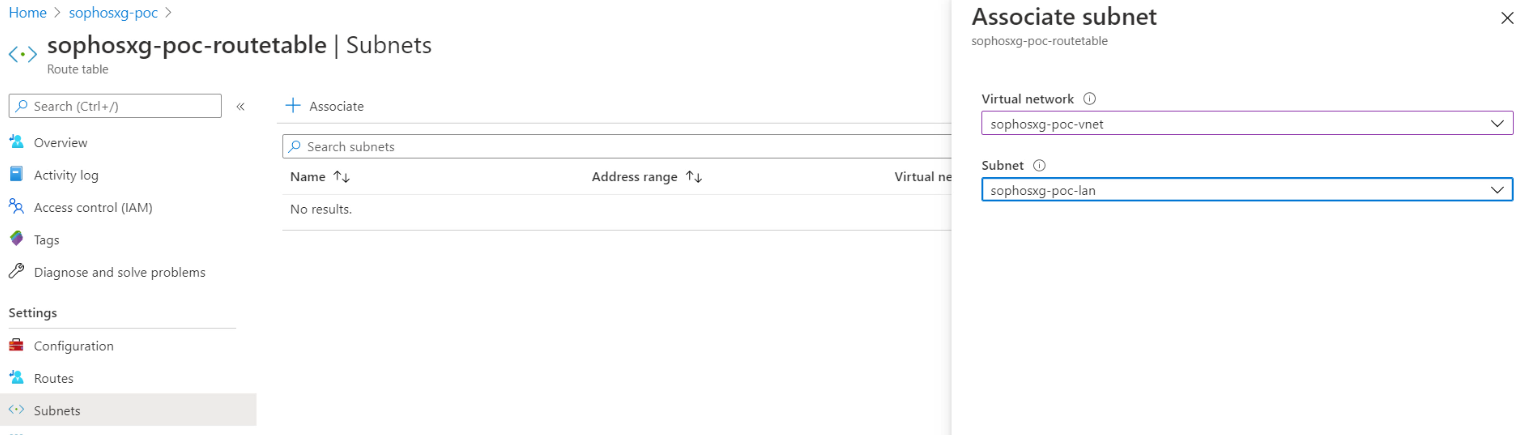
- Now open the Route table and then navigate to Settings > Subnets and click on the Associate

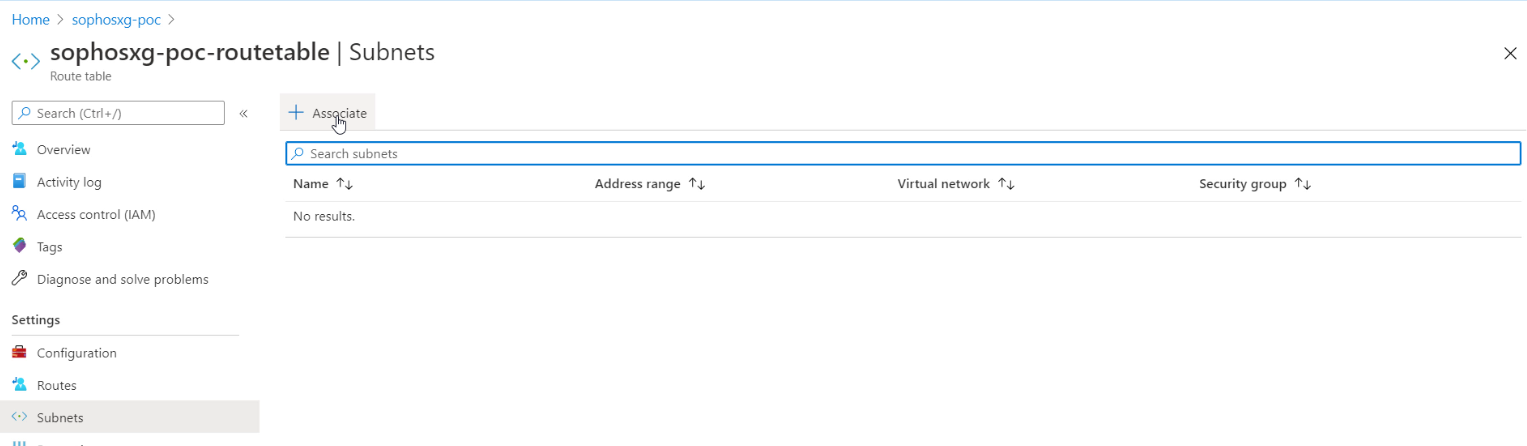
- Select the virtual network created in step 6 and select its associated LAN subnet and then click on the OK button.
- In the same route table, navigate to Settings > Routes and click on the Add
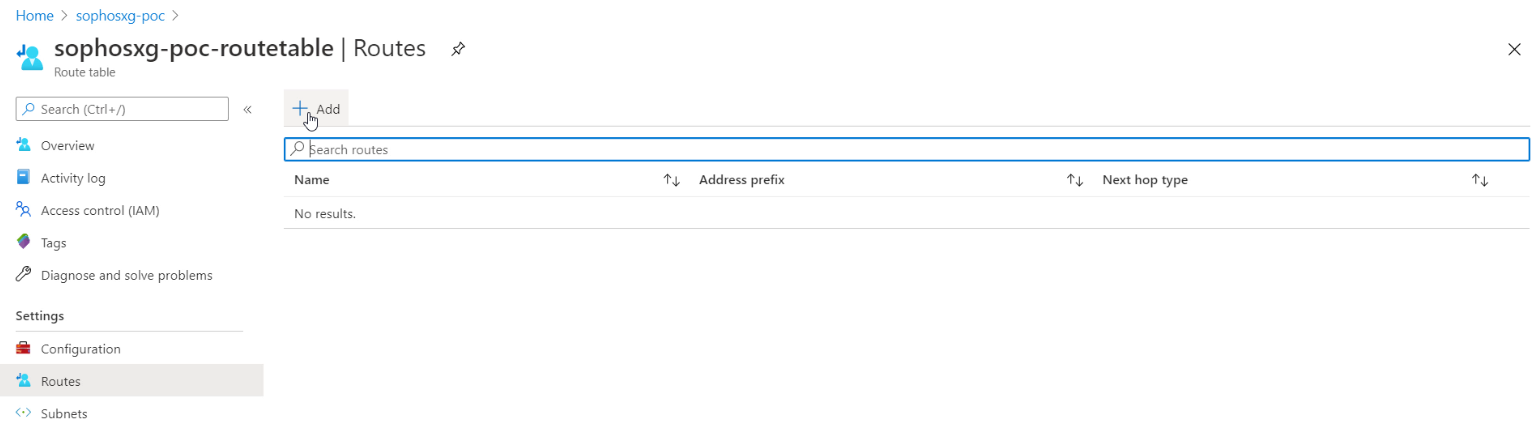
- Enter an appropriate route name.
- Keep the Address prefix as 0.0.0.0/0, which means that it will be applicable to any destination traffic originated from the LAN network.
- Select the Next hop type as Virtual appliance.
- Enter the static IP address (shown in step 25) of PortA as the Next hop address and then click on the OK button.

So, with the configuration, all the traffic originated from the LAN subnet will be routed via PortA of the Sophos firewall.
Sign up to the Sophos Support SMS Notification Service to get the latest product release information and critical issues.
Added TAGs
[edited by: Raphael Alganes at 7:39 AM (GMT -7) on 17 Sep 2024]
