

Disclaimer: This information is provided as-is for the benefit of the Community. Please contact Sophos Professional Services if you require assistance with your specific environment.
Table of Contents
Overview
This recommended read guides you through configuring active directory authentication and secure LDAPS on Windows server 2k22-12.
Useful Docs/KBAs related to AD authentication and user group behavior:
- Group membership behavior with Active Directory
- *NOTE: After Importing Active Directory groups, to see the users under “Authentication > Users,” the user must authenticate once on any portal, be it a user portal or a captive portal. This is the default architect of the SFOS; the users will not be synced until authentication.
Adding Active Directory Certificate Services
Step1. Access your server manager’s dashboard > Add roles and features

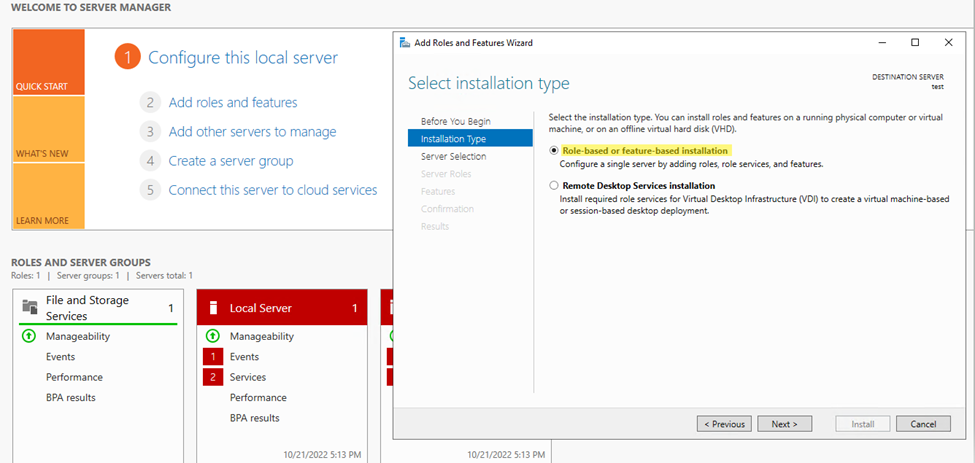
Step2. Select the installation type > Role-based or feature-based installation
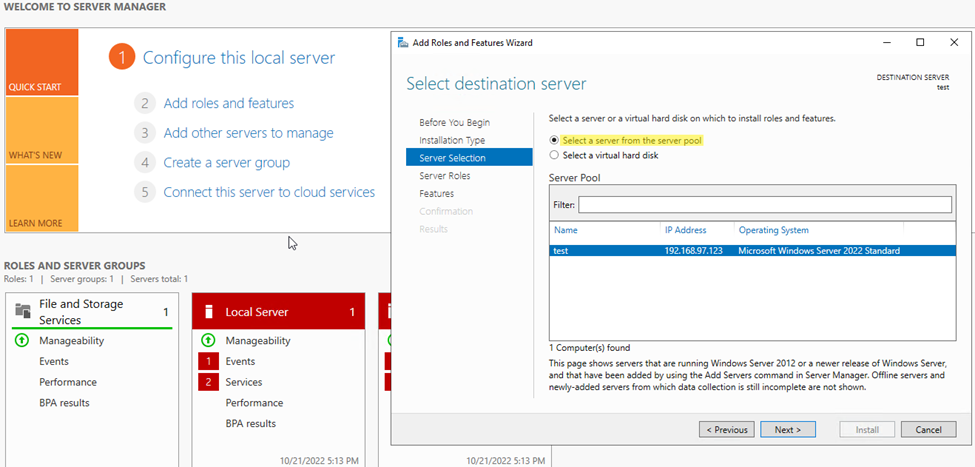
Step3. Select server selection
Step4. Select server roles > Active Directory Certificate Services

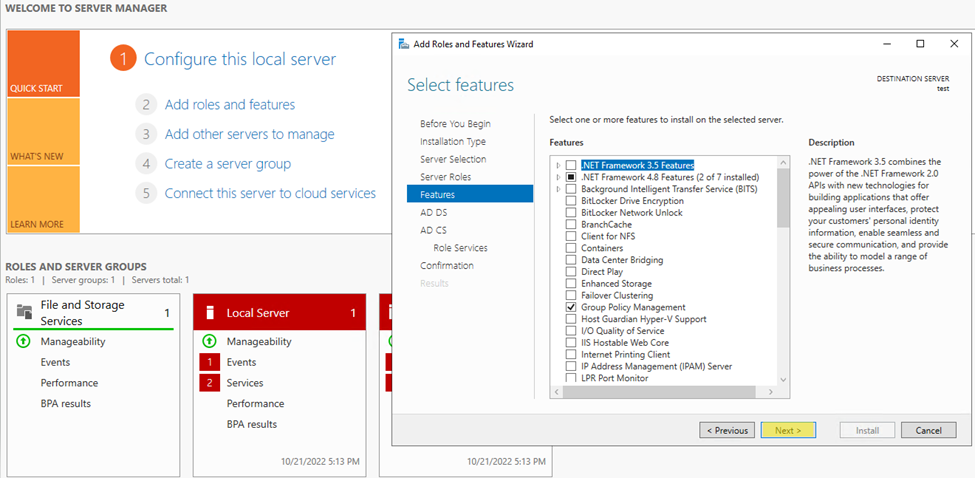
Step5. Select Next on the Features tab, AD DS, AD CS…
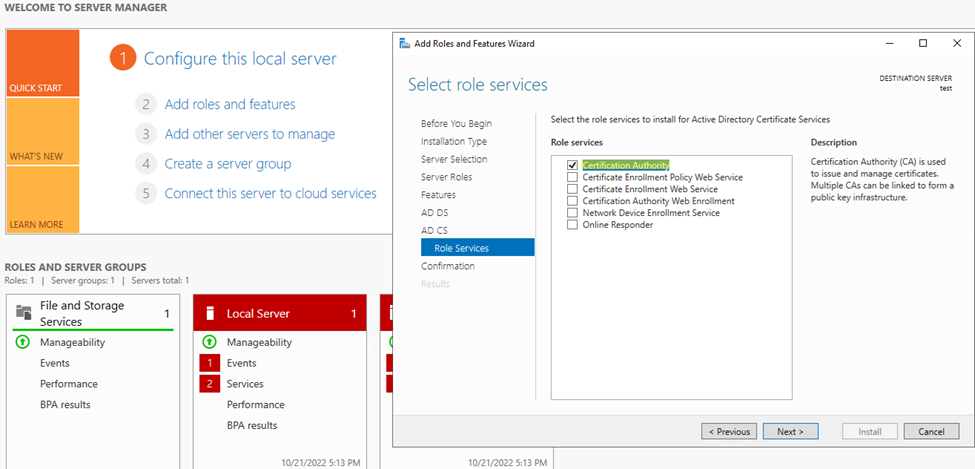
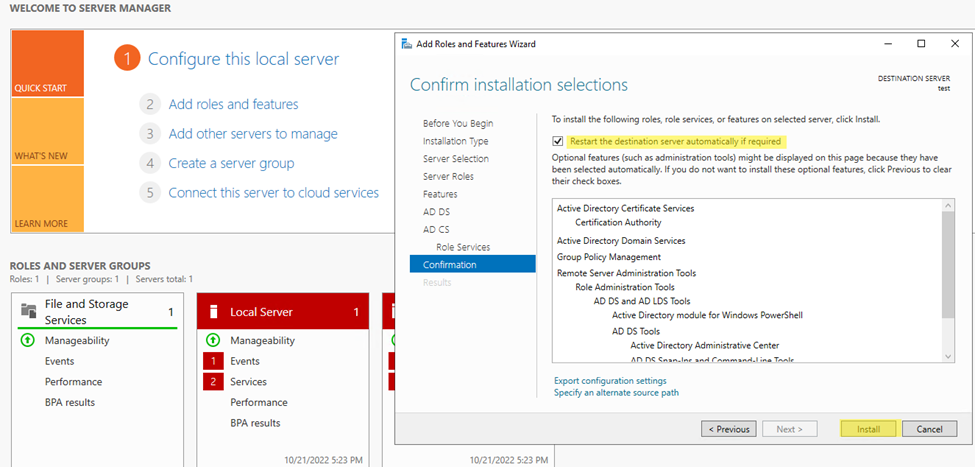
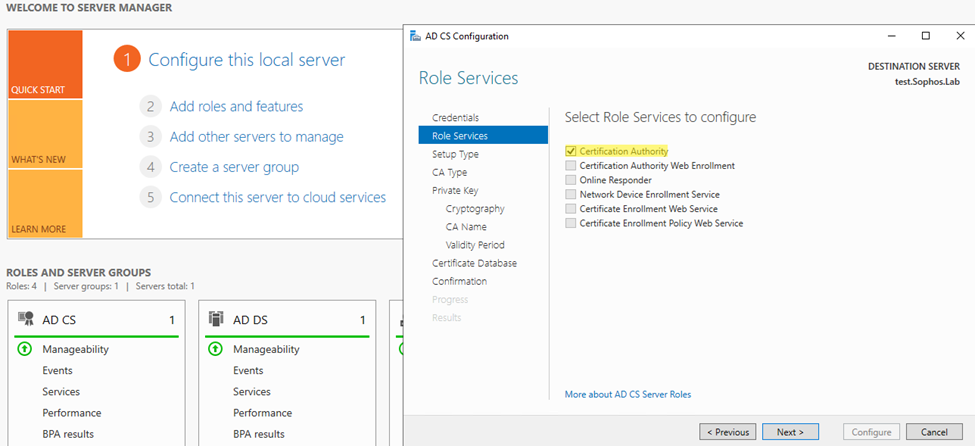
Step6. Select Role Services and ensure Certificate Authority is checked.
Step7. Next, turn on the option “Restart the destination server automatically if required.” Click Install.
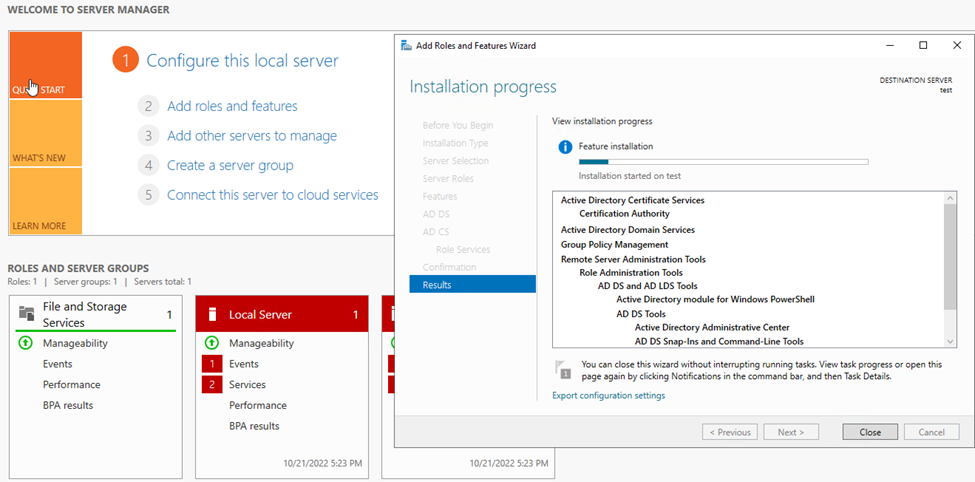
The installation process will begin, and we’ll wait for the installation process to complete.
Configuring Active Directory Certificate Services
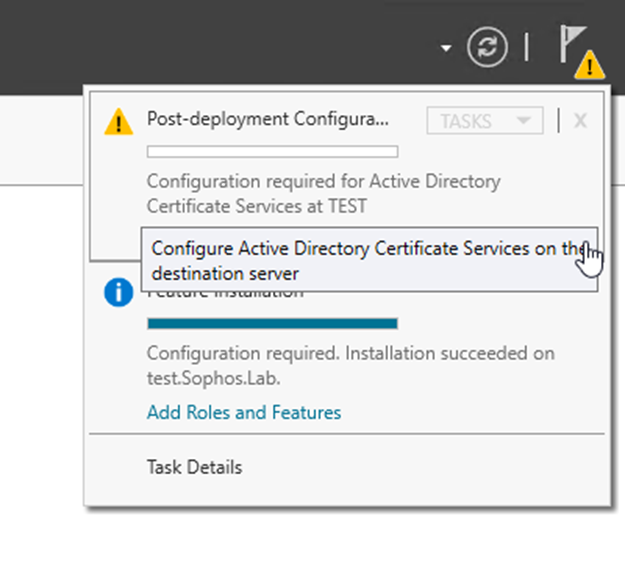
Step1: Post-deployment Configuration
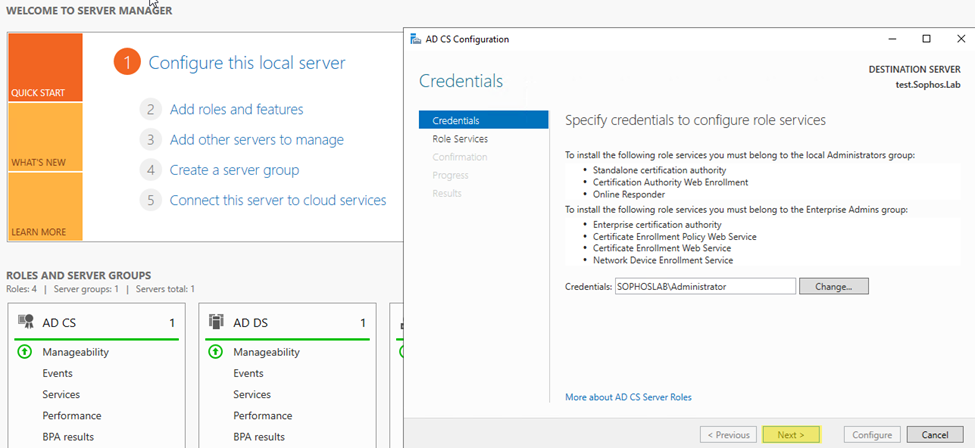
Step2: Select Next on Credentials
Step3: Under Role Services, ensure to turn on the “Certificate Authority” option.
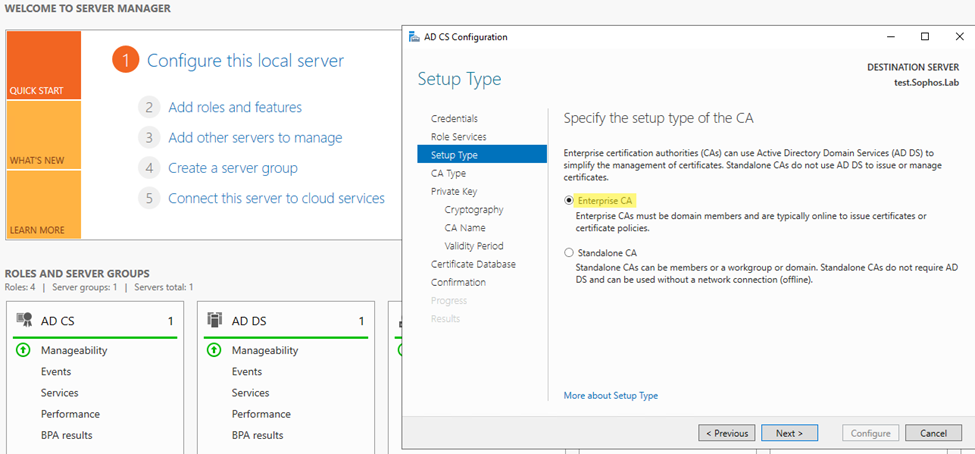
Step4: Select setup type as Enterprise CA
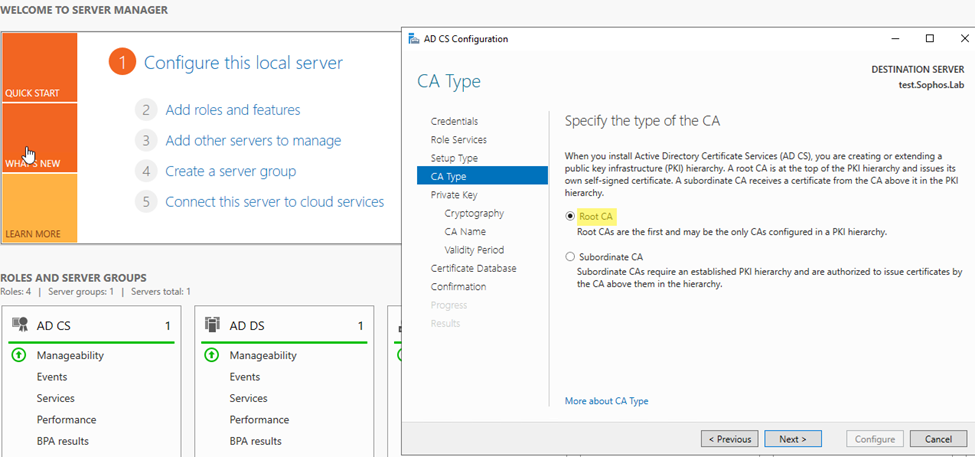
Step5: Select CA type as Root CA
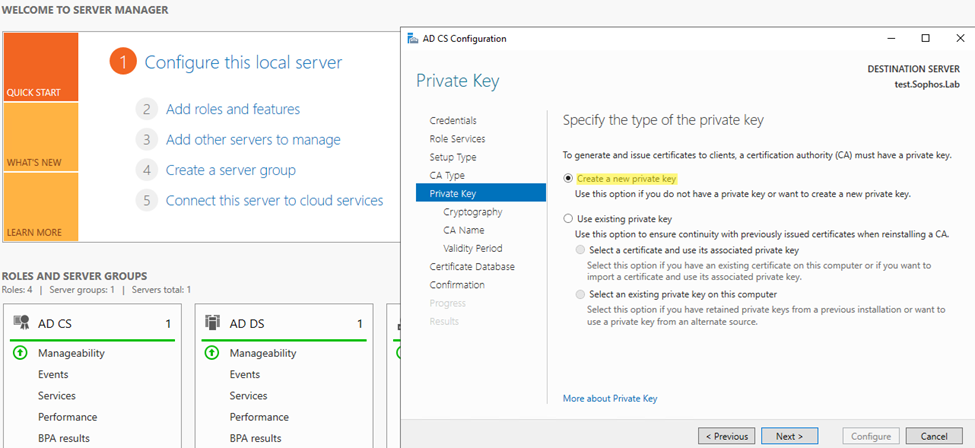
Step6: Select Private key as “Create a new private key”
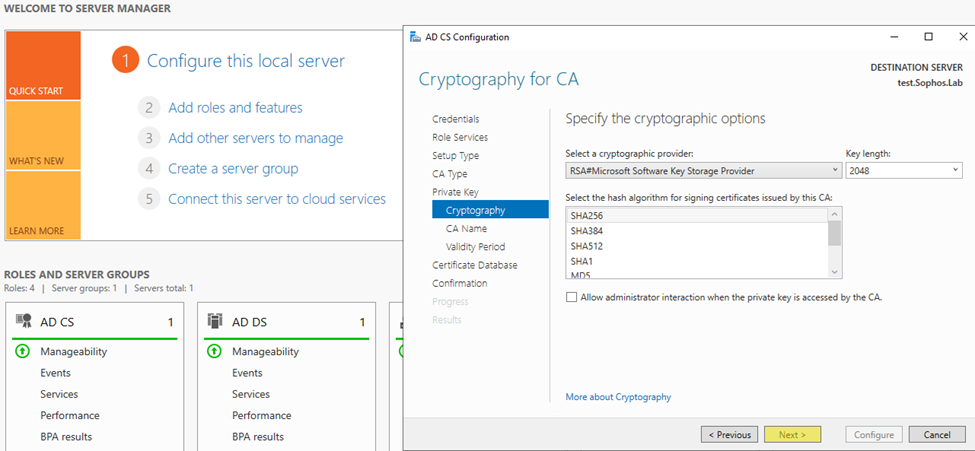
Step7: Click next on the Cryptography, you can change based on your requirement!!
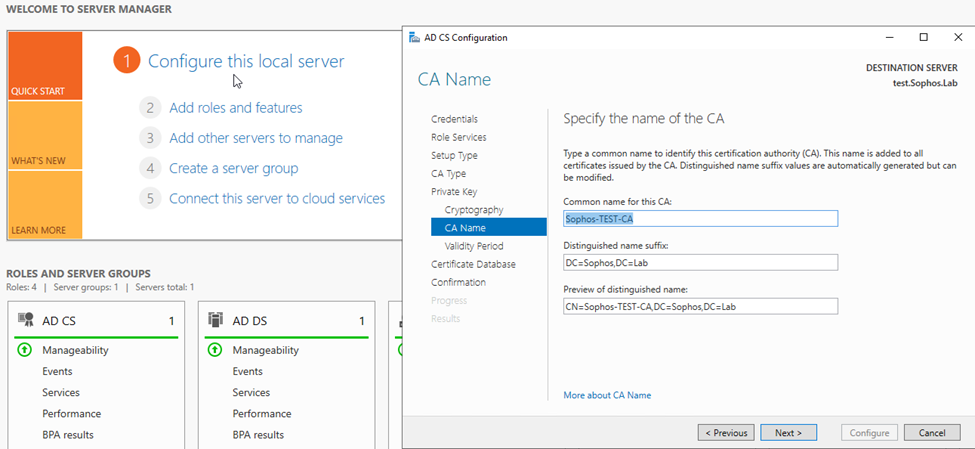
Step8: You can verify and click next
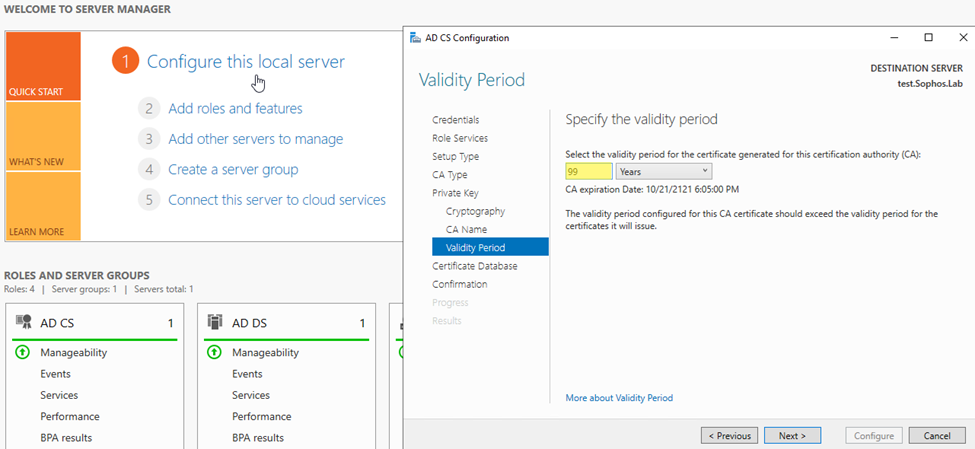
Step9: You can select the validity period based on requirement; I chose here 99 years
Step10: Click Next on Certificate Database, and on Confirmation, click Configure
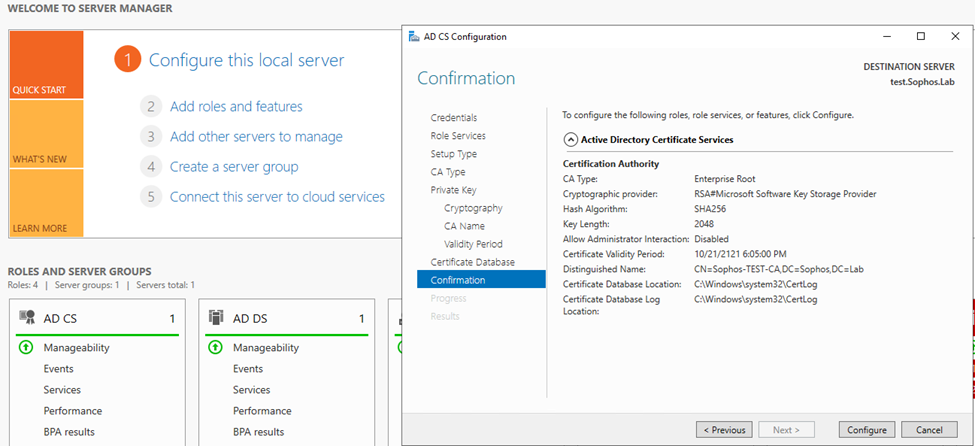
It’ll provide you with the results as per the screenshot below: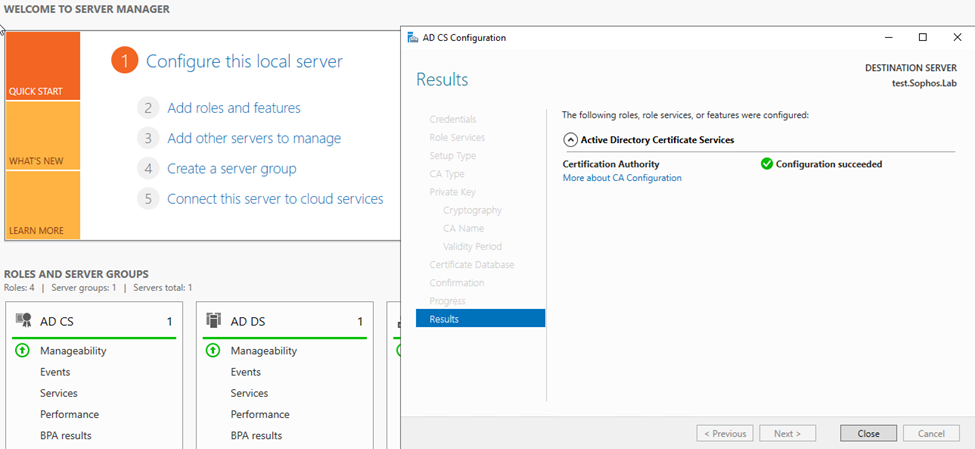
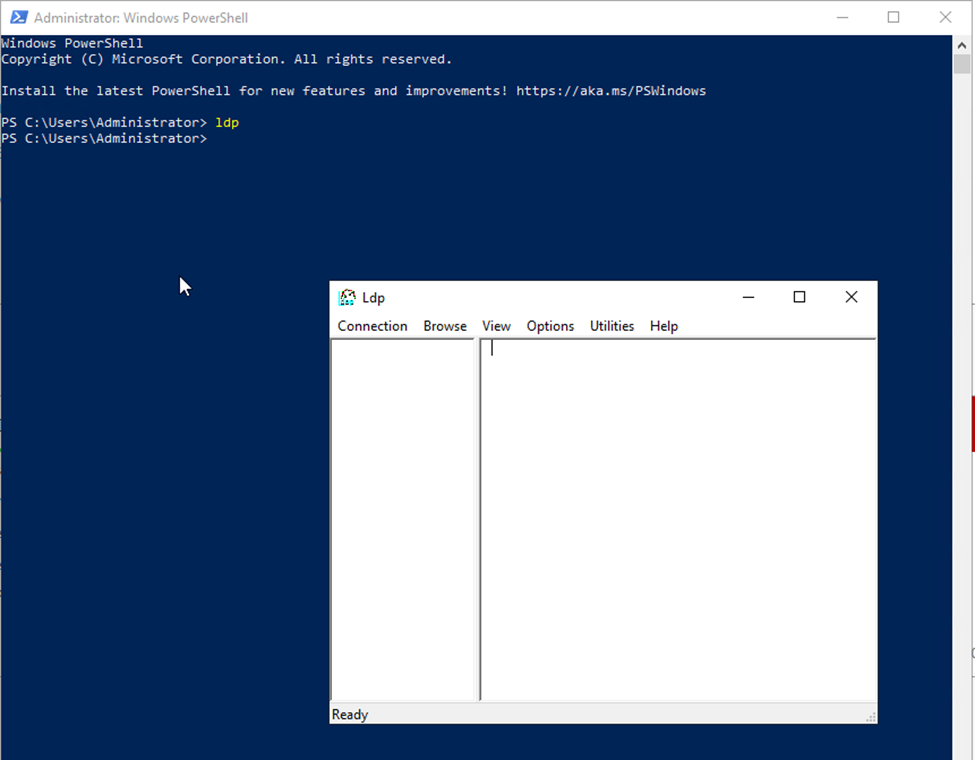
Testing LDAPS using a LDP tool
Step1. Open Windows PowerShell and type in LDP, which will help us determine if it’s successful or fails.
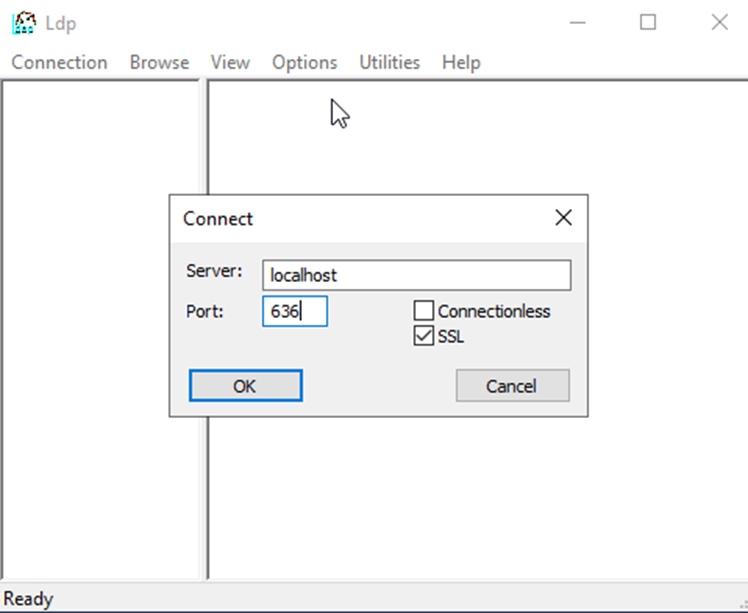
Step2. Go to connection under the Ldp box and click connect. Under the Server, type in localhost, type the port 636, and tick the option SSL as per the screenshot below:
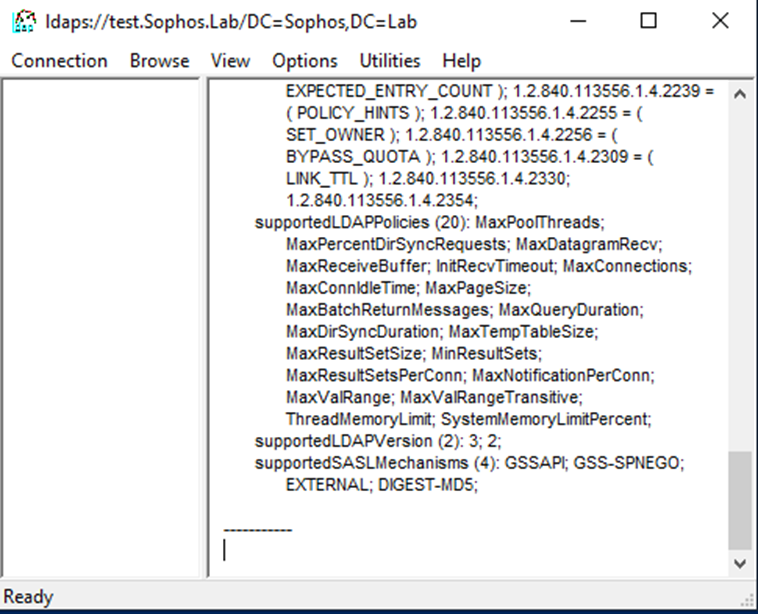
Step3. And it’s a success. If it fails, just restart the server once and then perform step 2 again you mustbe able to see an output something like this below:
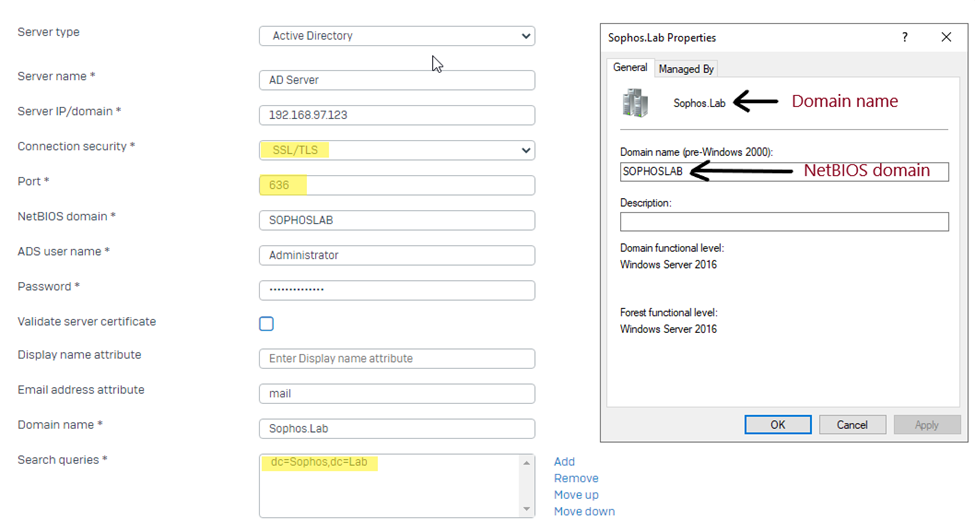
Adding an Active Directory Server with connection security type SSL/TLS
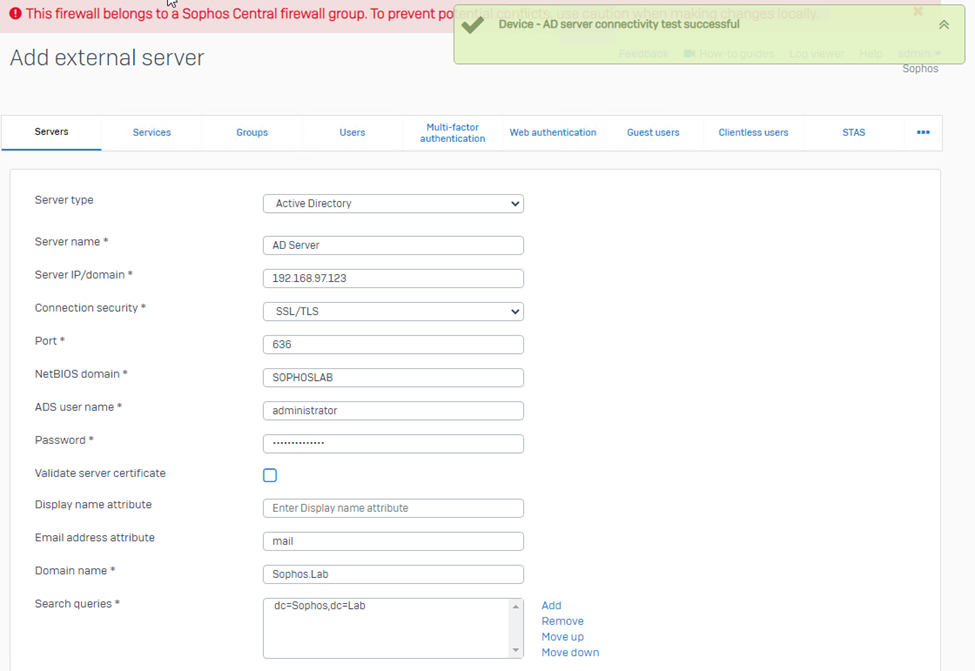
Step1. Under the Authentication > Servers > add
Step2. Now let’s test the connection, and the result is a success
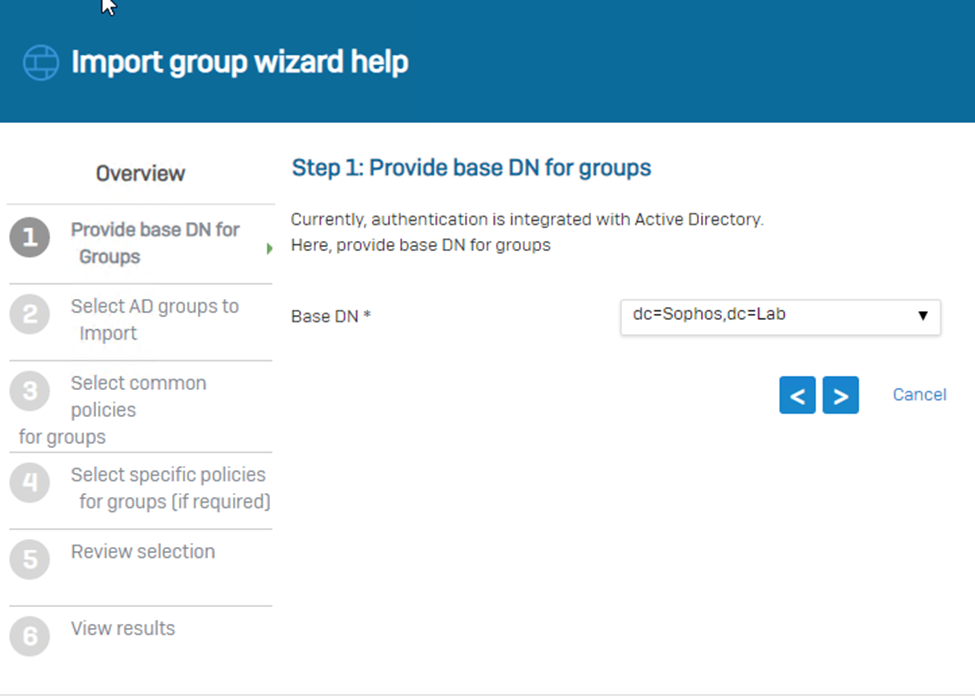
Step3. Now let’s import a group from this AD
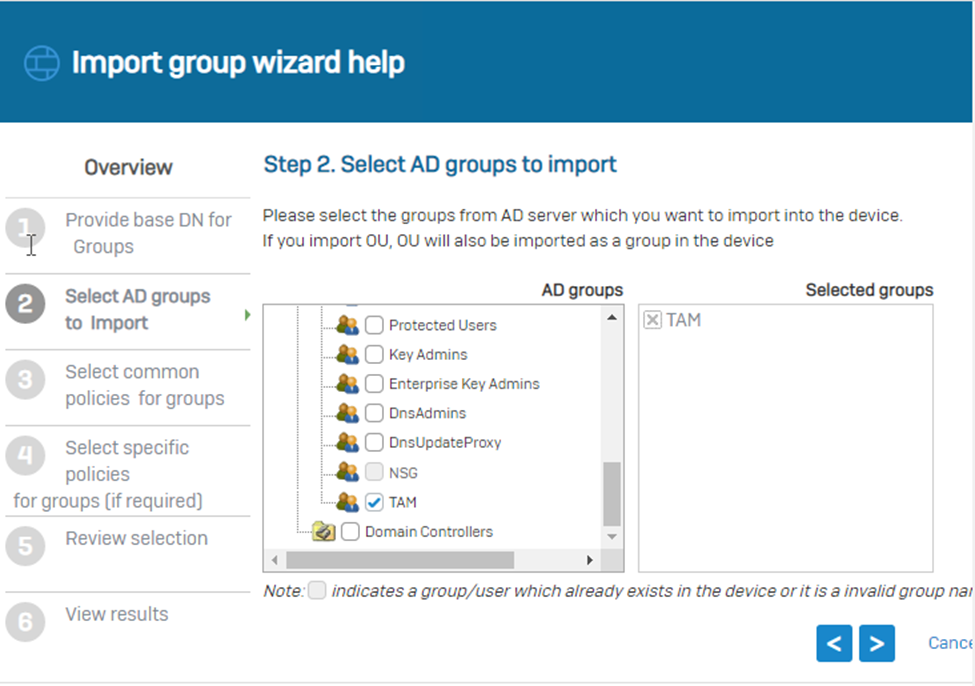
Step4. Added a group called TAM
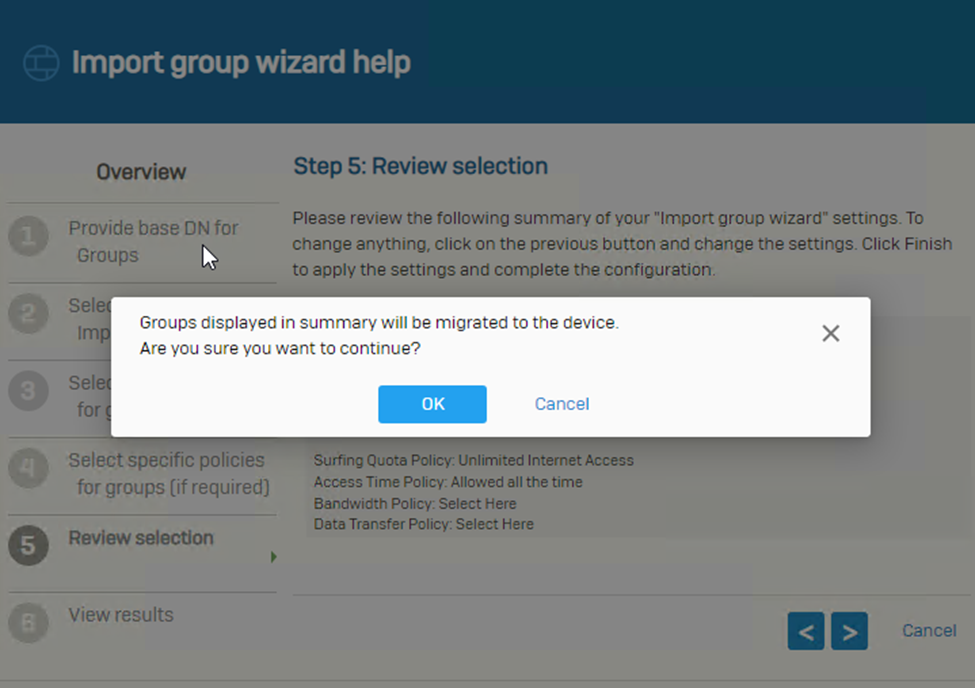
Step5. Select Next on common policies for groups, review the selection and click ok on the following prompt:
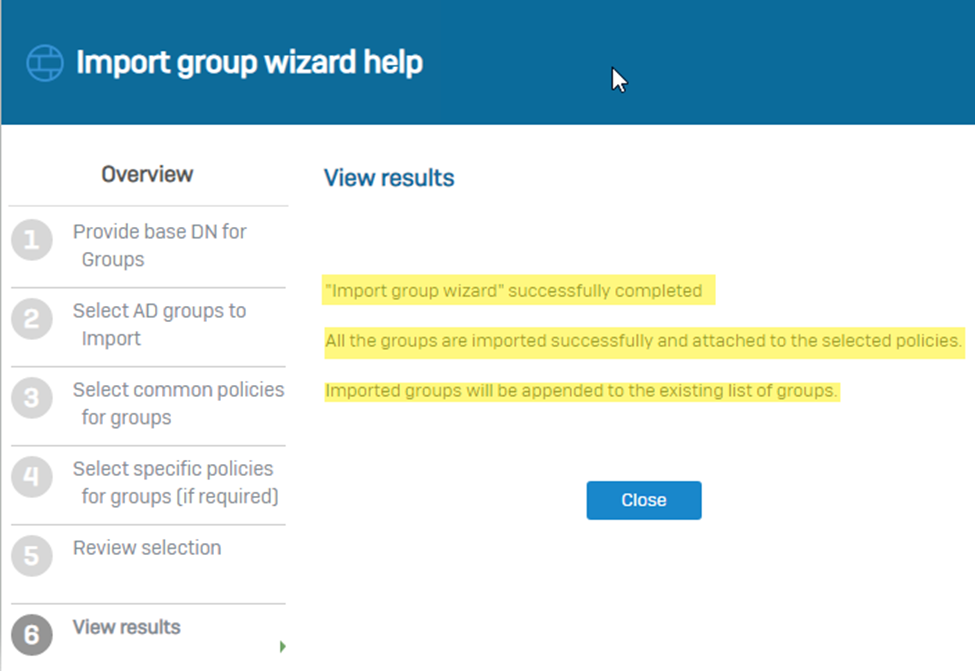
Step6. Once the group is successfully imported from the AD, you’ll be able to see group under the Authentication > Groups
Step7. Now upon visiting the user section, we’ll not be able to see the username “Vivek” yet
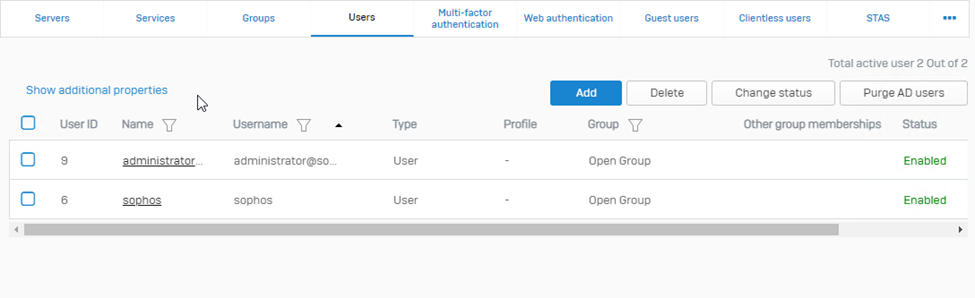
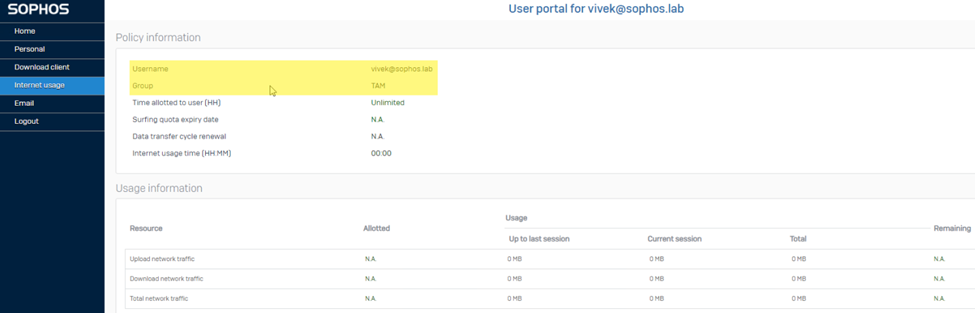
Now, as per the *NOTE mentioned above, we’ll log into the user portal for the AD username “Vivek”
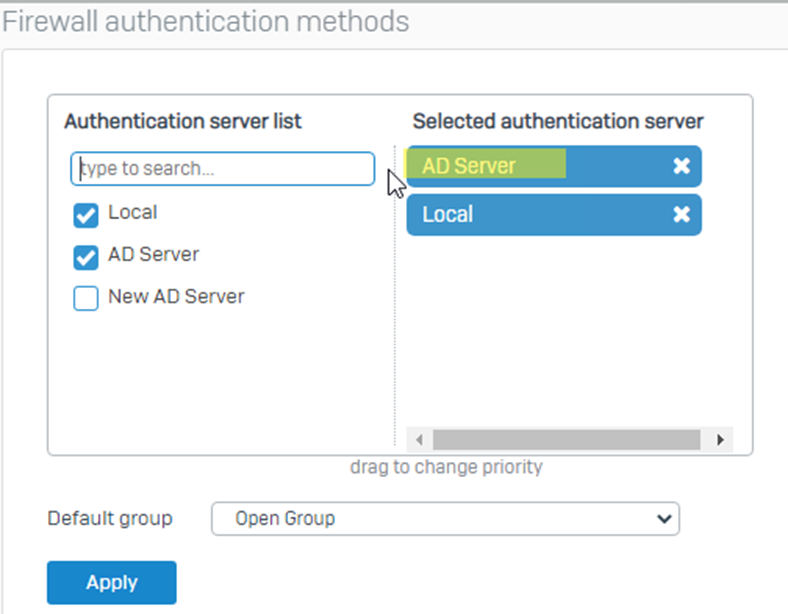
*Note: Before logging in, ensure that the AD Server is selected under Authentication > Services > Firewall authentication methods.
And then, as soon as you log in with the username credential, we get instant access in
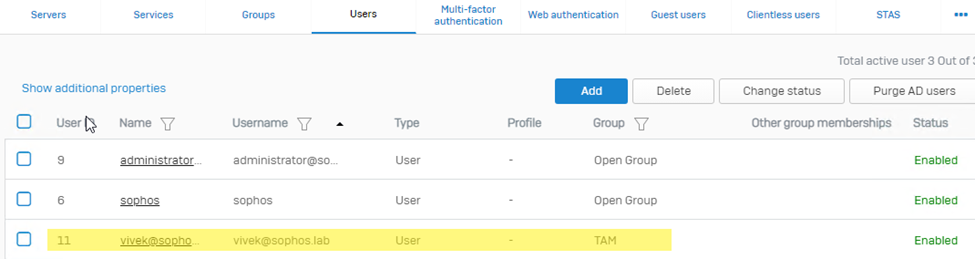
Now, we can also see the user under the authentication > user’s section in the correct group.
I hope this article has helped you understand the LDAPS-AD integration and how to import users/groups.
Revamped RR
[edited by: Erick Jan at 5:34 AM (GMT -7) on 10 Oct 2024]

