

Disclaimer: This information is provided as-is for the benefit of the Community. Please contact Sophos Professional Services if you require assistance with your specific environment.
Overview
This article describes the steps to configure Azure AD Sync on Sophos Central.
The following sections are covered:
Pre-requisites
- Microsoft Azure subscription
- Azure Active Directory
Azure AD configuration
- In Microsoft Azure Portal, select Azure Active Directory from the menu on the left.
- Select Enterprise applications from the menu on the left.
- Click New application from the top navigation menu.
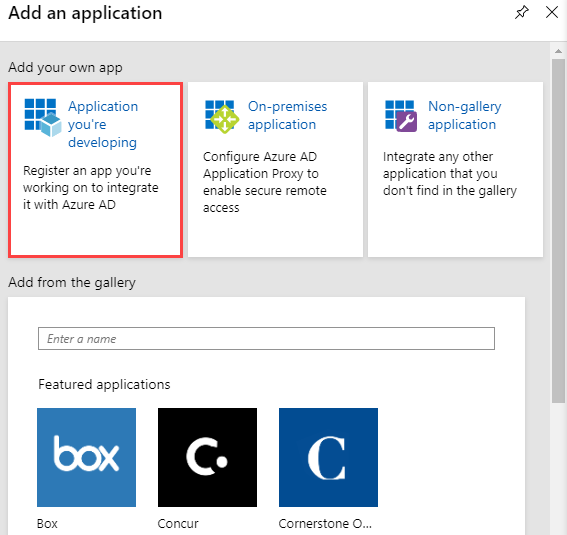
- In the Add your own app section, click Application you’re developing.
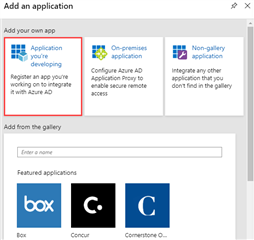
- Click Ok, take me to App Registrations to register my new application.
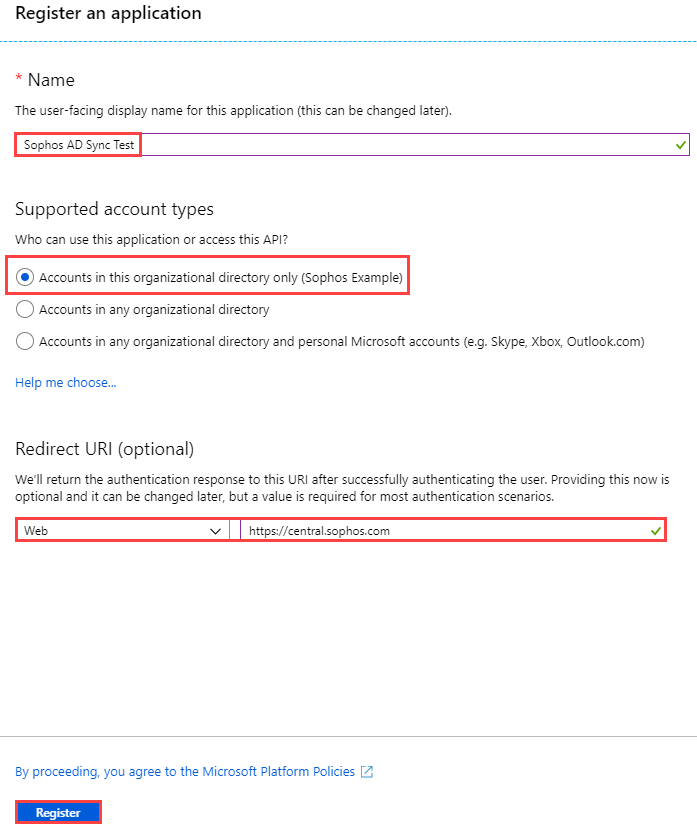
- Click New registration from the top navigation menu.
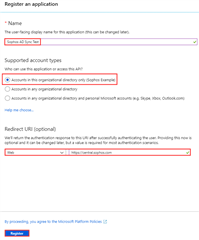
- Give your application a name and select a Supported account types which determines who can use the application.
- Under the Redirect URI (optional) section, select Web from the drop-down menu and enter the URL https://central.sophos.com. Click Register.
- The Azure AD application is now created, and the application's screen will be displayed. Make a note of the Application (client) ID and Directory (tenant) ID as you’ll need this later.
- Go to Certificates & secrets. Under the Client secrets section, click New client secret.
- Create the client secret by adding a description and selecting the time frame you wish to have the key valid for. Click Add.
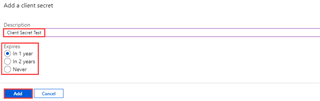
- The Value is now displayed. Make a note of this as you’ll need it later, and it isn't available once you navigate away from the page.

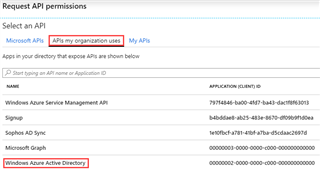
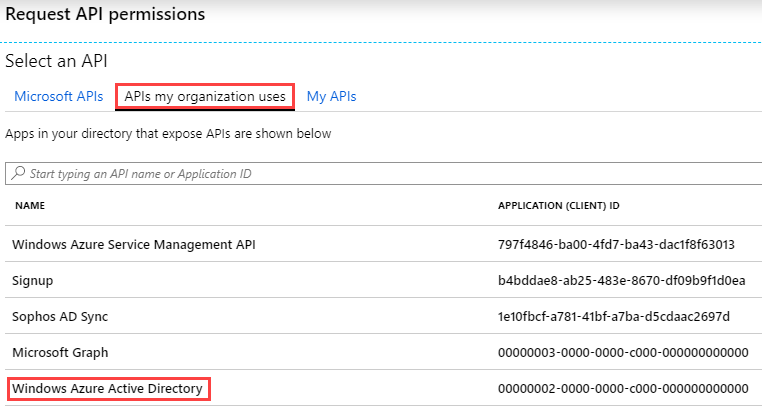
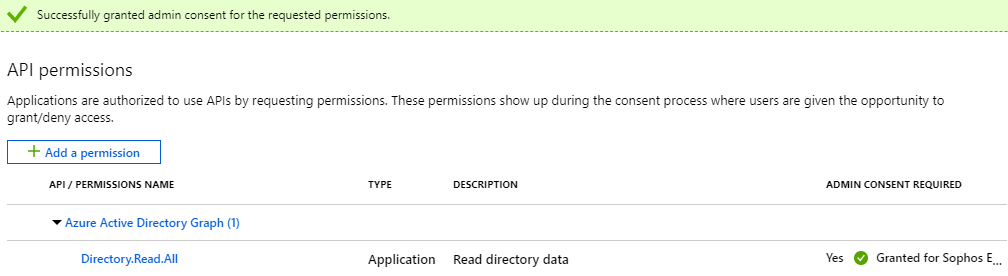
- Go to API permissions and click Add a permission.
- Click APIs my organization uses and select Windows Azure Active Directory.
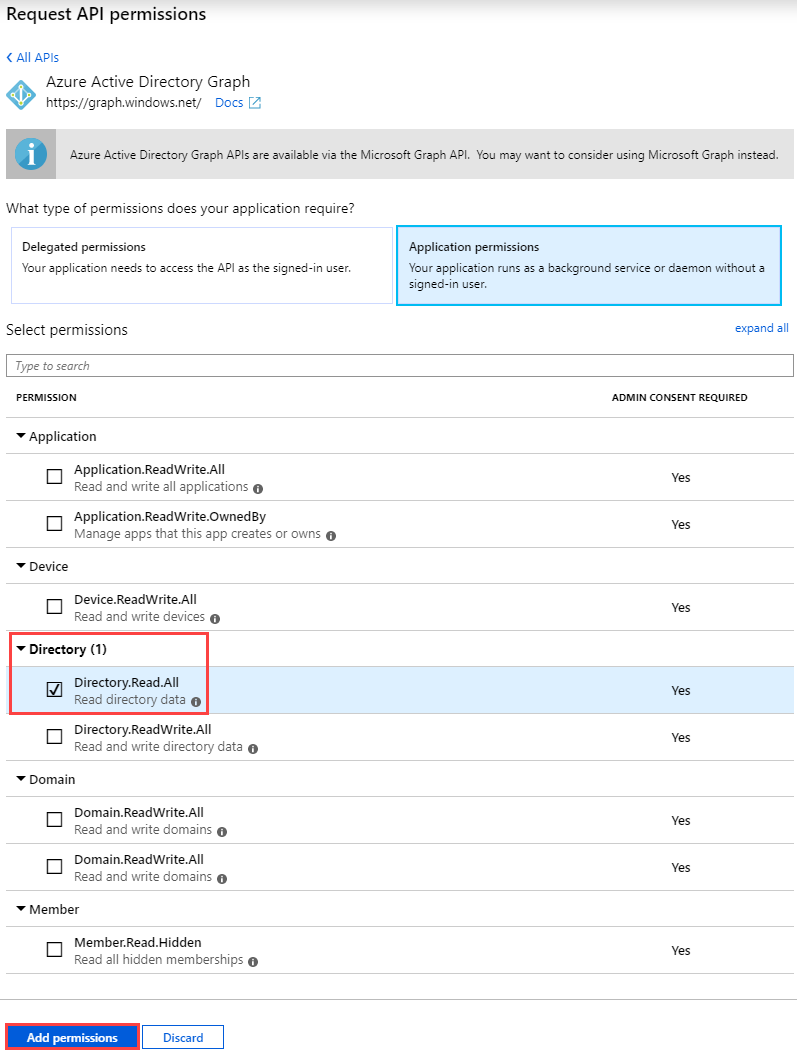
Note: This requires the (legacy) Azure Active Directory Graph > Directory.Read.All permission (not the Microsoft Graph > Directory.Read.All permission). - Click Application permissions. Under the Directory drop-down, assign the Directory.Read.All permission. Click Add permissions.
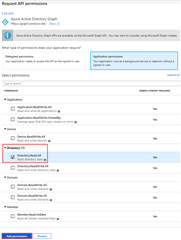
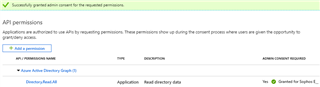
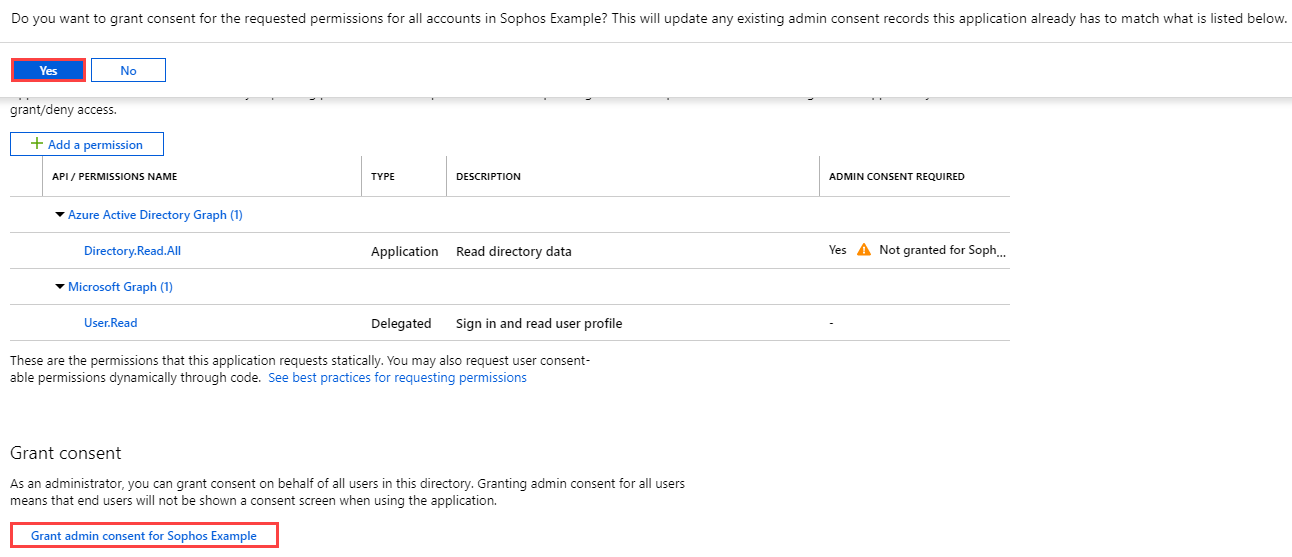
- Under the Grant consent section, click Grant admin consent for <account> and then click Yes.

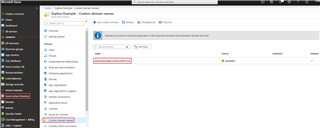
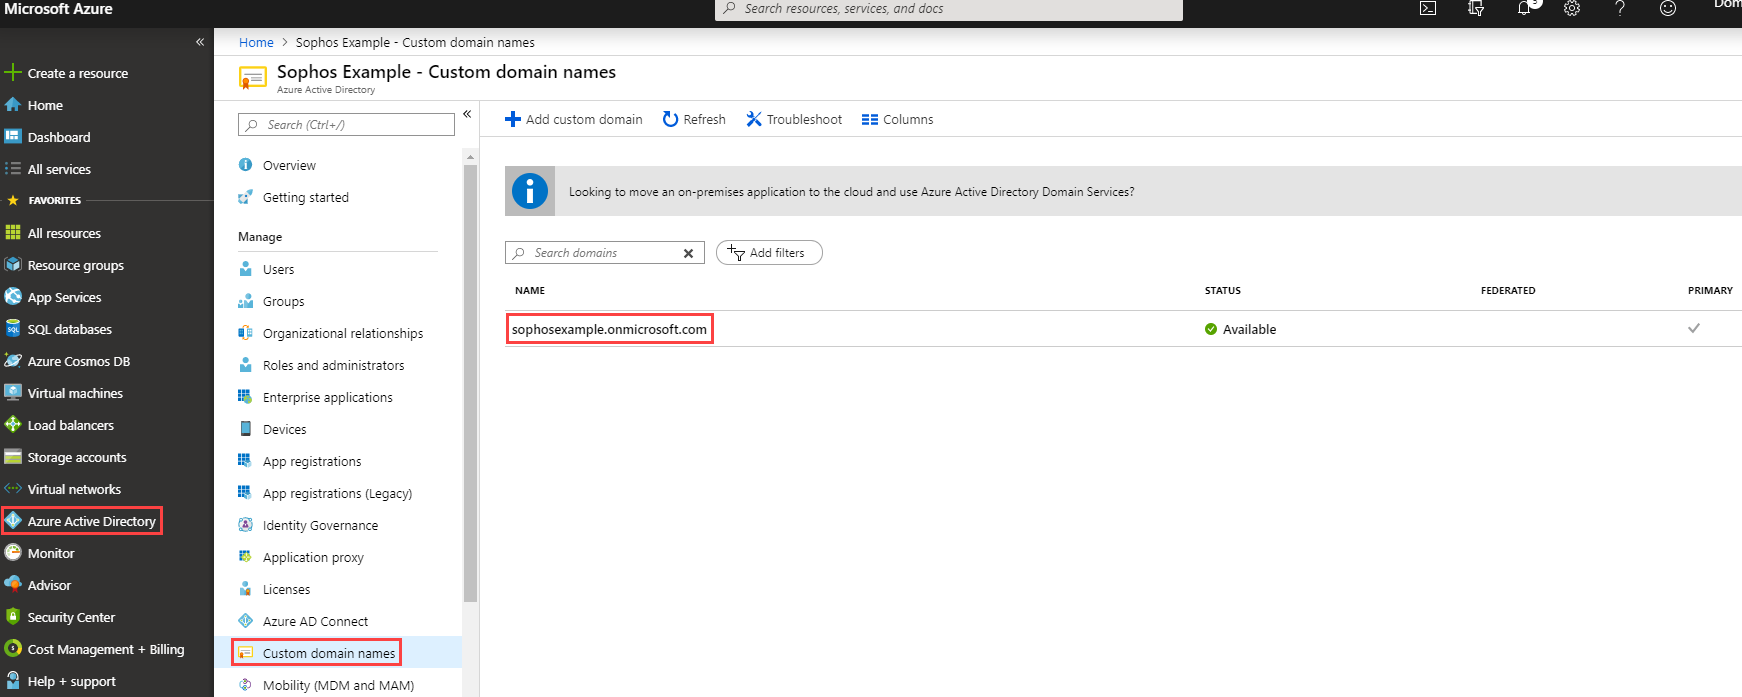
- You’ll also need your Tenant domain, which is the primary domain assigned to your Azure AD instance. You can find this in the Custom domain names section of your Azure AD configuration screen.
- Once you have completed these steps, you now have all the information needed to set up Azure AD Sync:
- Tenant domain
- Application (client) ID
- Directory (tenant) ID
- Client secret
- Client secret expiration


Sophos Central configuration
- Sign in to Sophos Central and go to Global Settings.
- Under Server Protection, click Connect to Microsoft Azure and then click Add.
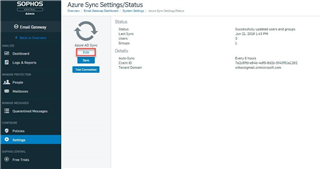
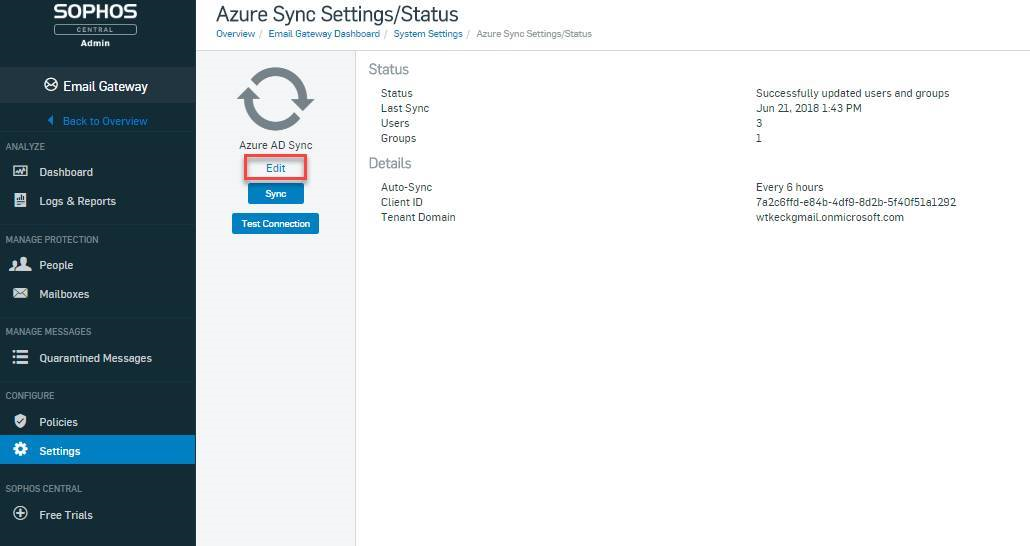
- Navigate to Settings > Administration > Azure AD Sync Settings/Status.
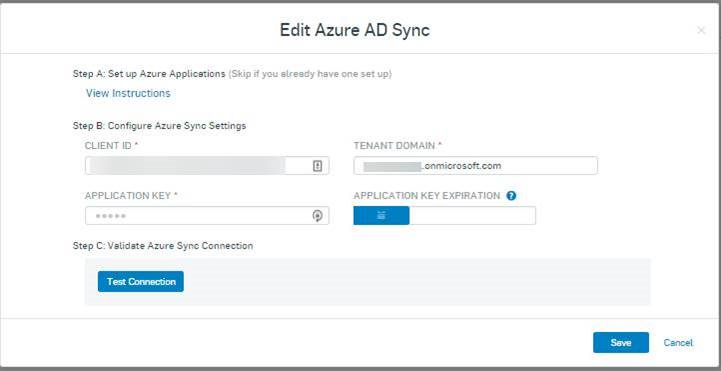
- Click to Edit the settings.
- Fill in the information as shown below:

- Client ID
- Tenant Domain
- Client secret
- Client secret expiration
- Now Test Connection and then Save.
- At the following menu, click Sync to import Users.
Added Disclaimer
[edited by: GlennSen at 8:16 AM (GMT -7) on 5 Apr 2023]


