

Overview
The purpose of this article is to make sure you get the most out of your new Sophos Email Appliance (SEA) as well as to provide some additional insight into the operations of the appliance.
Notes:
- Examples are provided in screenshots for educational purpose only, do not copy/paste said examples without considering their effects and how they will interact with your particular configuration.
- Also this article is not a replacement for the manual.
- This assumes you have already deployed the SEA and need to fine tune it.
The following sections are covered:
- DNS considerations
- Deployment considerations
- Accounts configuration
- Systems configurations
- Routing configuration
- Networking configuration
Applies to the following Sophos products and versions
Sophos Email Appliance
DNS considerations
In regards to DNS and routing the normal mail flow should look something like: MX Record, contains A records for Pub IP's >> firewall >> port forward port 25 to appliance.
-
Load balancer consideration: If you use a hardware load balancer, ensure that it is configured to allow the MTA connection and not strip-off / re-write the external IP addresses. Otherwise your spam catch rate will be abysmal as every mail will appear to be from external domain, with an internal IP address.
-
It is recommended to use DNS load balancing. It’s free, easy to configure and there is no reason to spend a time on a load balancer or consume its resources.
-
-
Cloud configuration: If you have O365 or similar, it is recommended to use the exact same routing in DNS as shown above, with O365 configured as the downstream relay. Configure O365 to deliver to the appliance as well. This will allow you to take advantage of all of the appliance abilities such as SPX encryption, batv, delay queue, etc.
-
Dual spam appliances: Normally having more than one spam product is not recommended for a number of reasons; company A may see a message as 17% and company B as 55%. In addition, now you have two quarantines and in general it causes a headache. However if you do make sure that ANY upstream email product that is receiving mail upstream and delivering it to the appliance is listed as a Trusted Relay. Trusted relays are ignored when checking spam, RDNS and similar checking. (see routing for more information)
Deployment considerations
- Always deploy Virtual Machines (VM) with 4 cores and 4 GB of RAM.
- It is important to consider how many messages the SEA can accept, run policy against and deliver downstream.
- Hardware and VMs will function seamlessly together when clustered. Your license includes a VM, so you should always have a backup appliance on hand.
- Email appliances should never have public IP addresses on the internet. They should be protected by infrastructure and be allowed to communicate outbound. (No web filtering, excluded from IPs and if you have an ASA, do not use mail guard.)
- SSL certificates, I recommend a 5$ godaddy certificate for TLS/Admin UI. Do not use your domain Wild Card certificate! Simply initiate your CSR from the applaince and see the section on SSL certificates.
- Note: If you do business with a .gov, .mil, or similar domains; they may impose TLS certificate validation, self-signed certificates are automatically rejected.
- When downloading the SEA from Sophos.com, always download all 4 files (the ovf and container files) and deploy the appliance.
- The appliance should never be configured to use SMTP authentication unless you have very specific need to relay mail from an external IP TO an external IP. Else your appliance can be sued by anyone with AD credentials.
Subsequent section of this article will detail all of the configurable features, some basic rules and considerations when making rules for SEA.
Note: Not every menu will be covered in this section. If it is not listed, chances are you do not need to worry about it.
Accounts configuration
Administrator

There are two types of administrators:
- System administrators – Have access to all the features in the dashboard
- Help Desk Administrators – access to everything except Configuration
User groups
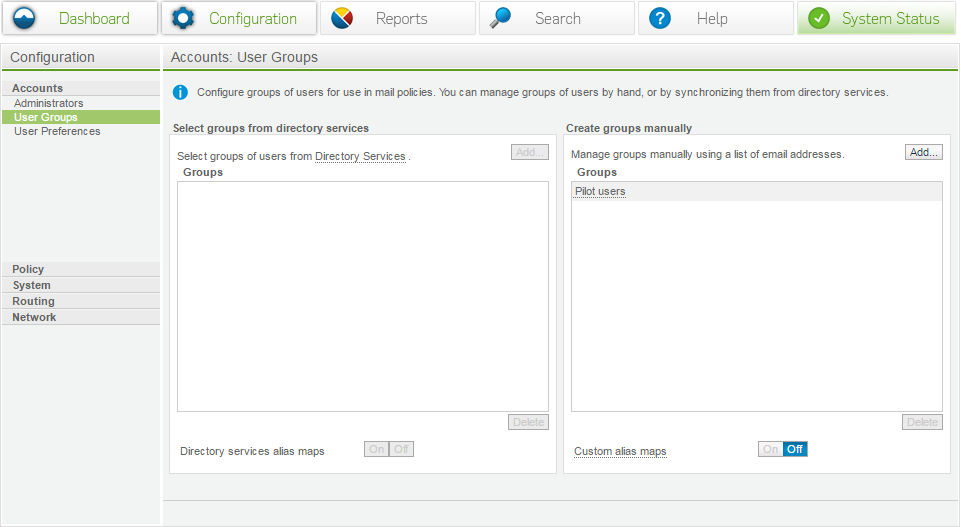
- Via Directory Services - If configured, this allows you to mix and match groups and users to create custom policies. For example, it is possible to add 3 users, accounting and sales into a group. This new group would be accessible from any of the mail policies.
- Manual groups – Allows you to enter a list of manual email addresses.
- Custom Alias Maps – allows you to create custom alias and apply those to policy.
User preferences
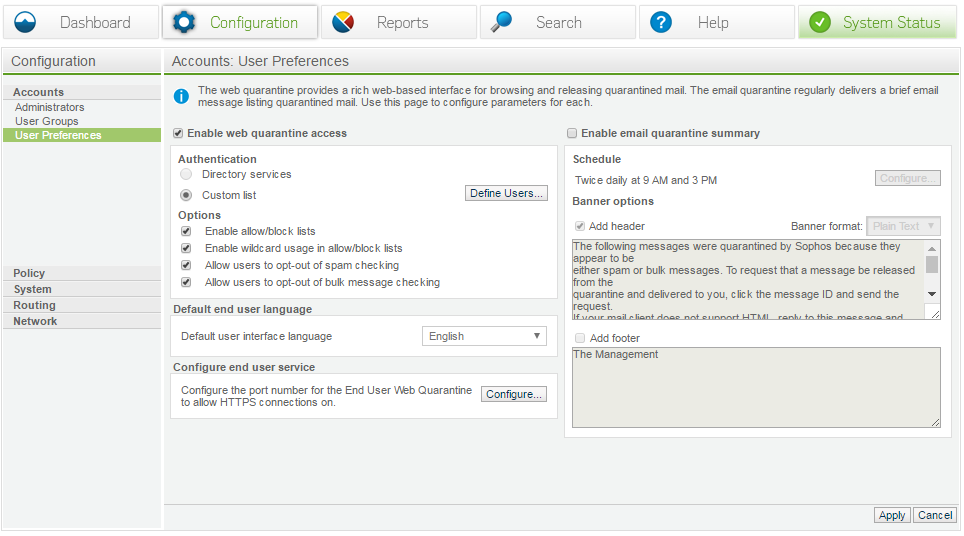
- Enable web quarantine – Allows users to use the web portal to manage their quarantine and configure end services. Companies that use OWA for example may already be using port 443.
- Enable quarantine summary - This should be used to enable digest to the users, it’s important to note that NO ad integration is required to use this feature. The only requirement is that the digest can be replied to and routed to the appropriate appliance.
Systems configurations
Updates
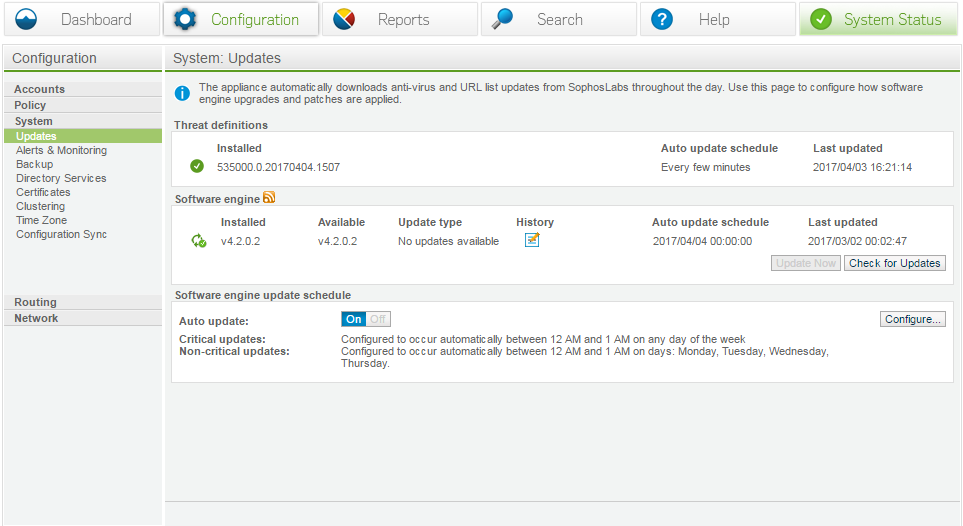
It is a prerequisite to configure Software engine updates.
This screen shows information of Installed software engine number as below format:
535000.0.250170404.1507
Here,
535000 is the antivirus version number
.0250 revision number
1507 time of release
Note: Always ensure that the AV updates have today's date on them.
Another section shows Software Engine, which is the appliance firmware version; you can manually apply updates, configure a window with the scheduler or disable updates.
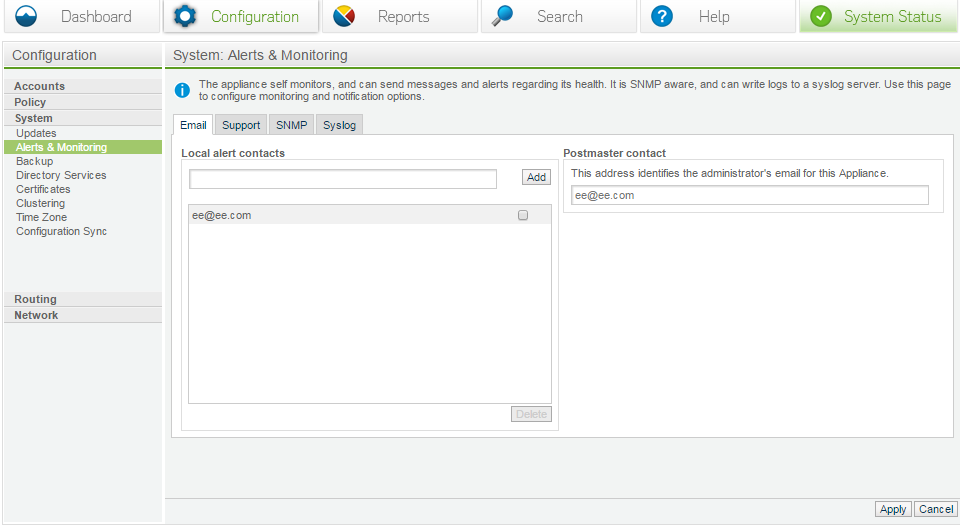
Alerts and monitoring
-
Email: Local alert contacts are email addresses where all alerts will be sent.
-
Postmaster email: This is the address that will be shown in all bounce related messages, or message/dialog emails such as the digest.
-
-
Support: Configure appliance non-critical and critical alerts.
-
SNMP Monitoring: This is a method where the customer can download the MIB package and export alerts to their SMNP server. All of the critical alerts are listed. Simply download the XML file and have a look to see what is covered.
-
Syslog: It is recommended to export the logs to a syslog server, so you have a copy of the actual mail logs. The SEA will scrape the mail log and populate it to the database after a month the original logs are destroyed.
Backup
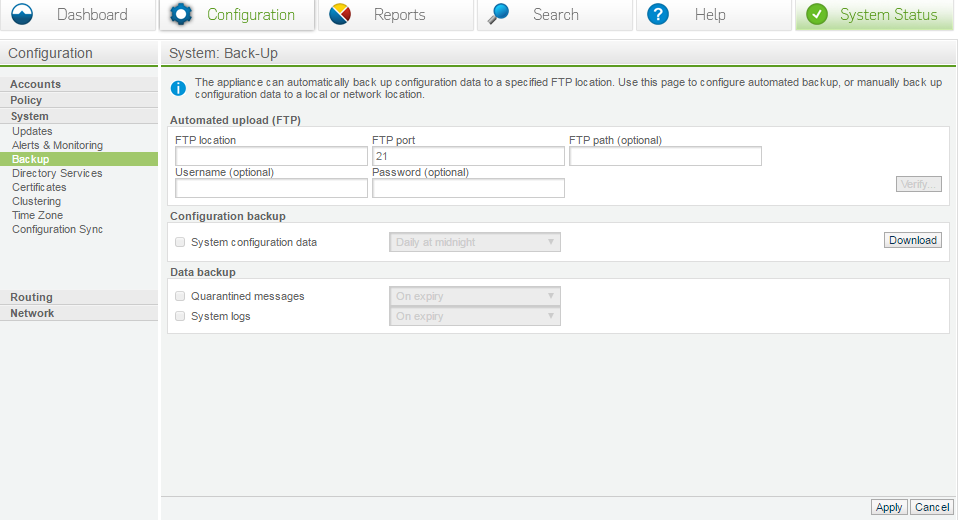
Ensure you use the backup option, it will be impossible to recreate your configuration if your appliance croaks. If you have a current system back up at worst it can be re-applied to the appliance by calling support.
It is not required to back up the quarantine, but it is recommended to back up system logs.
Directory services
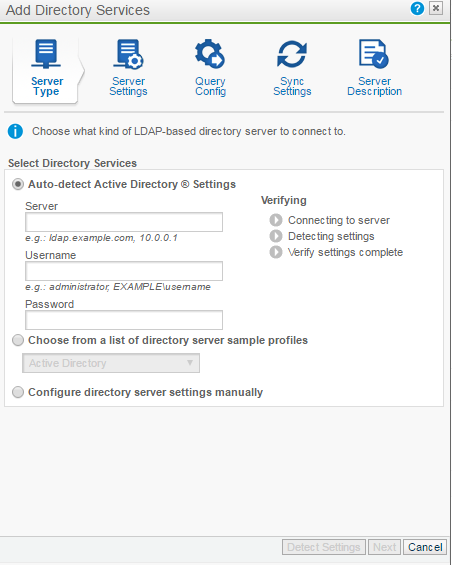
For the most part the defaults should work, however if you have a complex directory services you may need an ad query tool to export the correct layout.
Configuring AD will allow your users to log in and release spam, enable postfix to create validation lists and allow you to configure rules on a per user/group basis.
See the ? at the top right of the dialog box for more information on AD.
Note: AD configuration can be different with every organization, the default will simply pull the primary SMTP address. If you have specific needs you will need to create and test your own query string.
IE:
(&(objectClass=user)(%%ATTR_ACCOUNT%%=%%USERNAME%%)(%%ATTR_MAIL%%=*))
Certificates
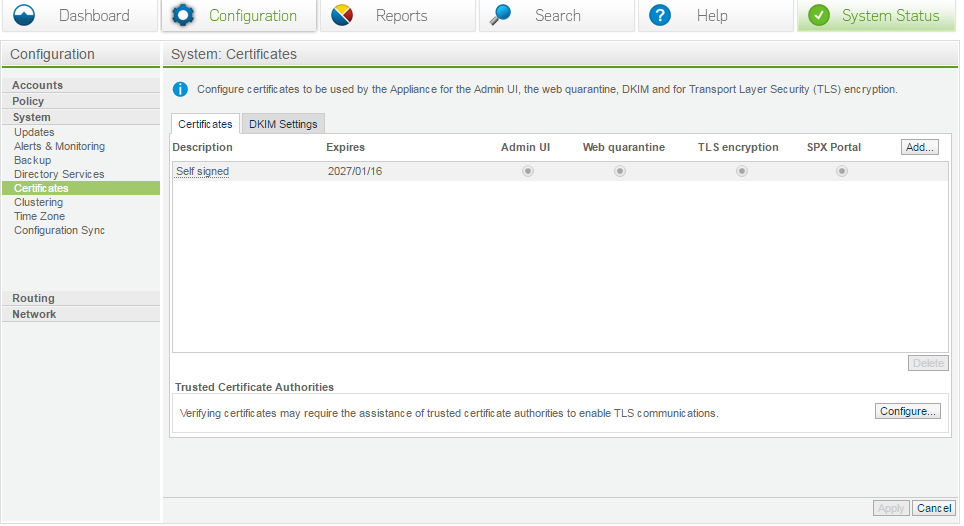
The 99.9% of mail servers do not require valid TLS certificates; therefore the self-signed one is usually fine. In the case of .mil or similar, they will require validation. In that case generate a CSR from the appliance and submit the request to your CA. Then upload the results into the appliance (ensure there are no extra spaces, line feeds or similar, or it will be invalid).
If you absolutely have to assemble your own certificate ONLY USE .PEM format, AKA Apache
Certificate formats and converting
-
PEM Format
- The PEM format is the most common format that Certificate Authorities issue certificates in. PEM certificates usually have extensions such as .pem, .crt, .cer, and .key. They are Base64 encoded ASCII files and contain -----BEGIN CERTIFICATE----- and -----END CERTIFICATE-----statements. Server certificates, intermediate certificates, and private keys can all be put into the PEM format.
- Apache and other similar servers use PEM format certificates. Several PEM certificates and even the private key can be included in one file, one below the other, but most platforms such as Apache, expect the certificates and private key to be in separate files.
-
DER Format
- The DER format is simply a binary form of a certificate instead of the ASCII PEM format.It sometimes has a file extension of .der but it often has a file extension of .cer.
- The only way to tell the difference between a DER .cer file and a PEM .cer file is to open it in a text editor and look for the BEGIN/END statements.
- All types of certificates and private keys can be encoded in DER format. The DER is typically used with Java platforms. The SSL Converter can only convert certificates to DER format. If you need to convert a private key to DER, please use the OpenSSL commands on this page.
-
PKCS#7/P7B Format
- The PKCS#7 or P7B format is usually stored in Base64 ASCII format and has a file extension of .p7b or .p7c.
- P7B certificates contain -----BEGIN PKCS7----- and -----END PKCS7----- statements. A P7B file only contains certificates and chain certificates, not the private key. Several platforms support P7B files including Microsoft Windows and Java Tomcat.
-
PKCS#12/PFX Format
- The PKCS#12 or PFX format is a binary format for storing the server certificate, any intermediate certificates, and the private key in one encryptable file. PFX files usually have extensions such as .pfx and .p12. PFX files are typically used on Windows machines to import and export certificates and private keys.
- When converting a PFX file to PEM format, OpenSSL will put all the certificates and the private key into a single file. You will need to open the file in a text editor and copy each certificate and private key (including the BEGIN/END statements) to its own individual text file and save them as certificate.cer, CACert.cer, and privateKey.key respectively.
-
Convert formats of certificate
- Convert DER to PEM
- openssl x509 -inform der -in certificate.cer -out certificate.pem
- Convert P7B to PEM
- openssl pkcs7 -print_certs -in certificate.p7b -out certificate.cer
- Convert PFX to PEM
- openssl pkcs12 -in certificate.pfx -out certificate.cer -nodes
Step 1: Assembling the certificate
Open notepad and select a new document. From there you must cut/paste all of the parts of the certificate exactly as described below. Note that you need to cut/paste each part in the correct order or the certificate will fail to import.
Sites such as SSLShopper may help you chain your certificate.
Definitions:
- - - - - BEGIN RSA PRIVATE KEY - - - - -
This is your private key, you should never give it to anyone or let anyone see any part of it.
Why? Because anyone with your private key can packet capture and decrypt any piece of information it was used to encrypt with.
- - - - - END RSA PRIVATE KEY - - - - -
- - - - - BEGIN CERTIFICATE - - - - -
This is the common public key that your provider got, chances are if you got a go daddy cert this is the whole reason.
You have to convert it, because they won’t give you certificates in clear text formats.
- - - - - END CERTIFICATE - - - - -
After these 2 parts, the next parts are the intermediate CA's. In order to complete the certificate correctly you must include all of the CA's.
In most cases they will provide you with 3 CA's, each one is separated with the same.
- - - - - BEGIN CERTIFICATE - - - - - -
- - - - - END CERTIFICATE - - - - -
Once the certificate chain is complete, save it to your desktop and scroll down to Part 5.
Sample certificate
Important: There should be no spaces/line feeds, or any extra spaces.
Note: If you submitted the CSR from the appliance do not include the private key.
-----BEGIN RSA PRIVATE KEY-----
MIFJDJfffdjfRKRKRKDKFKFDKFEFKkfkefKKEFKEFK93894M//ffDF/fdfLLDKEW
Step 2: Installing the certificate
- Log in to the SEA
- Go to Configuration / System / Certificates
- Click on Add button to add a certificate
- Check off Upload Existing certificate and private key
- Click Next
- Check off Import Certificate File
- Add a description in the provided box
- Click Browse
- Select your file on the desktop
- Click Next
- When the process indicator get to 100%, click Done
- The entered key is listed under valid keys. Click on the underlined link on the name of the certificate and check if all the information is right.
Step 3: Verifying the keys
- Click on the certificate Name
- Click on Download Certificate
- Save the file to your desktop
- Open the file and make sure you see the public key: CA, CA, CA.
- Once the public key is confirmed, it can then be used for sharing with other companies, who will validate the traffic and trust the certificate.
Clustering
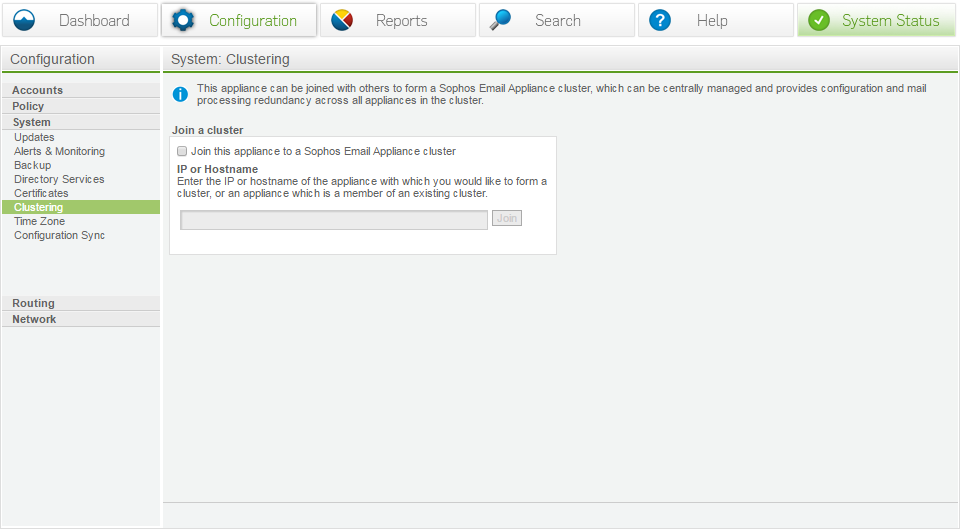
When you have multiple SEAs, then first SEA will become the cluster master. For example, you have SEA 192.168.1.1 and SEA 192.168.1.2. if you log into .2 and cluster into .1, then .1 will become the master that you cluster in to all the time.
Note: All cluster members must be on the same version. It is recommended to complete the installation process with new appliances and getting it fully up and running.
External connections
These services are typically used for connections between your SEA and locations outside of your organization's network.
| Port | Function | Service | Protocol | Connection |
|---|---|---|---|---|
| 22 | Remote assistance | SSH | TCP | [Required] Outbound from appliance to esa-ssh.sophos.com |
| 25 | Mail transfer | SMTP | TCP | [Required] Inbound/outbound between appliance and intranet/internet |
| 80 | Software downloads | HTTP | TCP | [Required] Outbound from appliance to internet |
| 123 | Network time synchronization | NTP | UDP | [Required] Outbound from appliance to NTP server (e.g.pool.ntp.org) |
| 443 | Registration | HTTPS | TCP | [Required] Outbound from appliance to esa-reg.sophos.com |
| 444 | Feedback | HTTP | TCP | Outbound from appliance to sophos.com |
| 10443/443 | SPX Secure Email Portal | HTTPS | TCP | Inbound from internet to appliance (selectable) |
| 32224 | Time-of-Click (ToC) Protection | HTTPS | TCP | Inbound from internet to appliance |
Internal Connections
These services are typically used for connections within your organization's network and your SEAs, or between multiple SEAs.
| Port | Function | Service | Protocol | Connection |
|---|---|---|---|---|
| 20, 21 | FTP backup | FTP | TCP | Outbound from appliance to FTP server |
| 24 | Clustering | SSH | TCP/UDP | Inbound/outbound between clustered appliances |
| 25 | Mail transfer | SMTP | TCP | [Required] Inbound/outbound between appliance and intranet |
| 53 | DNS services | DNS | UDP | Outbound from appliance to DNS server |
| 161 | SNMP monitoring | SNMP | TCP/UDP | Inbound from SNMP monitoring server(s) to appliance |
| 162 | SNMP traps | SNMP | TCP/UDP | Outbound from appliance to SNMP monitoring server(s) |
| 389, 3268, (636, 3269) | Directory services synchronization | LDAP(S) | TCP | Outbound from appliance to directory server |
| 443/10443 (redirect from 80) | End User Web Quarantine | HTTPS | TCP | Inbound from intranet to appliance (selectable) |
| 5432 | Database functions | Encrypted SQL | TCP/UDP | Inbound/outbound between clustered appliances |
| 18080 | Administration user interface and clustered UI functions | HTTPS | TCP | [Required] Inbound/outbound between appliance and intranet |
| 8888 | Delay Queue | DB Sync | TCP | Inbound/outbound Delay Queue database sync between clustered appliances |
Clustered members can be located anywhere, but they require access to all of the required ports for programs, ie 8888 and 5432 etc.
To replace a cluster member:
- Deploy a new VM, complete the set up configuration.
- Give the SEA a unique hostname and IP address.
- During the installation, a message will appear asking to join a cluster, select NO and complete the installation. Make sure it is fully up-to-date on the same version and reboot as needed.
- Once the appliance is clustered and running, log into the old SEA and remove it from the cluster (this will transfer jobs to the new member), then power it down.
- Log in to the new SEA console and assume the old SEAs hostname and IP. (Note: You do not need to create new firewall rules and/or change DNS and similar.)
- Note: If you wish to preserve your quarantine simply keep your old appliance online for 30 days. do NOT route new mail to it. Once the quarantine express power it down and assume its IP/Hostname
Time zone

Always make sure NTP is configured, AD will reject anything +/- 3-5 mins. This also tells the appliance how many hours to adjust the logs to (all logs are in UTC).
Configuration sync
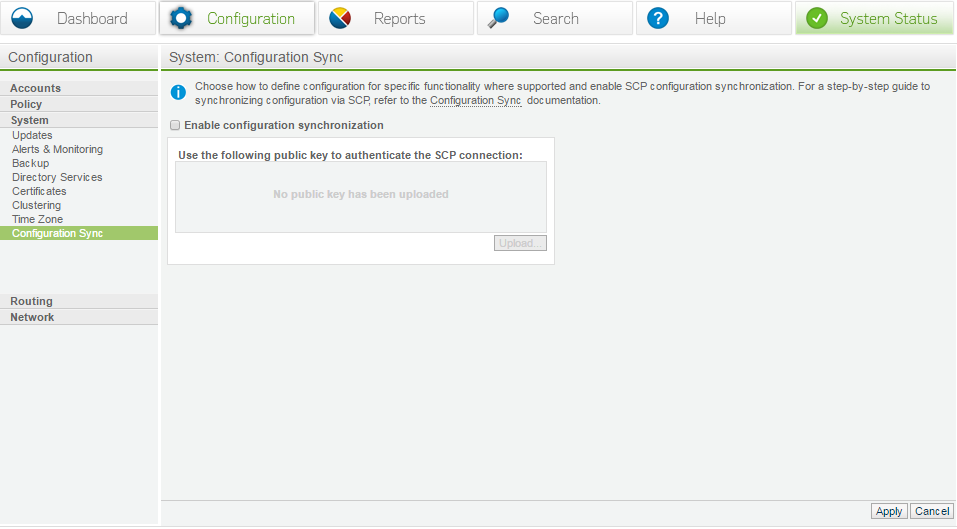
Configuration sync is for UNIX environments (or similar with NO AD) who wish to add SMTP addresses to the SEA manually. Have a look at the linked documentation. It is not recommended to perform this sync.
Routing configuration
Mail delivery servers
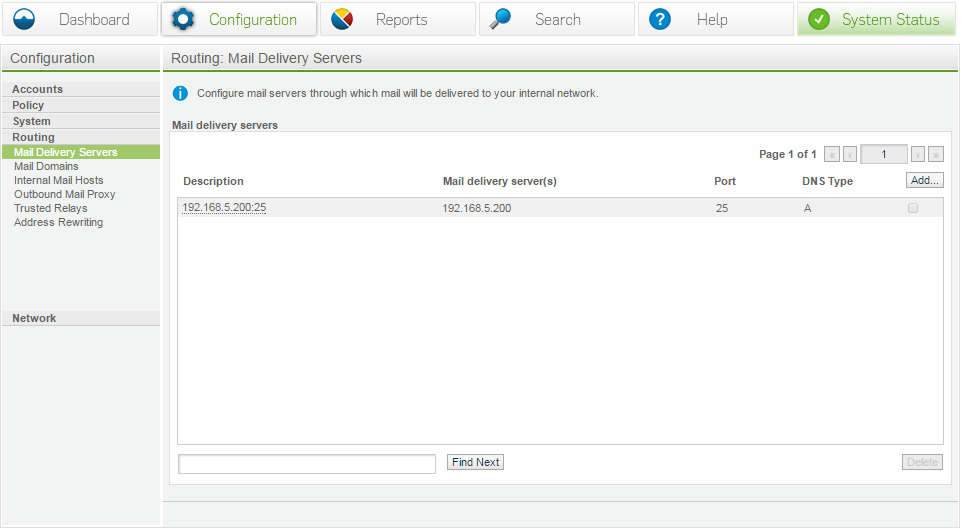
These should be your downstream servers. You will generally only require a single set however if you accept mail for multiple domains and route mail accordingly. You may have several groups or servers listed.
In order to assign a mail group you will need to configure your mail domains. i.e.: accept mail for abc.com and send to server group 1, accept mail for xyz and send to server group 2, etc.
Mail delivery servers are mandatory.
Mail domains
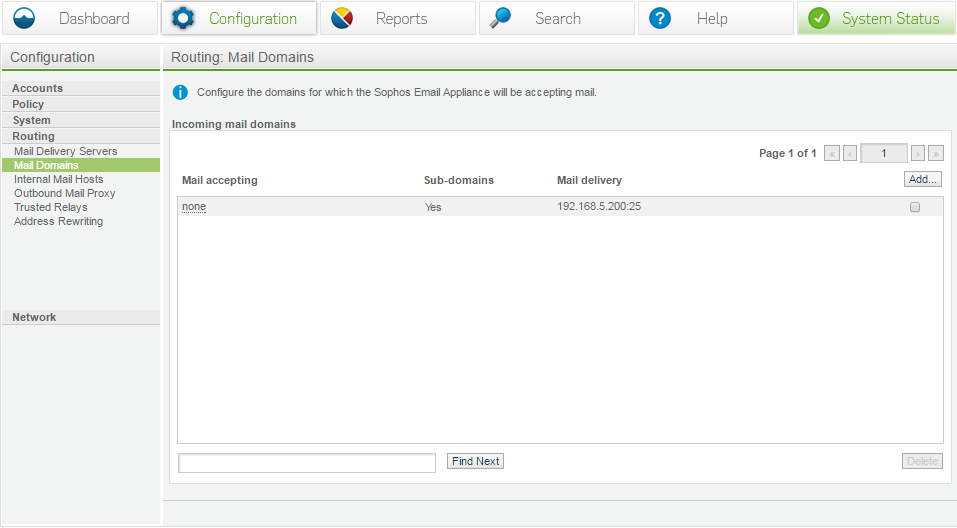
Identify the domains used to accept mail for, then assign the delivery server to it. You can do TLD’s or subdomains or any combination of the two. Just make a separate entry for each and assign it accordingly.
Mail domains are mandatory.
Internal mail hosts
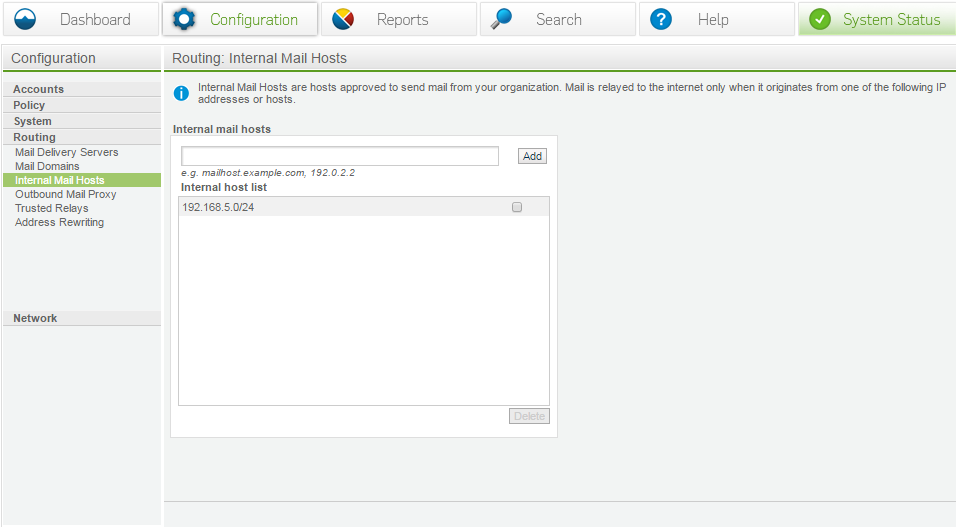
Contrary to the name, any IP range can be listed here. This tells the appliance who it is allowed to accept mail FROM. The hosts listed will assume that mail will be delivered to the internet.
Anything listed here should be set up to anonymously relay mail.
For example:
- Your internal exchange should be listed.
- Your workstation IPs should not be listed (there are some cases where you may wish to, but if you get a comprised workstation it will be allowed to relay mail out).
- Large /24 ranges are discouraged.
- Public IPs are allowed, but should be used sparingly with the assumption that they will have free access to relay mail. (a public IP listed will still be treated as Internal > External)
Internal mail hosts are mandatory. (If you wish to relay outbound mail through the appliance.)
Trusted relays

A trusted relay is a trusted mail source that should be exempt from spam scanning, DNS look ups and only used if necessary.
By default the vast majority of configurations will not need any trusted relays listed.
Before adding any trusted relays make sure you consult the full documentation listed here:
Address rewriting
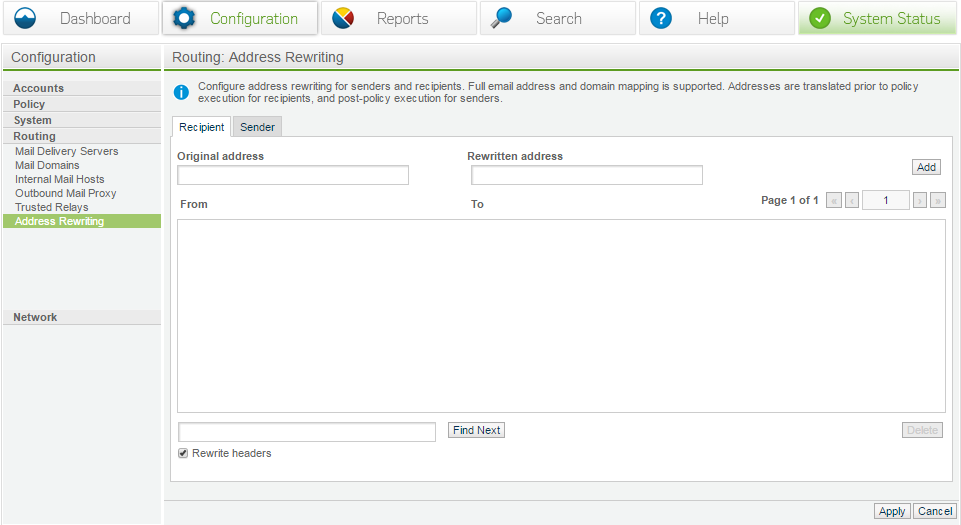
This can be used to convert one address to another; generally you will never see this as most of the times alias set by users are split at the exchange level.
Networking configuration
Network interface
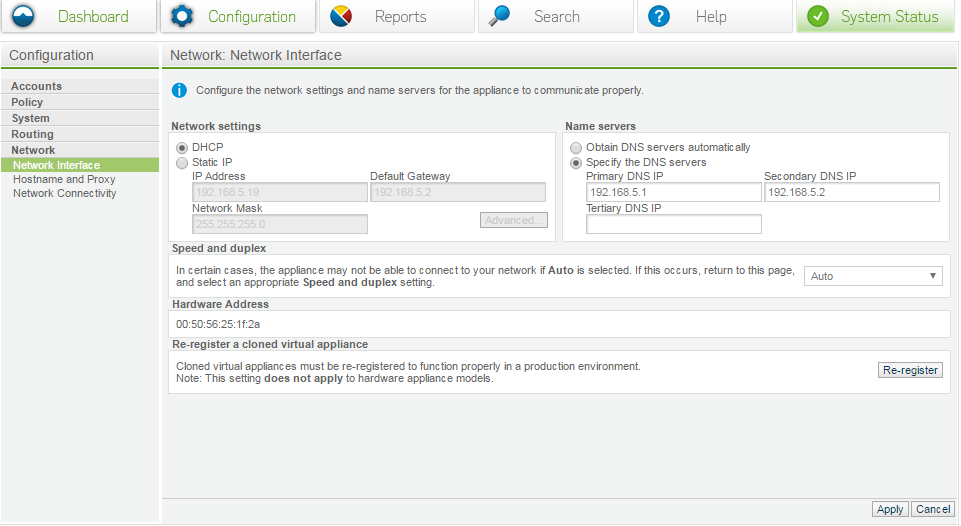
Using network interface, you can set your speed/duplex to match your port. It is not recommended to set it automatic.
Note: Re-register devices is a requirement for a cloned device. It is not recommended to clone devices as it is just as fast to deploy a new SEA. In turn this will create a unique SEA with proper SSL keys and will cause less issues with databases entries and a whole range of other issues.
Clones should be an absolute last option.
Hostname and proxy
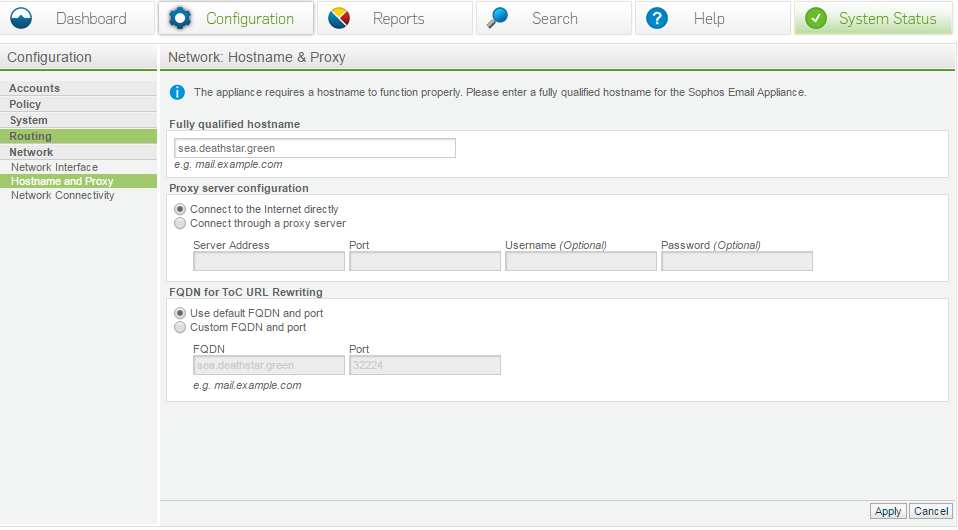
Your FQDN should match exactly to say your certificates. It’s also good to make sure that it can be resolved.
This is important because remote mail servers will RDNS your connections, having a host name that does not match is poor configuration.