

Introduction
ZTNA or Zero Trust Network Access, as the name implies is founded on the principle of trust nothing, verify everything. Sophos ZTNA provides
an elegant zero-trust solution for secure remote-access to network applications and data. It verifies the user’s identity and optionally the health of
their device while securely connecting the user directly to the application enabling improved micro-segmentation, better security, and protection
from Ransomware and attacks, with a better user experience than other remote access technologies like VPN.
In this EAP, we introduce a new deployment mode, ZTNA as a service. ZTNA admins can make use of a new Sophos-protected data-plane cloud
to provide access to internal resources. The multi-tenanted Sophos cloud works to further isolate network deployments from direct internet
exposure and reduces the attack surface area. Admins can easily connect their users to applications without the hassle of opening firewall ports
and NAT policy.
ZTNA connectors are supported on VMware ESXi, AWS, and Hyper-V in this EAP. Admins can choose from multiple geo points of presence to
provide access to their internal resources.
This document is a step by step guide for the admin to configure and deploy a ZTNAaaS Connector and resources behind it. This explains both
the agent-less and agent flow. While the configuration flow is largely similar to existing configuration of gateways, there are a few updates to the
following sections:
- IfZTNA as a service needs to be configured, domain ownership needs to be validated
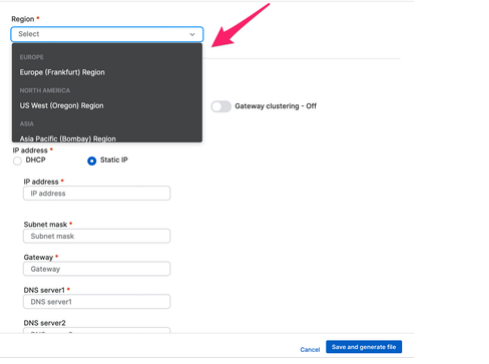
- While adding ZTNA connectors, you can choose the desired points of presence on Sophos Cloud. Currently we support 6 points of
presence. Choosing a PoP nearest to where applications are hosted helps in reducing latency - Public DNS server settings. CNAME records for the alias domains for ZTNA connectors and agentless resources will have to be added
Pre-Deployment Requirements
Before the admin sets up ZTNAaaS connector, they must meet the following requirements. The pre-requisites for setting up a ZTNA
connector are similar to those mentioned while connecting a ZTNA Gateway. The list can be seen here:
docs.sophos.com/.../index.html
DNS management
You need an external DNS server for the following:
- Verify the domain ownership that admin is going to use for ZTNAaaS connector
- Resolve the CNAME record of connector to point to the alias domain generated for the ZTNAaaS connector.
- Resolve the CNAME record of resources to point to the alias domain generated for the resources.
More details can be found in later sections
The domain name of your resources must match that of your connector. For example:
Connector FQDN: https://ztna.mycompany.net/
Resource FQDN: https://wiki.mycompany.net/#all-updates
Wildcard certificate
You need a wildcard certificate for the ZTNAaaS connector. Use one of the following:
- A certificate issued from Let's Encrypt.
- A certificate issued by a trusted certificate authority.
Azure Active Directory
You need a Microsoft Azure Active Directory account with security enabled user groups configured and synced with Sophos Central.
This guide tells you how to set up and sync these groups.
Azure Active Directory and Okta are the identity providers supported.
Configuration
| Infra | Role | Where does it exist? | |
| 1 | Azure AD |
https://docs.sophos.com/central/ZTNA/startup/en-us/setup/SetUpDirService/index.html
|
portal.azure.com |
| 2 | Gloabal AD Settings |
https://docs.sophos.com/central/ZTNA/startup/en-us/setup/SyncUsers/index.html |
Sophos Central |
| 3 | Zero Trust Network Configuration |
The Configurations shown here are only with respect to recommendation of Single Arm, 3 node cluster deployment. ZTNAaaS Supports Single Arm and Dual Arm Configurations
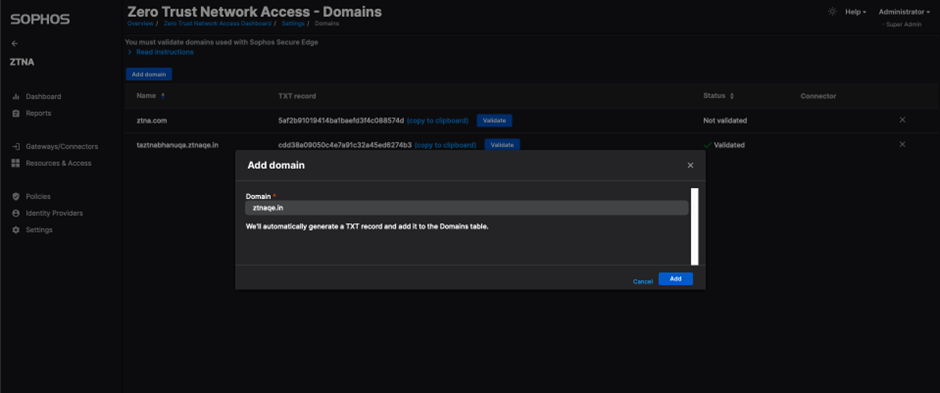
Turn on ZTNAaaS After joining the ZTNA as a service Early Access Program (EAP), Go to Central -> ZTNA -> Settings Turn on ZTNAaaS switch. Once you turn it on, the page will refresh and will load in couple of seconds. Note : Only if you enable this 'ZTNAaaS', will you be able to configure gateway in connector mode
Go to Central ZTNA Settings
3. Domain will now be displayed in domains table
4. The generated TXT record/token for the domain has to be added in DNS server as a TXT record (Cloudflare is used in this example)
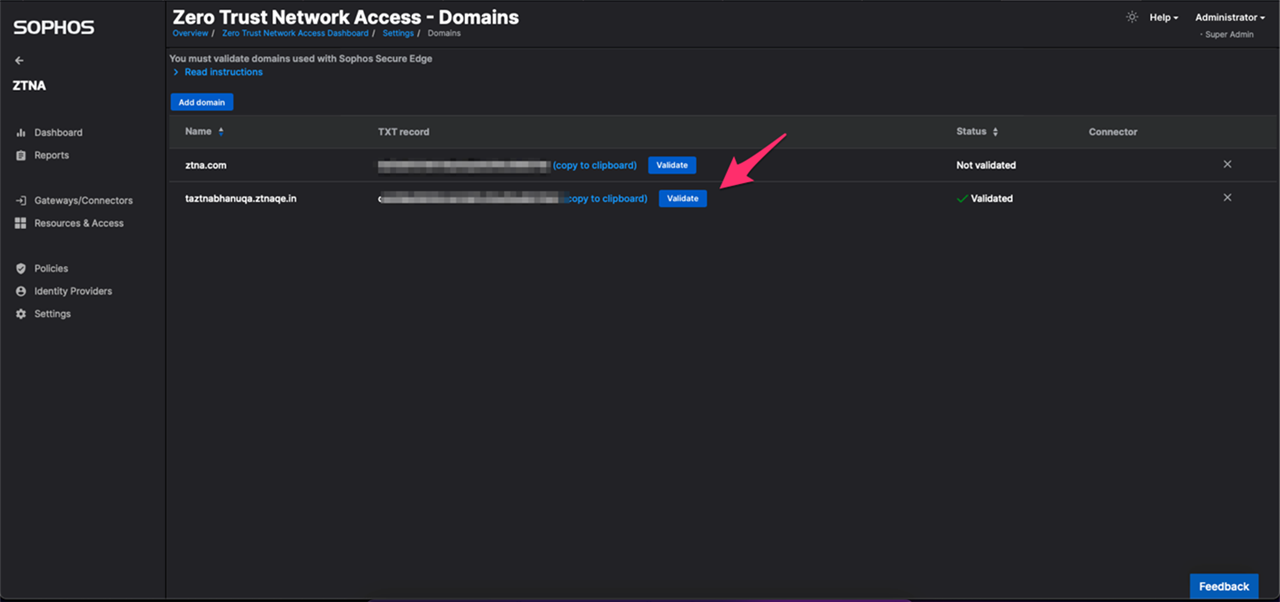
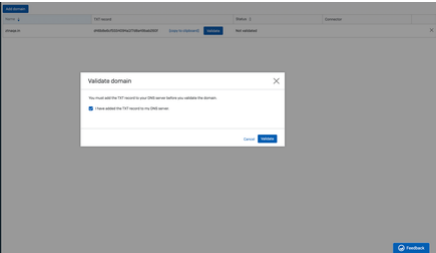
Note: Give few minutes after the above step before proceeding to next step. 5. Click on validate button for your domain
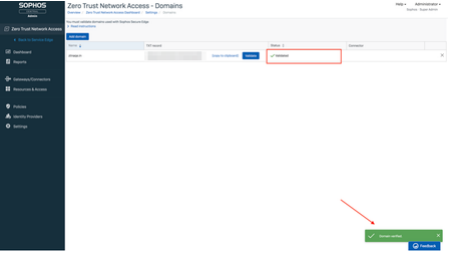
6. Your domain status should get changed to "Validated" by now
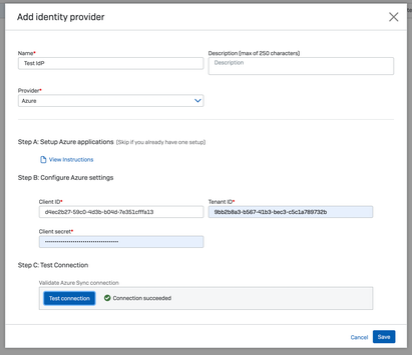
https://docs.sophos.com/central/ZTNA/startup/en-us/setup/IdentityProvider/index.html Go to Central -> ZTNA -> Identity Providers Add Identity Provider
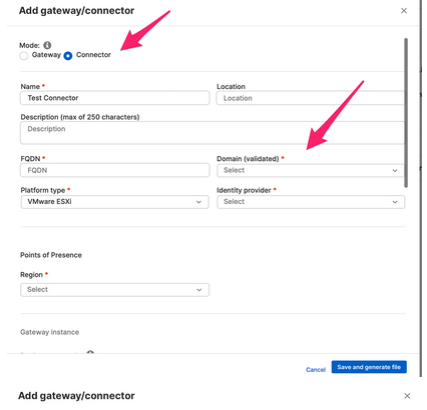
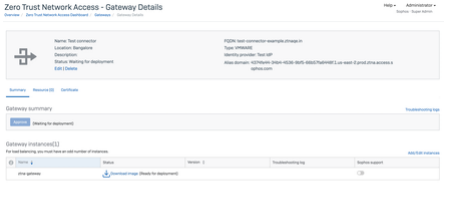
Go to Central -> ZTNA -> Gateways/Connectors
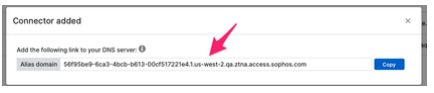
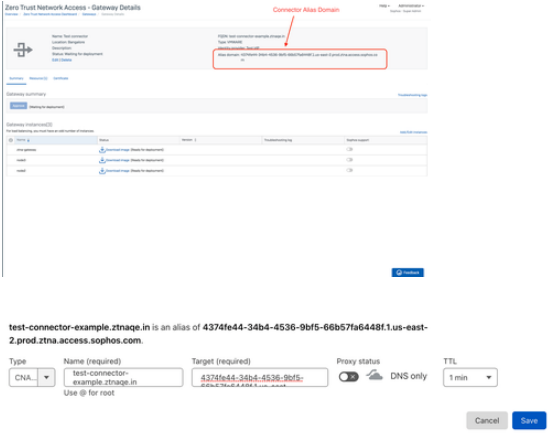
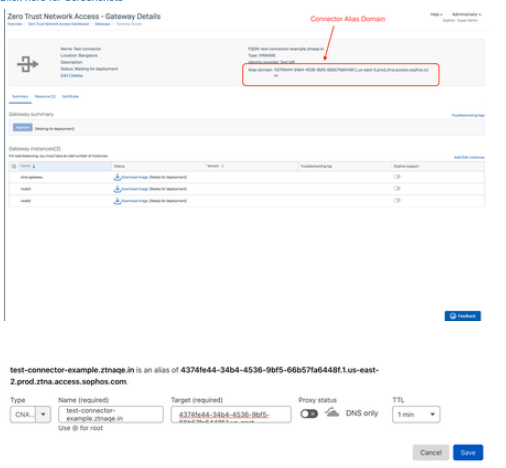
2. You will get a 'Connector Added' popup with generated alias domain for the connector; which we will use later. Connector will now be displayed in Summary Page
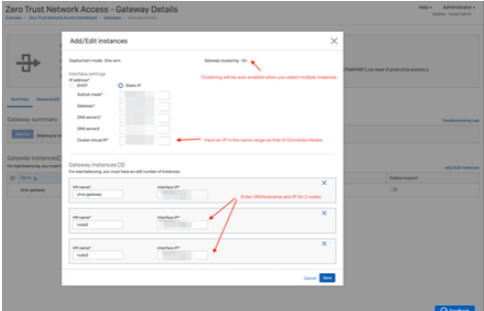
3. Click on Connector from Summary which will now take you to Connector Details Page. In case you need to add more instances in the cluster, click on 'Add/Edit Instances'
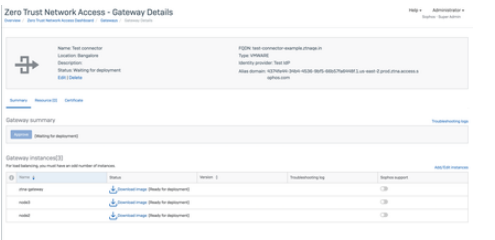
4. Click on Add another instance, in the below pop-up, where we will now add the remaining 2 nodes to the cluster
5. Download ISO for all nodes
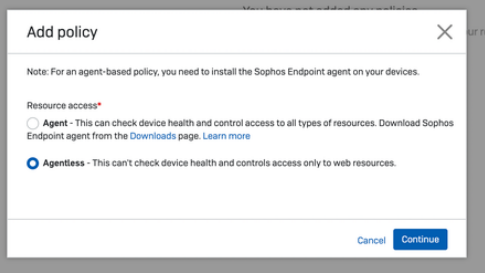
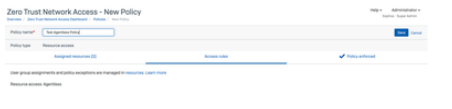
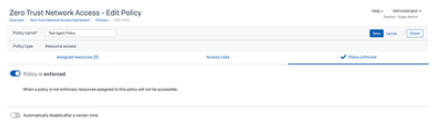
Go to Central ->ZTNA -> Policies -> Add Policy
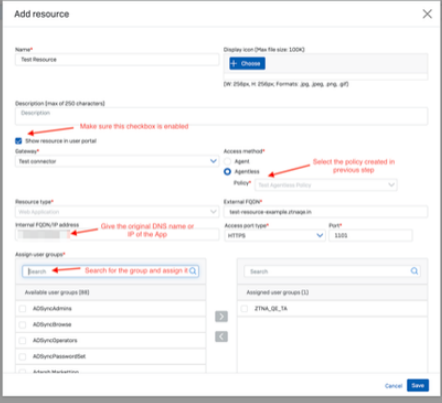
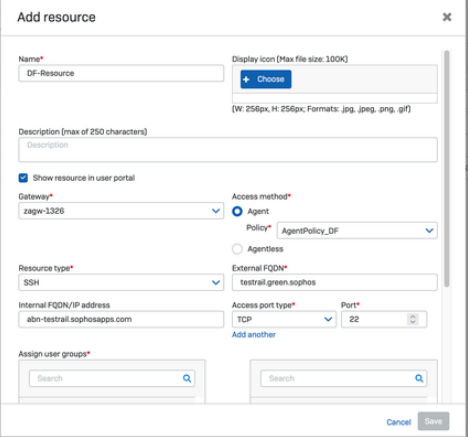
Go to Central -> ZTNA -> Resources & Access Add resource
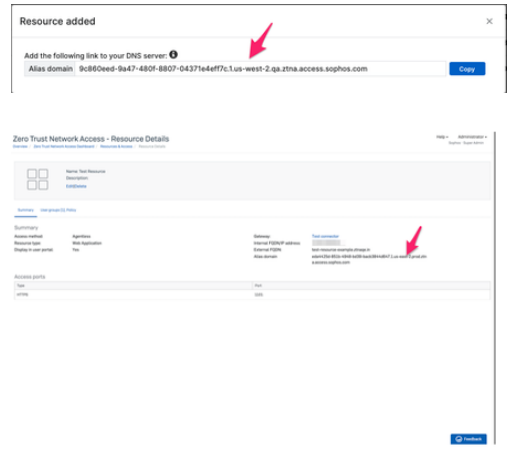
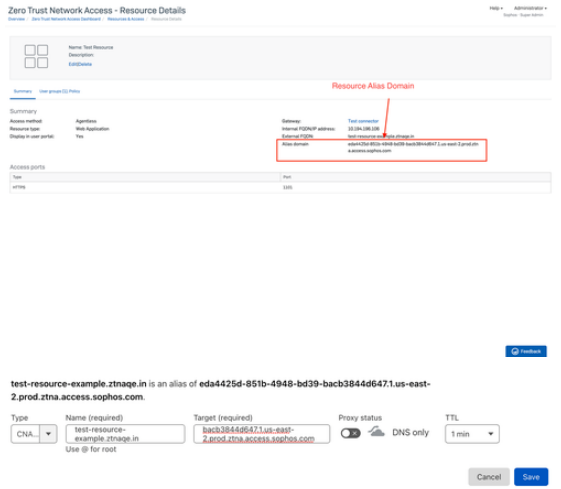
You will get a Resource added popup which will have the alias domain. Verify Resource Created from Summary Page.
|
Sophos Central |
| 4 | Public DNS Server |
1) Below are the DNS entries required for AGENT-LESS resource access: "CNAME" Record : Connector FQDN Connector Alias Domain
Agentless resource configuration on public DNS server:
2) In case of AGENT based Resource access, we need to have only 1 DNS record "CNAME" Record : Connector FQDN Connector Alias Domain Note : Incase resource is of 'Agent' type, alias domain is not generated Note:
|
Public DNS Server |
| 5 | Private DNS Server |
Connector needs to be pointing to a Private DNS Server to redirect user to actual resource post successful authentication and authorization |
NA |


Connector Boot-UP
Follow the steps mentioned in the below link to bring up the ZTNA connector based on the chosen platform type. We currently support VMware ESXi, Hyper-V and AWS.
docs.sophos.com/.../index.html
For ESxi and Hyper-V platforms, download the base image from the "Protect Devices"
1. Download Base Image from Protect Devices Tab on Sophos Central

Endpoint Installation with ZTNA Agent
ZTNA agent can work either with other endpoint components or as a standalone agent. In the latter case, you cannot make use of synchronized security.
Option 1: Enable ZTNA on existing Endpoint Installation
ZTNA Agent can be installed/ enabled on an already installed Endpoint.
For this you should have the 'Manage Endpoint Software' feature enabled on Central.
Once you have this enabled, go to Central Devices page
Select the device you want to install ZTNA on, and choose the 'install' option from the ZTNA dropdown and continue. You should see a tick against the ZTNA column in devices page.
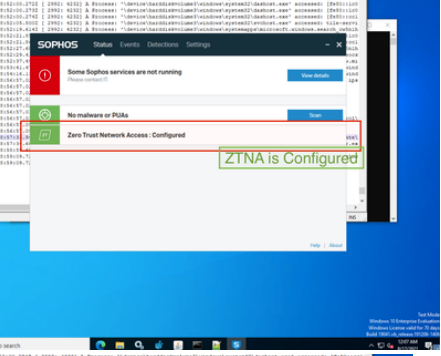
Please wait for a minute before you can check the Endpoint UI , you should see a new item in the Sophos UI named - Zero Trust Network Access.

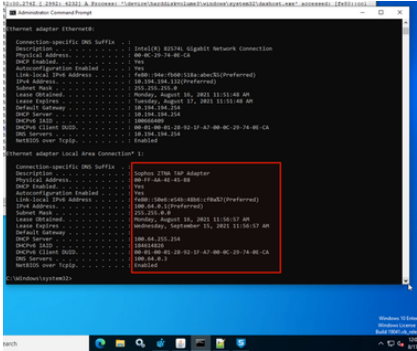
f you have a connected Gateway in Central and the ZTNA installed properly, you should see this screen on the Endpoint and ipconfig /all command will show a Sophos ZTNA TAP Adapter in the interfaces list.
c:/> ipconfig/all
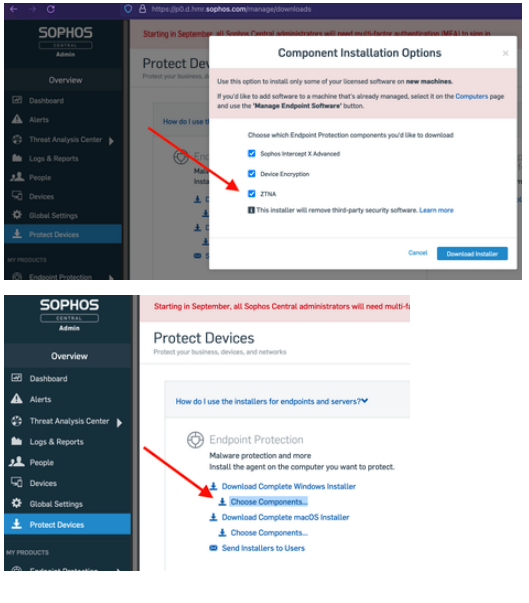
Option 2: Fresh Installation
ZTNA Agent is bundled in the Endpoint and can be chosen as a thin-installer component while downloading the thin-Installer from the Central. You will be able to see this optional ZTNA component only when you have joined the ZTNA EAP program.
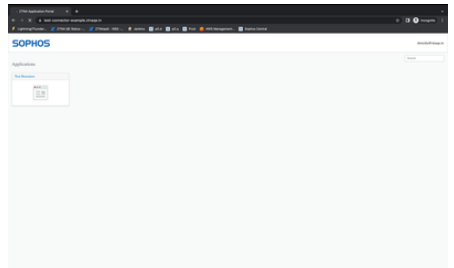
Accessing Userportal/Agentless Resource
- Type User Portal/Resource FQDN in browser
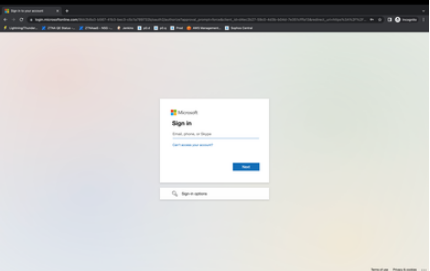
- Authenticate using the user credentials. User will be displayed with the agentless resources to which he has access in user portal.
- User redirected to User Portal/Resource ( Post Successful Authentication & Authorization )
Feedback
To provide Feedback or report any issues use the Feedback option within Sophos Central.
Edited screenshots
[edited by: emmosophos at 12:19 AM (GMT -7) on 4 Nov 2022]