

Note: Information is posted as-is and the content should be referenced at your own risk.
Overview
In certain scenarios it might be required to gain root access to Sophos UTM without having previously accessed the WebAdmin console. Due to AWS security policy requiring that the root account is disabled for SSH access we will need to work around limitation to get access to the system and enable root access if needed.
This article describes the steps to enable SSH access for root on Sophos UTM instances in AWS.
Note:
- Sophos do not recommend using the root user for logging in to the system or any other operation due to the risks associated with this account.
- The safe alternative is to use the
sudocommand when executing commands that require root privilege as loginuser is part of the sudo-approved users by default.
Applies to the following Sophos products and versions
Sophos UTM v9.412 and above
Connecting to Sophos UTM using PuTTY
The loginuser user account has access to any UTM system launched on AWS by default. This user can sign in using the private key selected during the UTM’s deployment. Download and install both PuTTY and PuTTYGen from www.putty.org.
|
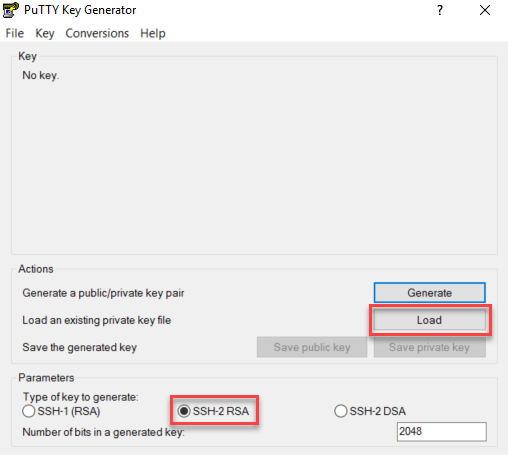
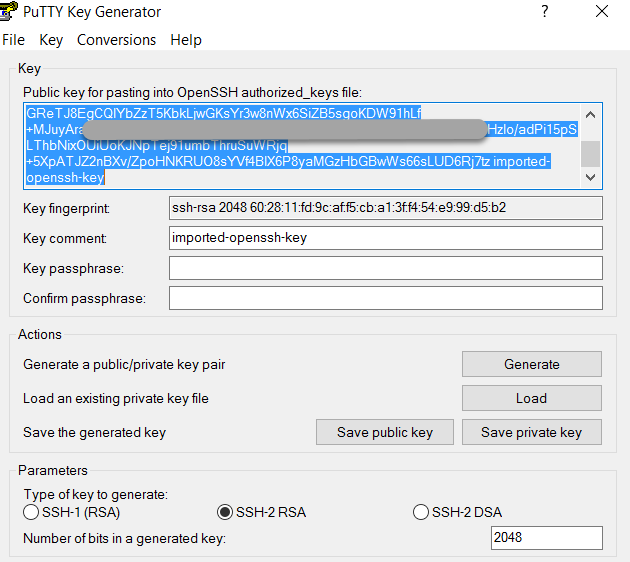
Open PuTTYgen to convert your AWS .pem file to PuTTY’s .ppk format. Select SSH-2 RSA (or RSA in newer versions of PuTTYgen) and click Load. |
 |
|
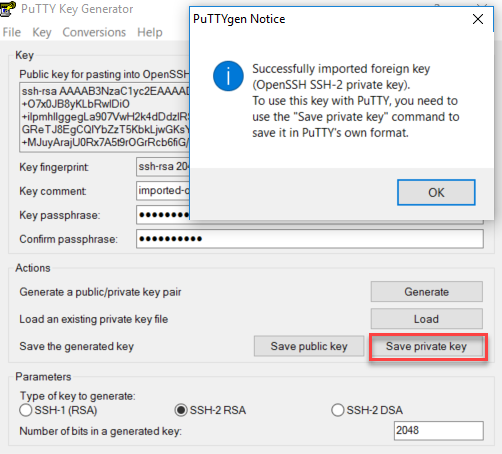
Browse to a stored copy of your AWS private key and click Save private key to save your private key in .ppk format. |
 |
|
Note:
|
|
|
Start PuTTY and navigate to Connection > SSH > Auth. Click Browse to select the .ppk keyfile generated earlier. |
 |
| Navigate to Session and enter the UTM’s public IP address or hostname. Make sure Connection type is set to SSH and click Open to connect to the UTM. |
 |
|
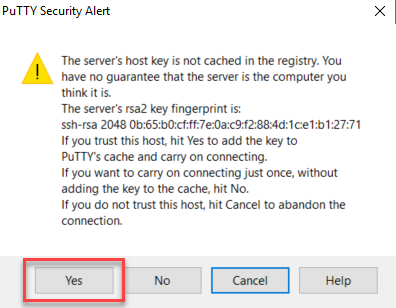
Accept the security alert regarding the RSA fingerprint to connect. |
 |
|
Note:
|
|
| Enter the name loginuser to authenticate with the UTM instance |  |
Setting up a password for root
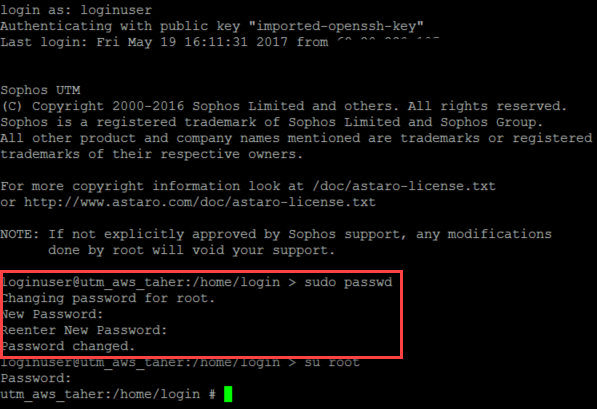
Since root uses a unique randomized password, you will need to modify this password to log in as root.
- Log in to the UTM with loginuser account as described above.
- Enter
sudo passwd root followed by <enter>. - Set and confirm a new password for the root user.
- Optionally confirm the new password by switching to root. Enter
suorsu rootcommand followed by <enter>.
Enabling SSH login for root
If your setup requires direct SSH access to UTM with the root user, you can use one of the following methods to enable it.
Enabling root access via SSH channel
Login to the UTM using the loginuser account and run the following command:
rest --request PUT --data '"without-password"' '/nodes/ssh.root_login'
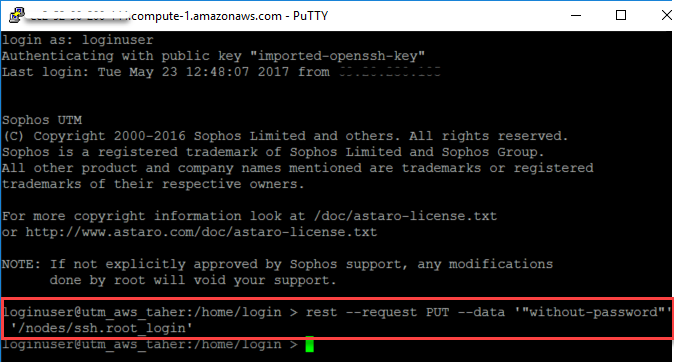
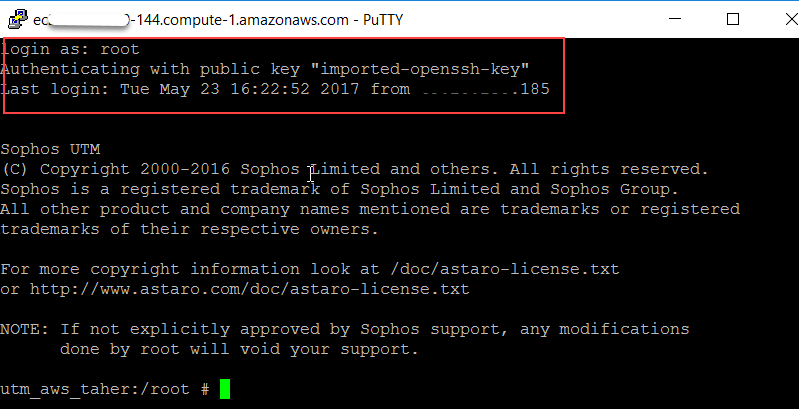
You can now set up a new PuTTY session and login as a root.

Enabling root access via RESTful API channel
From any remote application supporting RESTful API, run the following commands against your Sophos UTM instance:
UTM_HOST="utm_hostname.example"
ADMIN_USER="admin"
ADMIN_PASSWORD="your_password"
curl -f -X PUT --header 'Content-Type: application/json' --header 'Accept: application/json' --user "$ADMIN_USER:$ADMIN_PASSWORD" --data '"without-password"' "https://$UTM_HOST:4444/api/nodes/ssh.root_login"

You can now set up a new PuTTY session and login as a root.

Enabling root access using the confd client
|
Login to the UTM instance as loginuser and type Type |
 |
|
Enter the following commands line by line and press Enter after each line:
|
 |
|
You can now set up a new PuTTY session and login as a root. |
 |
Enabling root access by editing the configuration files
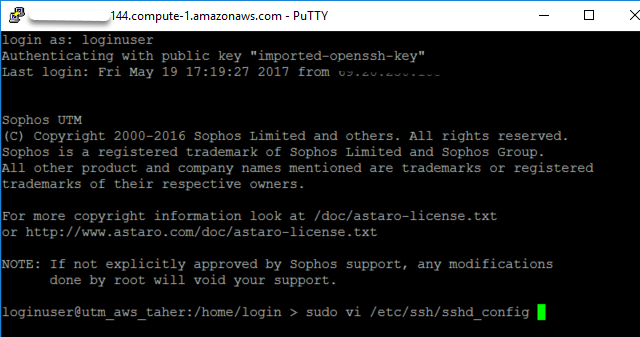
Log into the UTM as loginuser and edit the SSH configuration by entering sudo vi /etc/ssh/sshd_config |
 |
|
Move the cursor to the PermitRootLogin no line. |
 |
|
|
Press the Insert key on your keyboard or the “I” key to enable editing. |
 |
|
| Press the Esc or Escape key on your keyboard to disable editing. Type :wq followed by <enter> to save the changes and close the file. |
 |
|
|
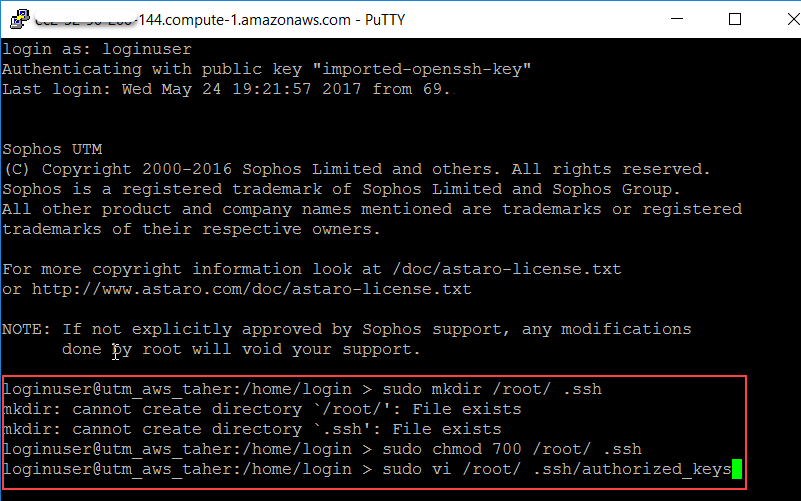
Your private key needs to be added to authorized keys. Create a .ssh directory in /root by entering: Set the rights on the directory using: Create the authorized keyfile with: Press the Insert key on your keyboard or the “I” key to enable editing. |
 |
|
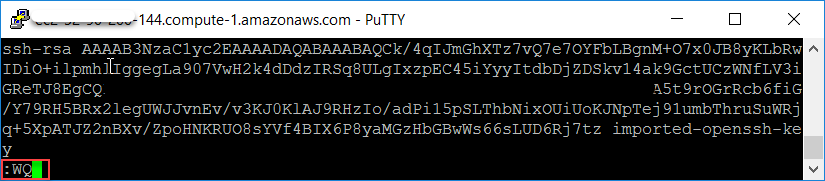
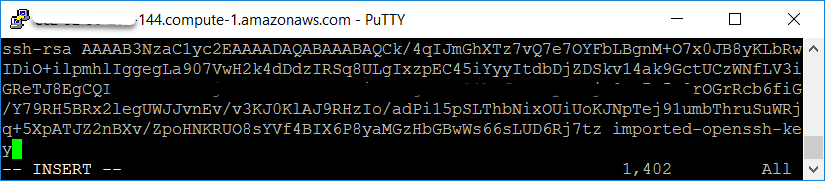
| Enter or copy the private key (PuTTY supports pasting by clicking the right mouse button). Note that you can copy the on-screen output of PuTTYgen or copy the existing contents in /home/login/.ssh/authorized_keysPress the Esc or Escape key to disable editing. |
|
|
Type :wq followed by <enter> to save the changes and close the file. |
 |
|
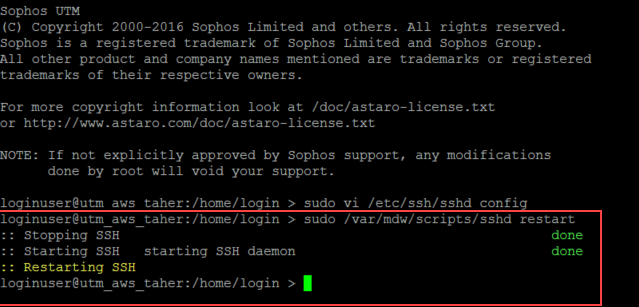
Restart the SSH daemon by running sudo /var/mdw/scripts/sshd restart |
 |
|
|
You can now set up a new PuTTY session and login as a root. |
 |
|
| You can also enable SSH access for root using password for authentication following below steps: | ||
|
When you log into the UTM as loginuser and edit the SSH configuration by entering Change Press the Esc or Escape key on your keyboard to disable editing. Type |
 |
|
Restart the SSH daemon by running sudo /var/mdw/scripts/sshd restart |
 |
|
| You can now set up a new PuTTY session and login as a root using the password set earlier. | 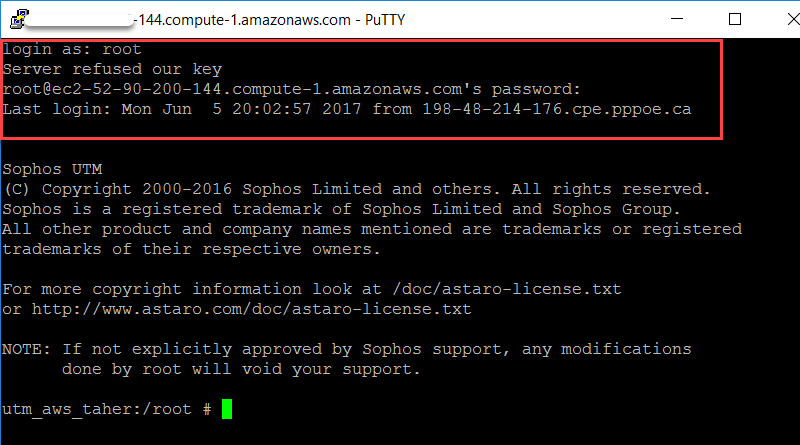 |
|
Note:
- Any changes made in WebAdmin under Management > System Settings > Shell Access will erase all the changes made above.