

Disclaimer: This information is provided as-is for the benefit of the Community. Please contact Sophos Professional Services if you require assistance with your specific environment.
Table of Contents
Overview
This Recommended Read describe on how to deploy the Sophos firewall as a standalone EC2 instance in your AWS account via AWS Marketplace.
Pre-requisites:
A valid AWS account with administrative privileges to deploy Sophos Firewall EC2 instance through CloudFormation stack.
Configuration steps in AWS console:
Step 1.Keypairs
Optional, if you already have key pair created in your account
Once you have logged into your AWS web console, click on Services > EC2 and scroll down all the way to click on Key Pairs.
Click on Create Key pair button, enter an appropriate name, select ppk and finally click on the Create key pair button so that the private key gets automatically downloaded to your computer which can be later used to access the Sophos firewall instance via SSH.

Step 2. AWS Marketplace
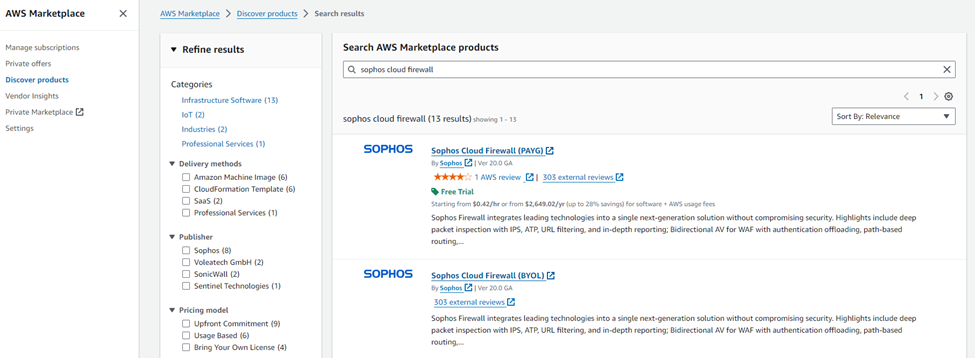
Go to AWS Marketplace > Discover products and search for Sophos Cloud Firewall.
You will see two search results, PAYG and BYOL.
For the demonstration purposes, we are using the BYOL deployment option.
Step 3. Sophos Cloud Firewall
It will open a new webpage and show the details related to Sophos Cloud Firewall.
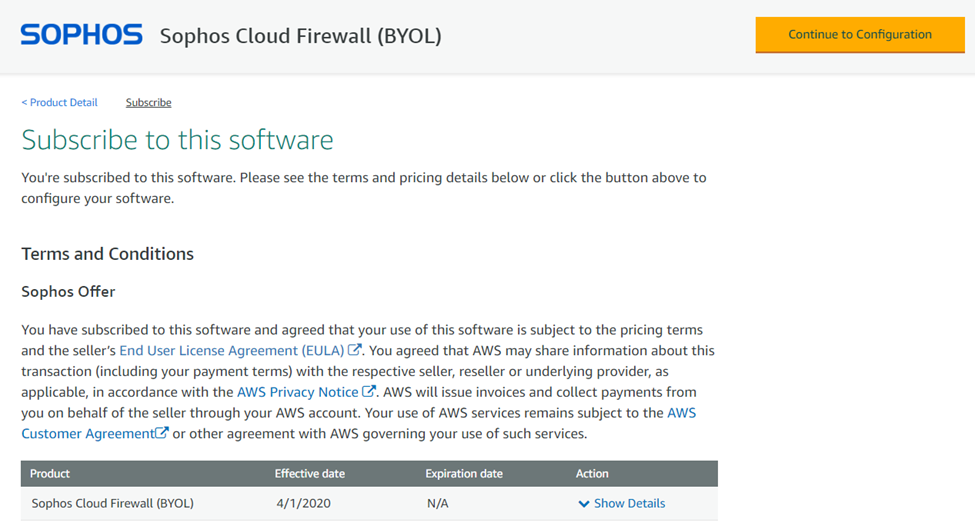
Click on the Continue to Subscribe button.
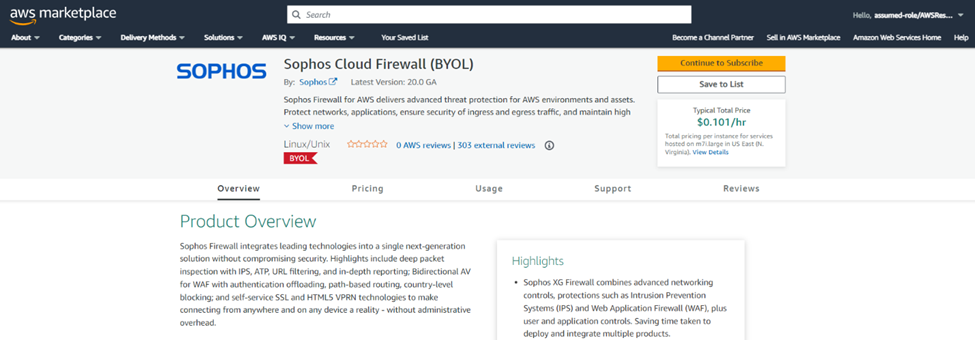
After the subscription process, click on the Continue to Configuration
Step 4. Standalone Firewall
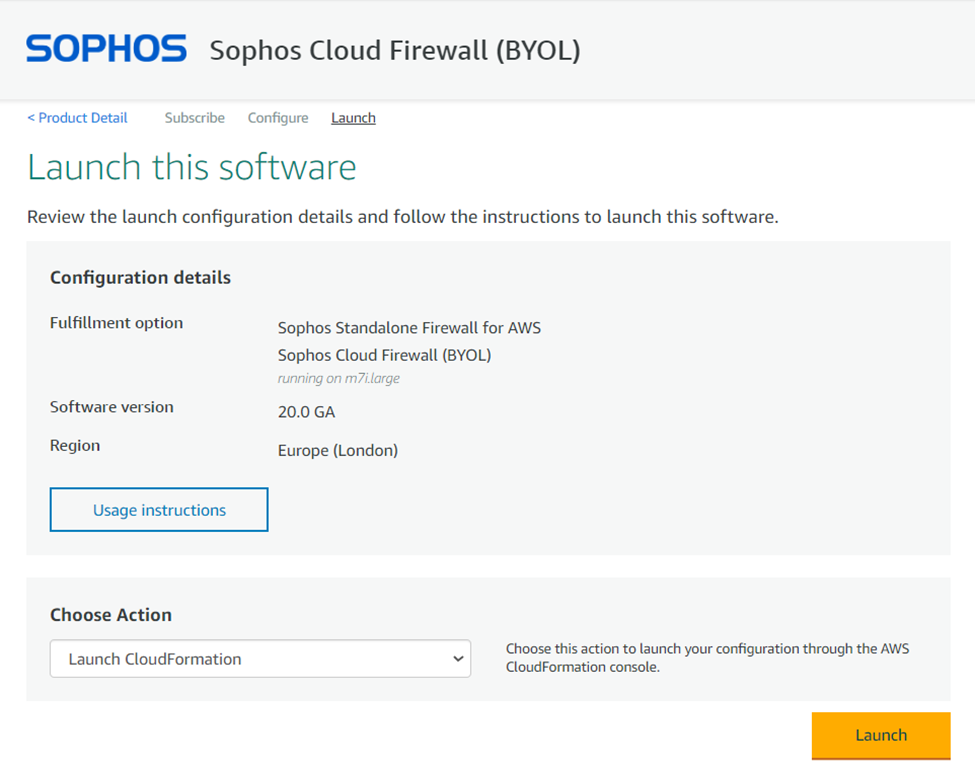
Under the Fulfillment option, select Sophos Standalone Firewall for AWS option.
Select the latest version of the software (currently version 20 GA).
Also ensure that you select the correct region of deployment before clicking the Continue to Launch button.
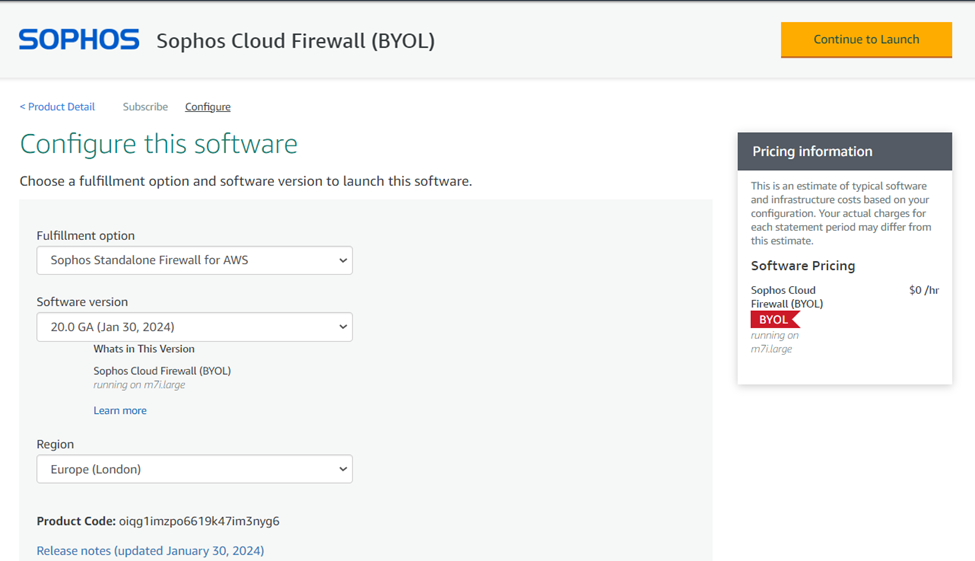
Select Launch CloudFormation option as the action and click on Launch button.
Step 5. Creating Stack
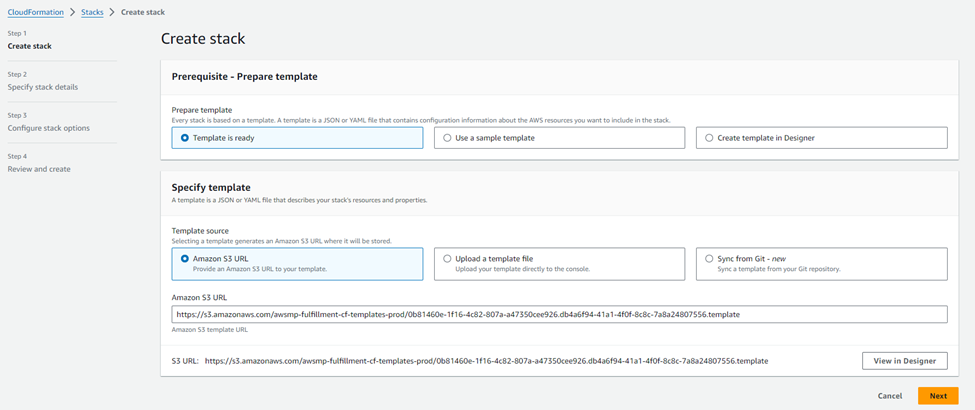
This will open your AWS web console and redirect to the CloudFormation stack page with S3 URL referring to the standalone BYOL deployment template. Click on the Next Button.
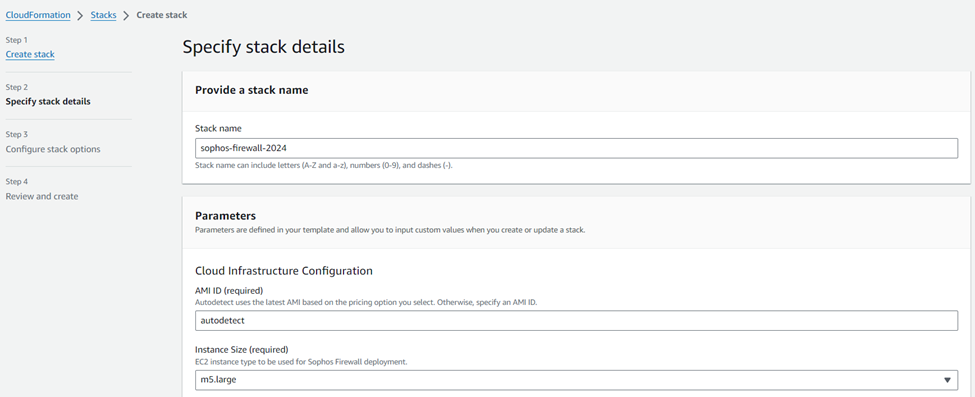
- Enter an appropriate stack name
- Keep the AMI ID as autodetect,
- Select the required instance size from the drop-down list.
Step 6. Availability Zone
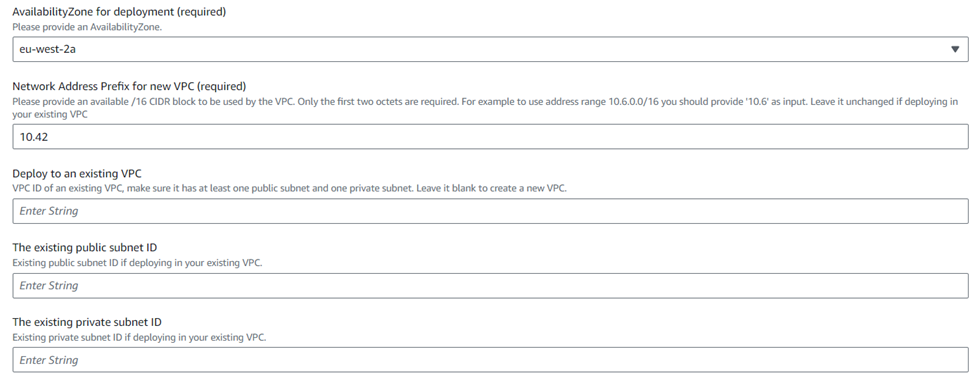
Select the required Availability zone for the firewall deployment.
Configure the network address for the new VPC. You just need to enter the first two octet of the network IP. We have entered 10.42 for the demonstration purposes in this document.
If you wish the deploy the Sophos Firewall EC2 instance in an existing VPC, then you can enter the existing VPC ID, public subnet ID and private subnet ID.
In this document, we are considering fresh deployment, so we will keep those fields as blank so that the CloudFormation stack deployment will automatically create VPC and subnets.
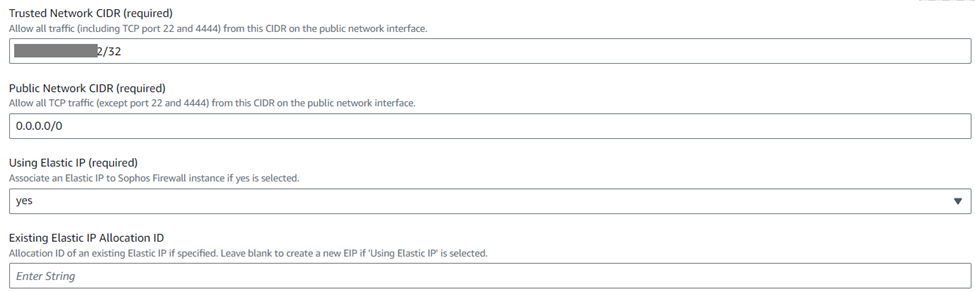
- Enter the public IP address of the administrator deploying this firewall in the Trusted network CIDR This IP address will have full management access (SSH and Web Console) to the Sophos Firewall EC2 instance.
- Enter the Public Network as 0.0.0.0/0 or you can enter a specific IP address that will have access to all the ports from outside except the management port 22 and 4444.
- Select the option yes for Elastic IP, since we want to assign public IP address to the firewall instance.
If you have an existing unused elastic IP created in your account, you can directly enter the its allocation ID or leave the field as blank so that it gets created automatically.
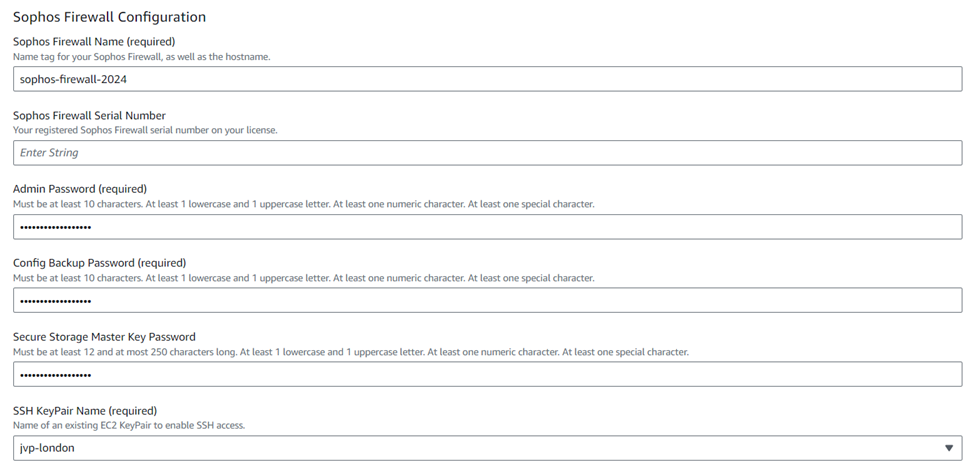
- Enter the name of the firewall EC2 instances and this name will also be used as their hostnames.
If you have already received the serial number of the Sophos Firewall, then you can enter the serial number in this field or keep the field as blank. - Enter the admin password of your choice matching with the password complexity policy for the remote access of firewall instances.
- Enter the configuration backup password and Secure Storage Master Key (SSMK).
- Select the SSH KeyPair that was initially configured
Step 6. S3 Bucket
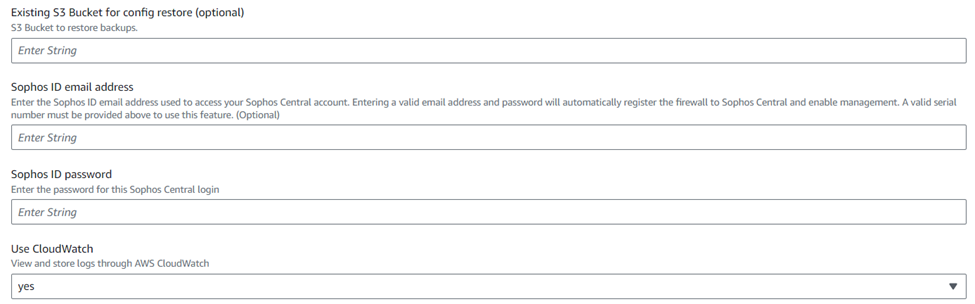
S3 bucket name is optional field, and this can be used to backup-restore process. You can leave this field as blank.
If you already have Sophos Central account created, then you can enter the email ID and password of your central account or keep those fields as blank.
The logs of Sophos Firewall EC2 instances can be stored in CloudWatch and if you wish to have this functionality enabled, then select yes from the drop-down list.
Step 7. End User License Agreement
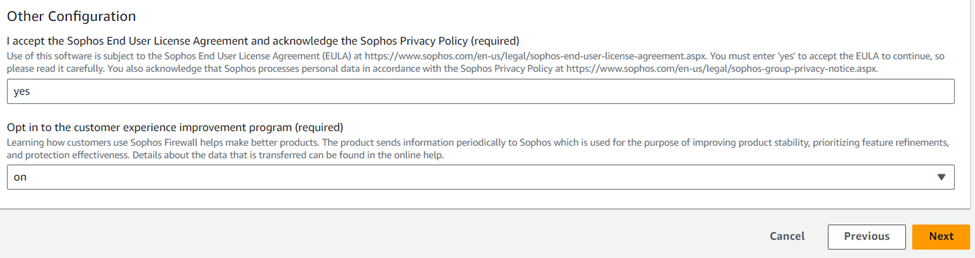
Enter "yes" in the End User License Agreement field after reading and agreeing to the terms and conditions of Sophos EULA and privacy policy.
Now, if you wish to opt for the customer experience improvement program, you can select "on" option from the dropdown menu or select the ‘off’ option. We will select On and click on Next.
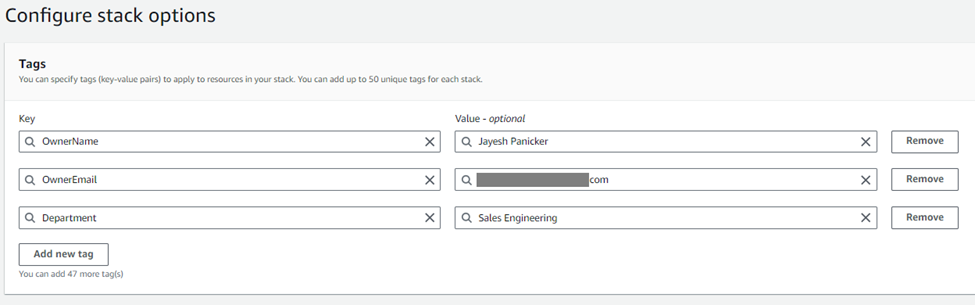
Step 8. TAGs
- Optionally, you can add Tags for this deployment or leave the fields as-is.
- For the demonstration purpose in this document, we will add OwnerName, OwnerEmail and Department tag for this CloudFormation stack deployment and click on Next.
Read through the deployment configuration summary, then enable the checkboxes for allowing IAM resources creation permission and finally click on Submit

It will show the progress of the stack deployment for the firewall instance and the resources associated with it.
Step 9. Deployment
The deployment process will roughly need 5-8 minutes for successful completion and then it will show the status as Create Complete.
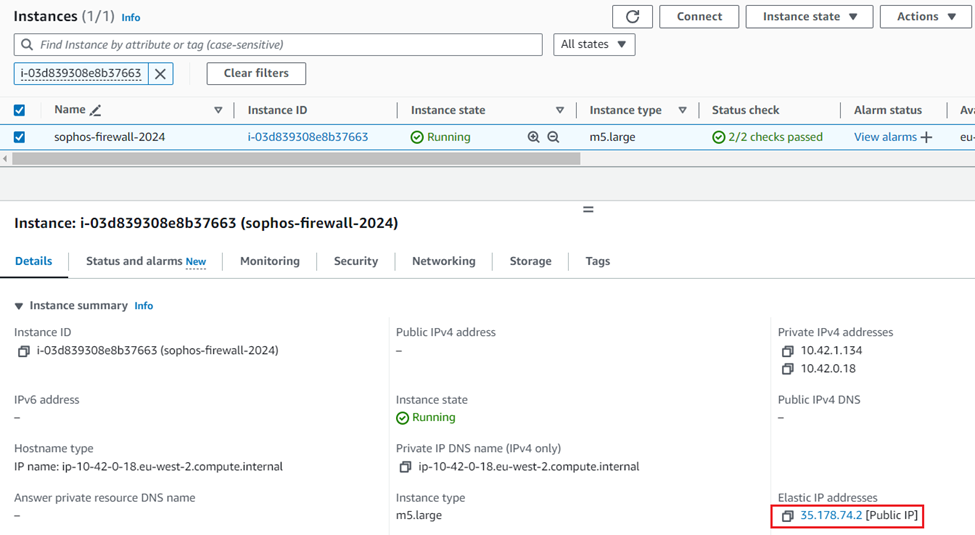
You can click on the Resources tab and see the public IP and the instance ID of the Firewall EC2 instance.
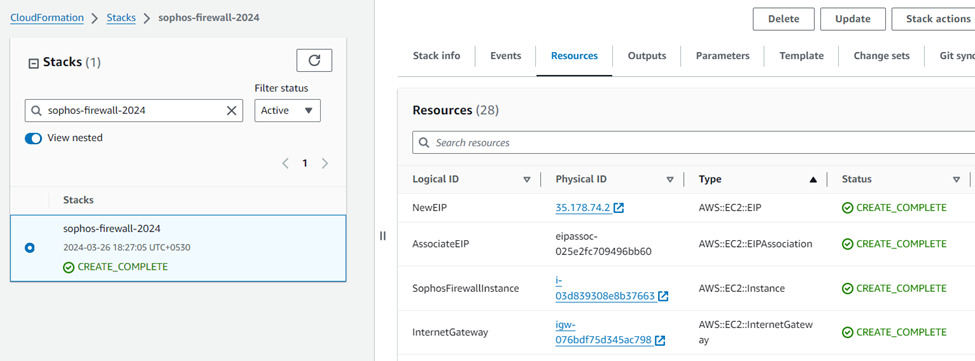
Clicking on the instance ID will open a new webpage showing details of the firewall EC2 instance and you can copy the public IP address to access the Sophos Firewall webUI.
Configuration steps in Sophos Firewall
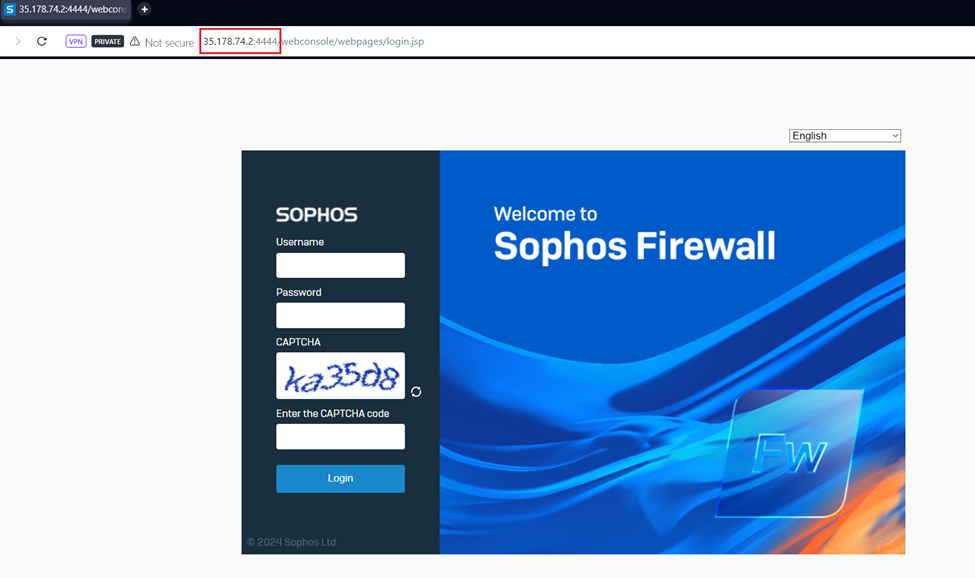
Step 1. Accessing the firewall
- Open a new web browser tab and access the web console of the first firewall on HTTPS using the public IP and append the port number 4444.
- Enter the admin credentials and captcha and click on Login.
Step 2. License Registration
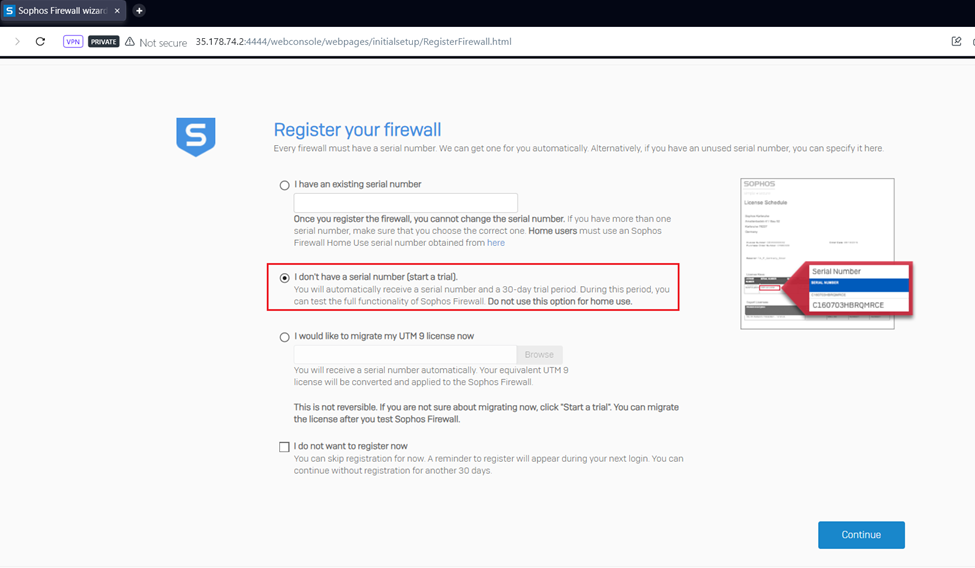
After logging into the device, it will go through the device claim(registration) process.
We didn’t enter any serial number previously, so we can select the second option of enabling the trial. Click on Continue.
Step 3. Claiming of Firewall
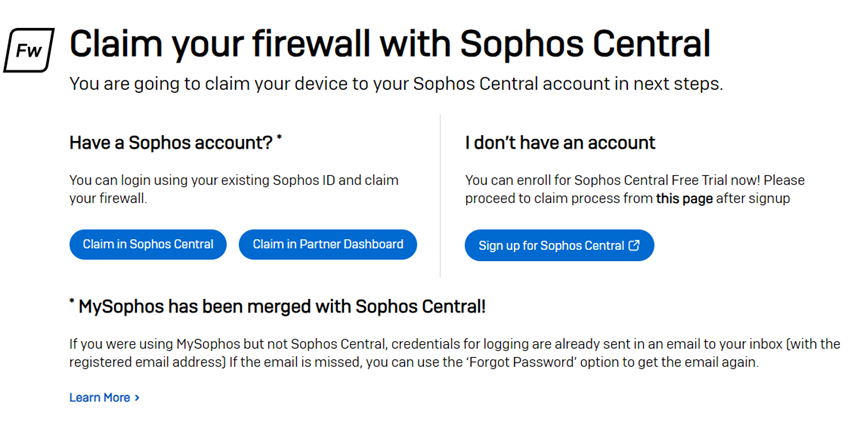
Next step is for the claiming the firewall in the Sophos Central account.
If you already have central account then you can click on the option Claim in Sophos Central else you need to first create a Sophos Central account by clicking on Sign up for Sophos Central.
For the demonstration purposes in this document, we will select the Claim in Sophos Central option.
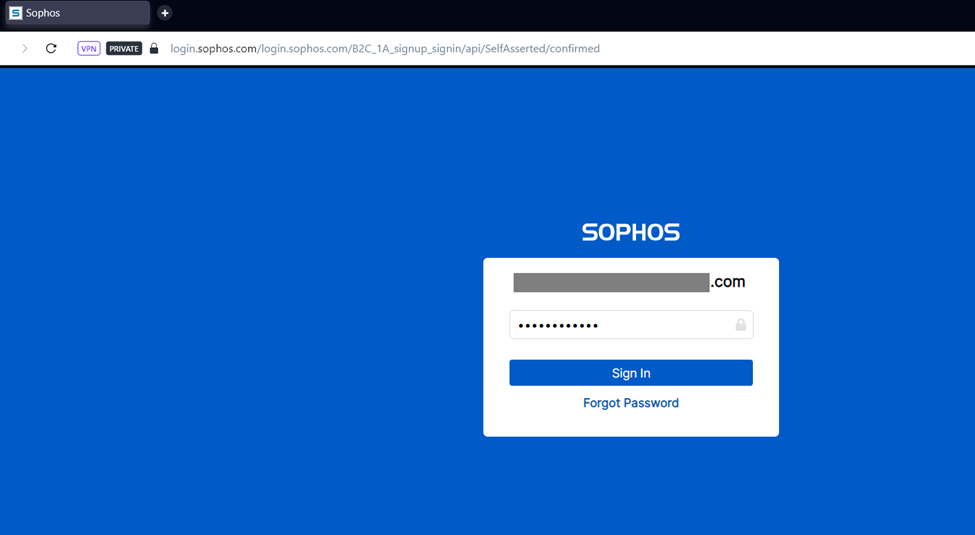
 Enter the email ID and password of the Sophos Central account.
After successful login, it will redirect to the Sophos Central Firewall licensing page, create a new serial number with SFUNL (unlimited) license type and you can claim this firewall for 30 days of trial license. Click on Claim firewall.
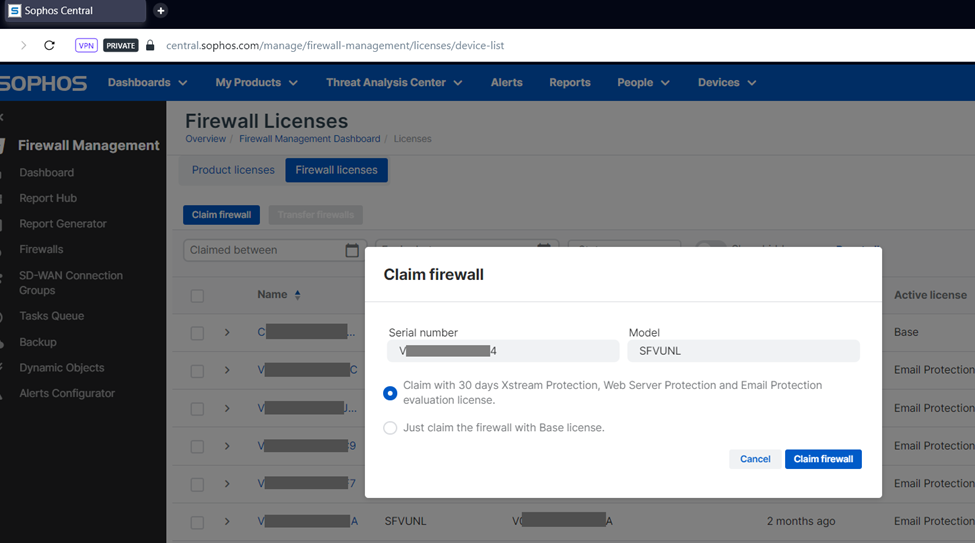
After this step, it will show the license status of the firewall instance and then click on Continue to go to the Dashboard page.
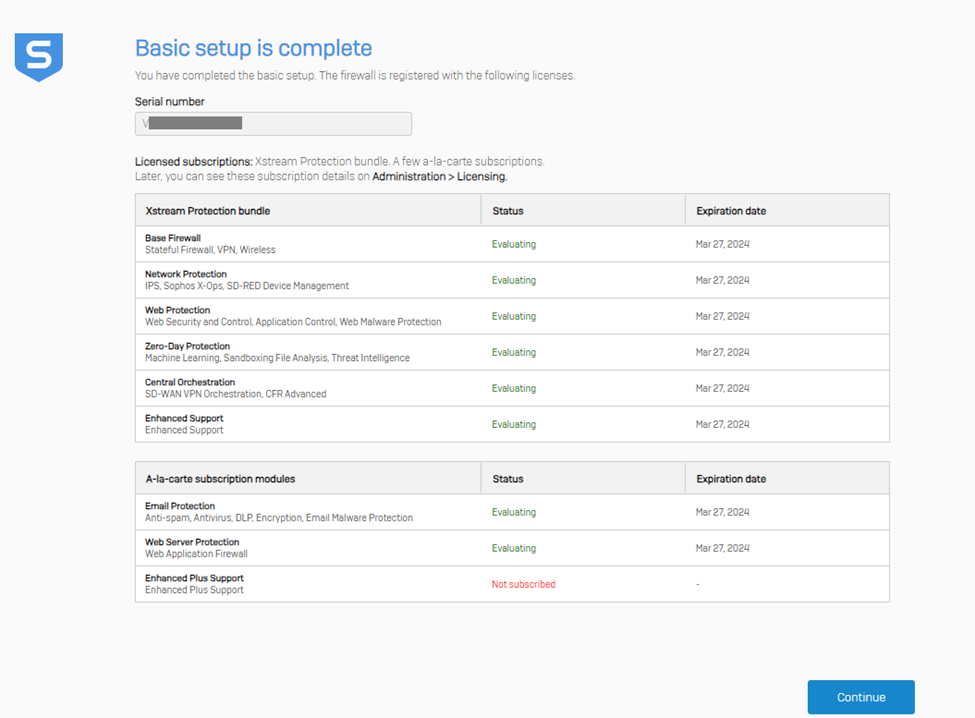
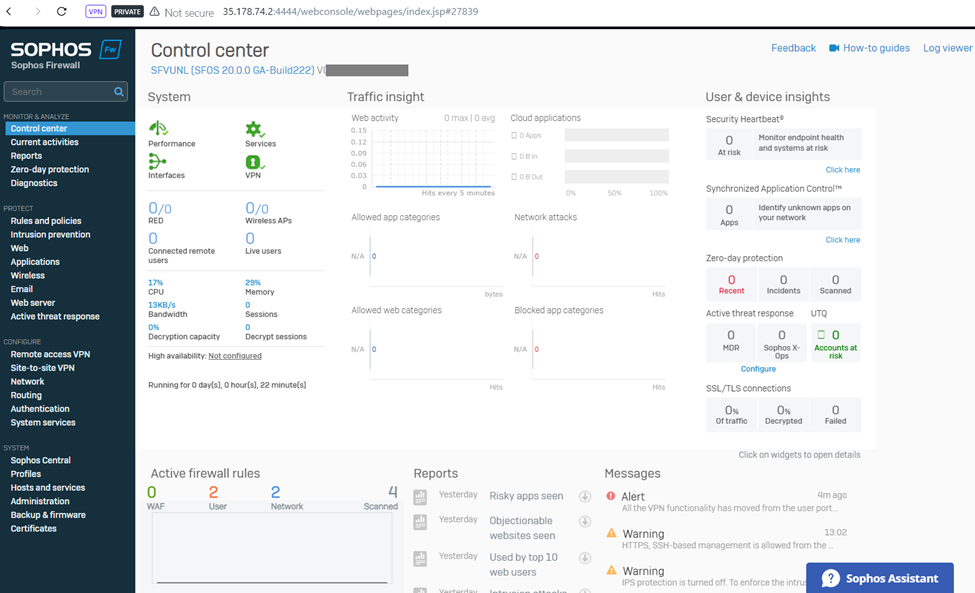
After the successful claim process, it will load the dashboard page of the firewall instance.
Allowing Internet to LAN
To allow internet for the LAN subnet, navigate to PROTECT > Rules and policies > Firewall rules and click on Add firewall rule > New firewall rule.
- Enter a meaningful name for the rule,
- Select the Rule position as Top and Rule group as None,
- Source zone as LAN, Destination zone as WAN
- Destination networks as Internet IPv4 group, as it is a group of all the public IPv4 addresses.
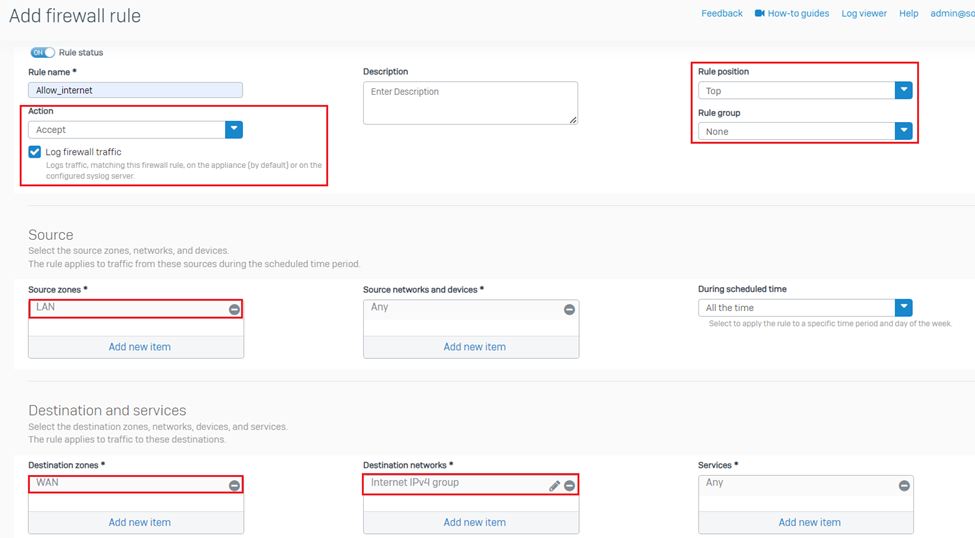
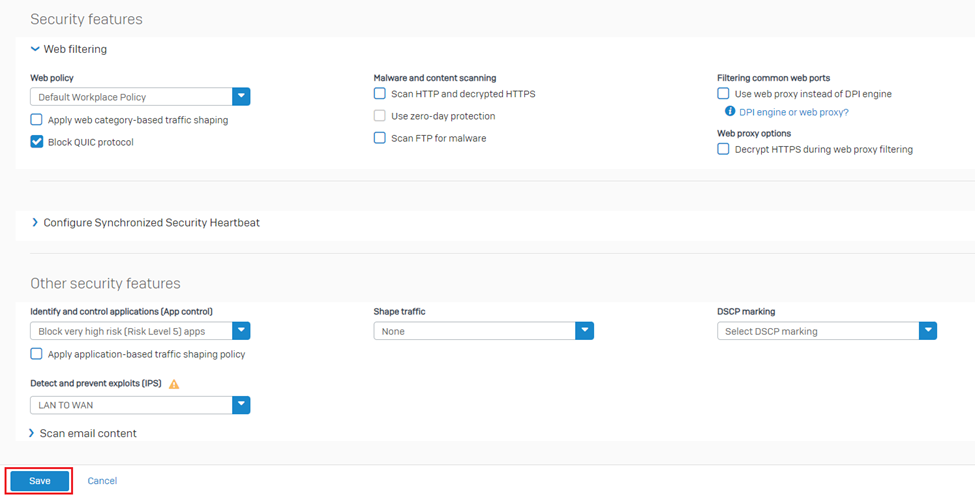
Optionally, you can apply web control, application control, IPS policies on the same rule or keep those parameters as None, depending upon your requirements and use-cases. Click on Save button.
Routing the traffic via Sophos Firewall
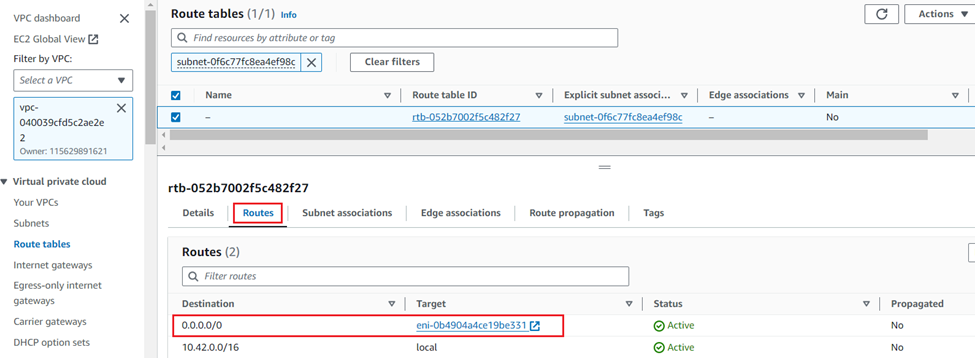
If there is a requirement for the internet bound traffic generated by your internal or private EC2 instances to be routed via Sophos Firewall for security inspection and control policies, then you need to make sure that the VPC route table associated with that private subnet, must have the target as the elastic network interface of Sophos Firewall PortA as shown in the below example.
Security and scanning features of Sophos firewall
To use the security and scanning features of Sophos firewall, feel free to refer to online documentation repository available via following link:
Added TAG
[edited by: Erick Jan at 7:28 AM (GMT -7) on 17 Oct 2024]