

Disclaimer: This information is provided as-is for the benefit of the Community. Please contact Sophos Professional Services if you require assistance with your specific environment.
Note: Make sure your Sophos Firewall time is correct to avoid potential Certificate Trust issues
Table of Contents
- Overview
- Registration in ZeroSSL
- Step 1. www.zerossl.com
- Step 2. Create a Free Account
- Step 3. Create SSL Certificate
- Step 4. Enter Domain
- Step 5. Validity
- Step 6. Auto Generate CSR
- Step 7. FQDN
- Step 8. Add Certificate
- Step 9. Certificate Signing Request
- Step 10. Certificate Name
- Step 11. Download CSR
- Step 12. Copying CSR to ZeroSSL
- Step 13. Finalizing Order
Overview
This Recommended Read goes over how to install a Free and Valid SSL Certificate for the Sophos Firewall using zerosll.
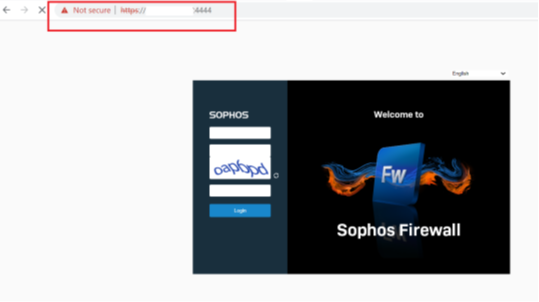
To remove the warning page, users get when entering the FQDN of the Firewall in their browser, we need to install an SSL certificate signed by a valid Certificate authority. In this Recommended Read, we’ll be going through the steps to get a free one from zerossl.com
Registration in ZeroSSL with Sophos Firewall
Step 1. www.zerossl.com
Go to www.zerossl.com and click Get Free SSL in the upper right corner.

Step 2. Create a Free Account
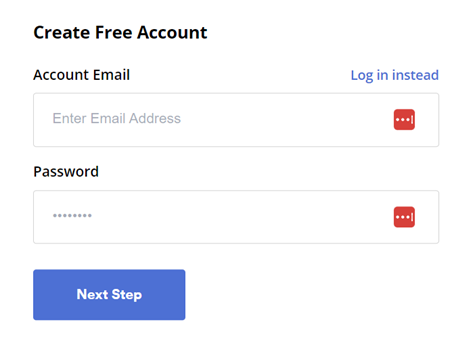
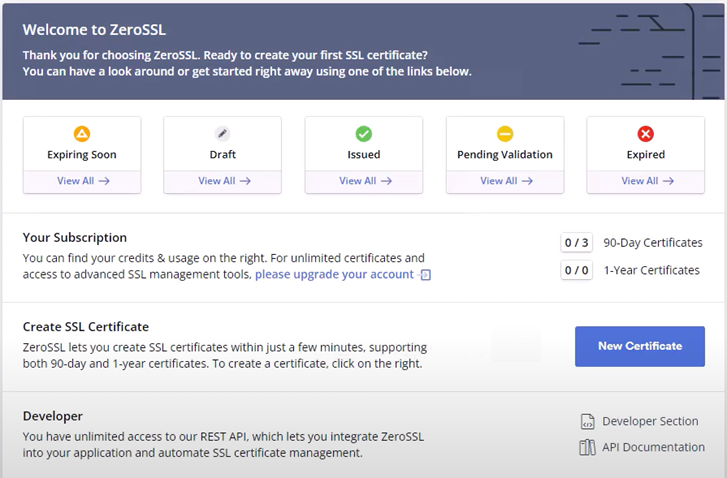
Step 3. Create SSL Certificate
Once created in the Dashboard, go to > Create SSL Certificate and click New Certificate.
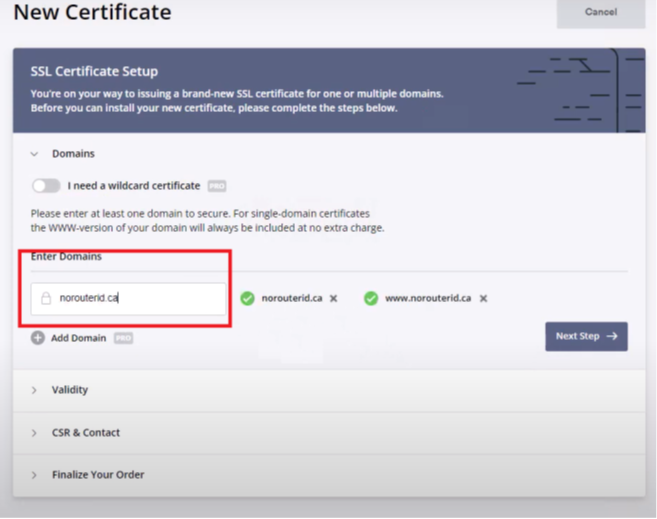
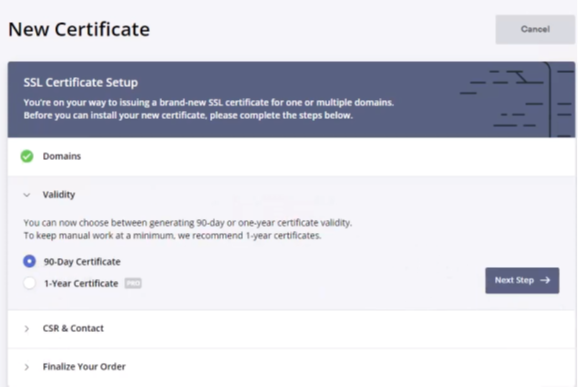
Step 4. Enter Domain
On the SSL Certificate Setup page, enter the domain that the SSL certificate will cover.
Step 5. Validity
For Validity, select "90 days" and click Next Step
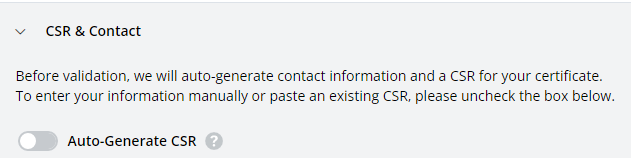
Step 6. Auto Generate CSR
For CSR & Contact, DISABLE Auto-Generate CSR
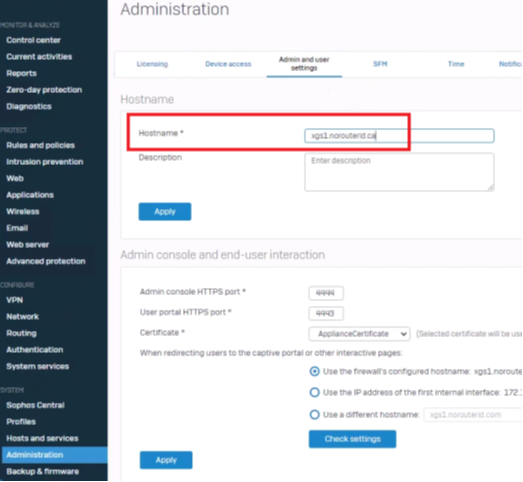
Step 7. FQDN
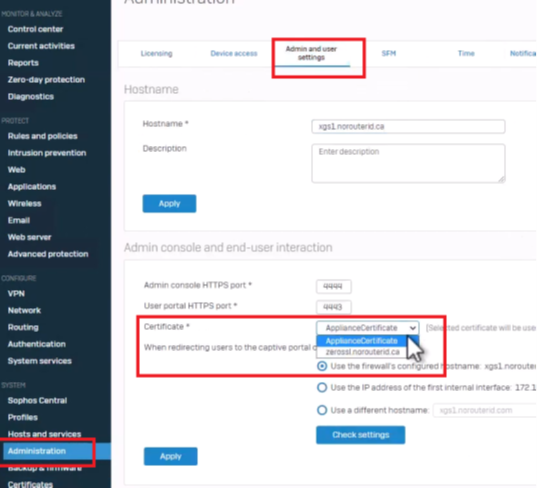
In your Sophos Firewall, go to System > Administration > Admin and user settings, and confirm the FQDN of your Sophos Firewall
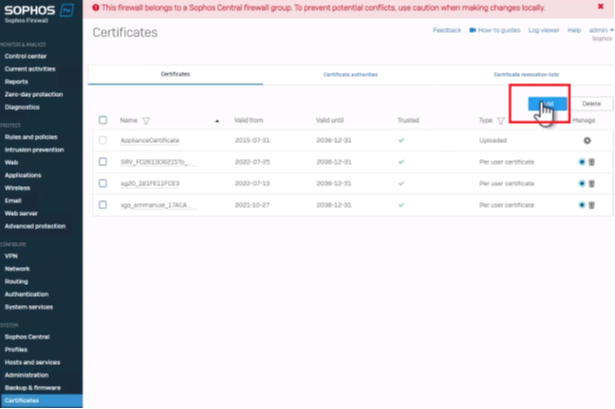
Step 8. Add Certificate
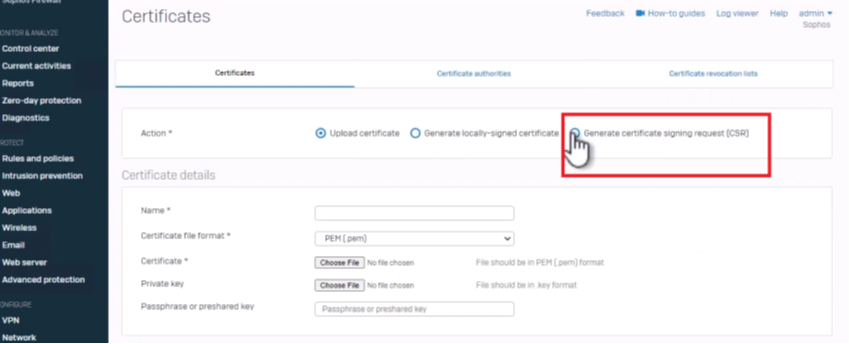
Go to System > Certificates > Click Add
Step 9. Certificate Signing Request
Click the Radio bottom for "Generate Certificate signing request (CSR)"
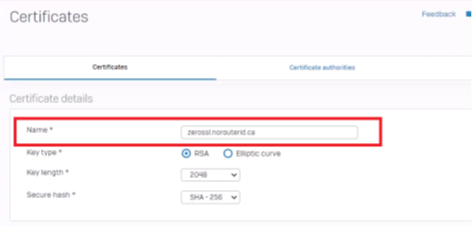
Step 10. Certificate Name
For Name, enter the name you want to associate with this certificate. This can be anything, but we recommend making it a meaningful one.
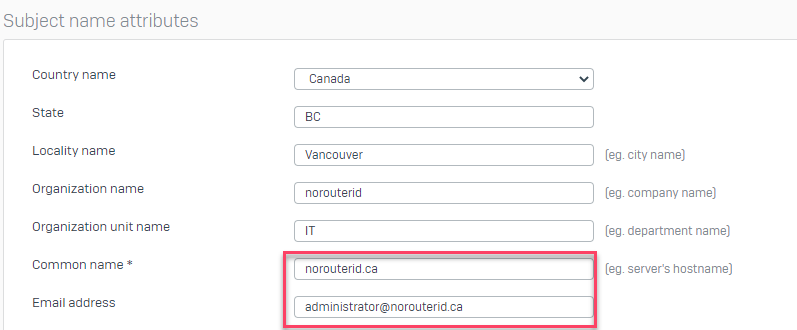
Under the Subject name and attributes, fill out the corresponding information. Remember that the most important setting is the Common Name and email address (since the email address domain entered here will be the one used for zerossl to validate you own this domain.)
Note: Zerossl will only send a validation domain to one of the following emails:
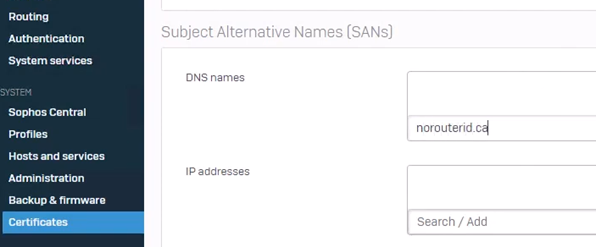
Under Subject alternative names (SANs) define the entities for which your certificate will be valid. Entities can be DNS names or IP addresses. In this case, we’ll enter the FQDN of our domain and the Firewall.
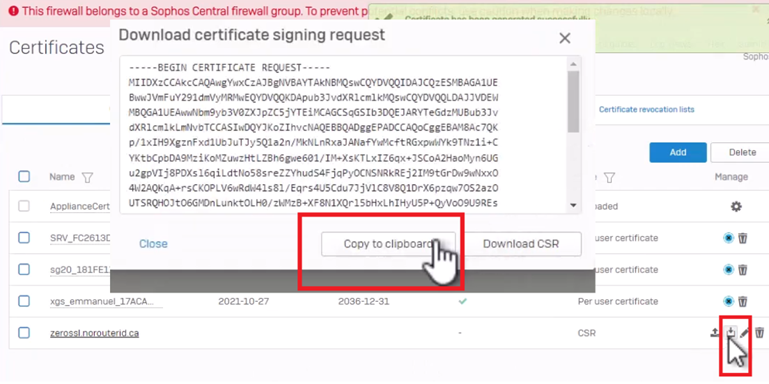
Step 11. Download CSR
Click SAVE, and you’ll see two arrows next to the CSR for the certificate signing request you just created. Click the pointing down arrow and Copy to clipboard the CSR.
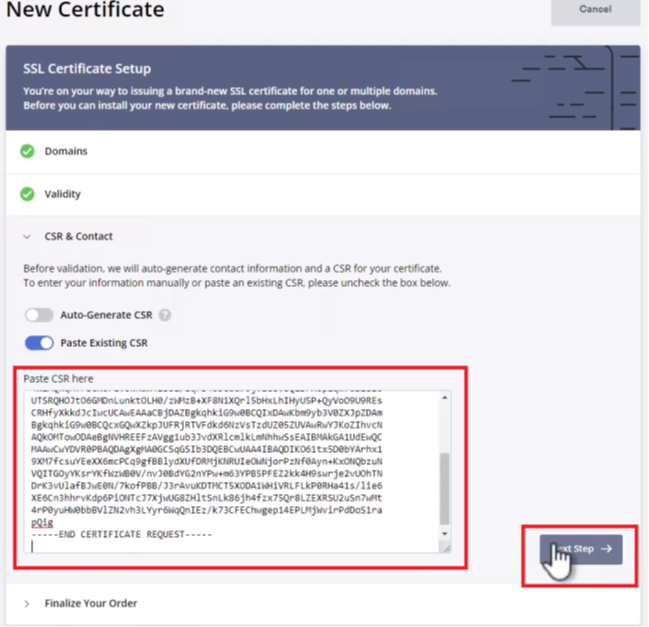
Step 12. Copying CSR to ZeroSSL
Return to zerossl, turn on only the 'Paste Existing CSR', then paste as plain text and click the next step.
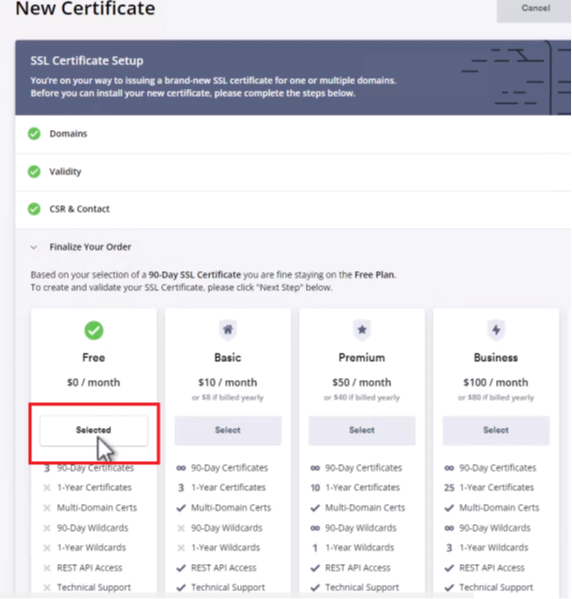
Step 13. Finalizing Order
Select the Free "(0/month)" then click next
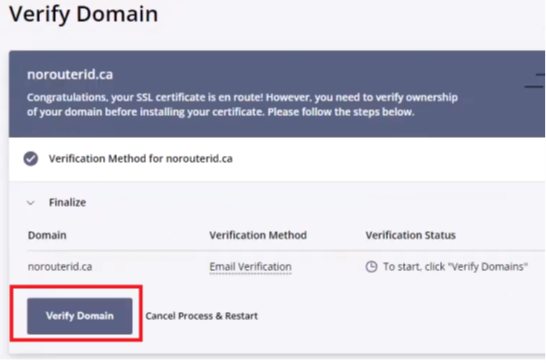
Step 14. Email Verification
On email verification, select a valid email address (predefined by zerossl) and click Verify Domain.
Note: You need to have access to this email address, as zerossl will send a verification email to this email.
Step 15. Verification Page
Check your email, copy the verification key, and click "Go to Verification Page."
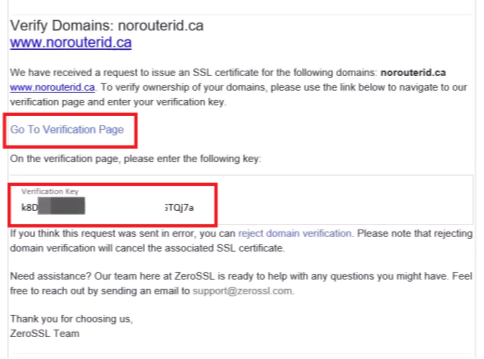
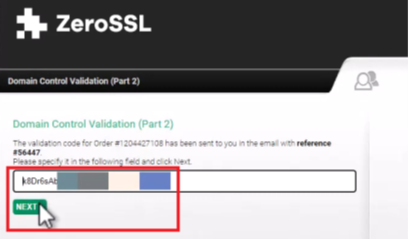
Step 16. Verification Key
Enter the verification key on Domain Control Validation (Part 2), then click next and close the window.
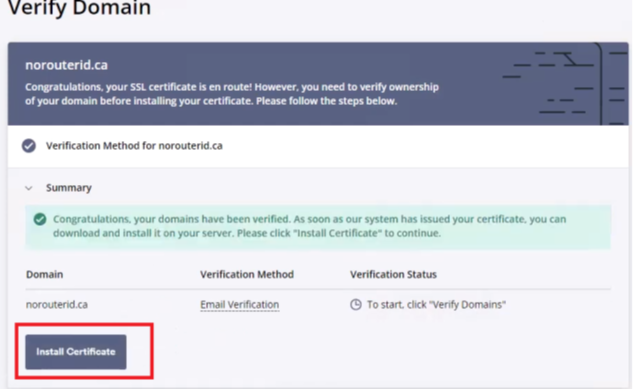
Step 17. Install Certificate
You’ll receive another email shortly after. click “Install Certificate”/Go back to ZeroSSL.com, click refresh Status, and Install the Certificate.
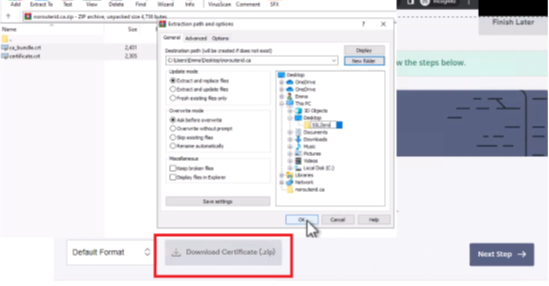
Step 18. Download Certificate
Download the Certificate (.zip) on your Machine and extract it to a specific folder.
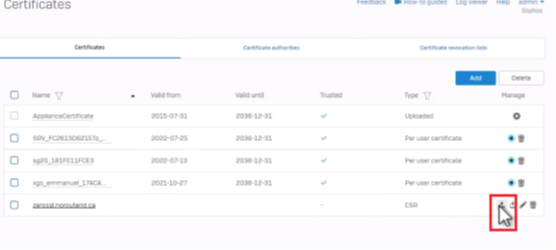
Step 19. Upload the Certificate
Next, go to the Sophos Firewall > System>Certificate>Name(zerosslnorouterid.ca) and click upload.
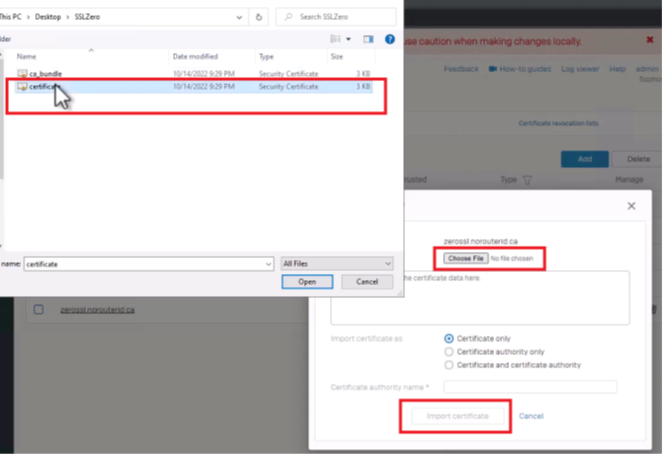
Step 20. Import Certificate
Choose File and select the certificate extracted(certificate), then import the certificate.
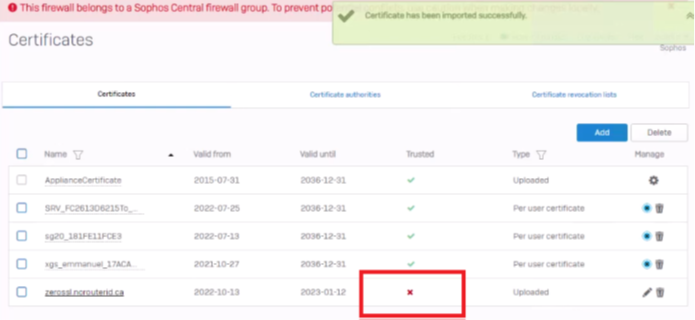
Step 21. Imported Successfully
Once uploaded, you probably will see a red x for Trusted. This is because the Sophos Firewall doesn't have the Certificate Authority installed.
Step 22. Add ca_bundle
Go to Certificate Authorities, Click Add, then choose file, select the “ca_bundle “then click save

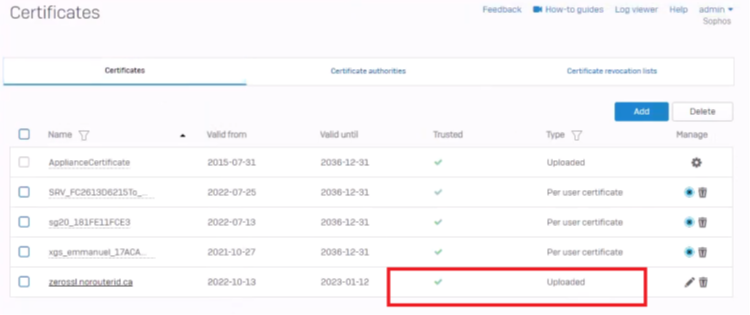
Step 23. Verify if the Certificate is trusted
Return to the Certificate Tab. You'll see a green tick instead of the red x. This means the certificate is trusted
Step 24. Admin and User Settings
To use the Certificate, go to System>Administration> Admin and user settings> Admin console and end-user interaction>select the newly created certificate(zerosslnorouterid.ca), then click apply and ok
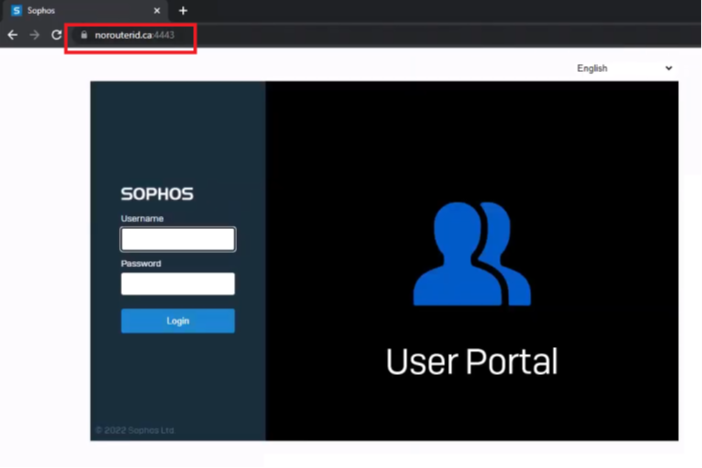
Step 25. Testing
To test. Go to your web browser and enter the hostname of the Sophos Firewall User Portal ( ex.norouterid.ca:4443)
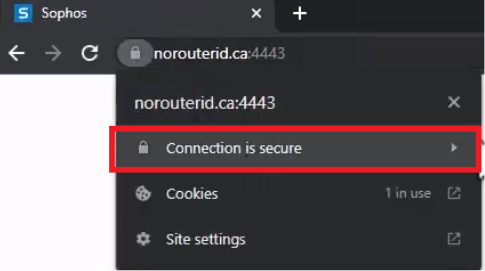
Step 26. Verify the Secure Connection
You’ll see on the left corner of the URL that it is now secure:” Connection is secure.”
Added TAGs
[edited by: Raphael Alganes at 5:19 AM (GMT -7) on 18 Sep 2024]


