

Disclaimer: This information is provided as-is for the benefit of the Community. Please contact Sophos Professional Services if you require assistance with your specific environment.
______________________________________________________________________________________________________________________________________
Table of Contents
Overview:
This article shows how to validate Active Directory credentials using SSL/TLS or STARTTLS connection security when Sophos Firewall shows “Servers using insecure plaintext connections” alert for servers added with plaintext connection security.
What to do:
- This article assumes that you’ve already integrated the Active directory with the Sophos Firewall. If Active Directory is not integrated then please follow: Configure Active Directory authentication
- In Server configuration, there are 3 Connection securities.
- Plaintext
- SSL/TLS
- STARTTLS
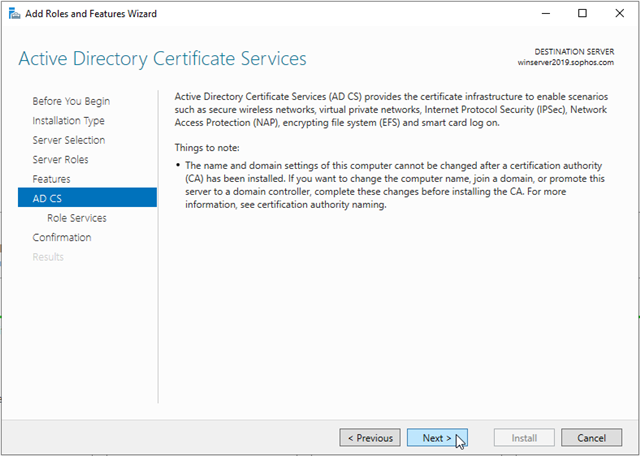
- To use connection security as SSL/TLS or STARTTLS, we need to install ‘Certification Authority on the windows server. For more information, see Install the Certification Authority | Microsoft Docs
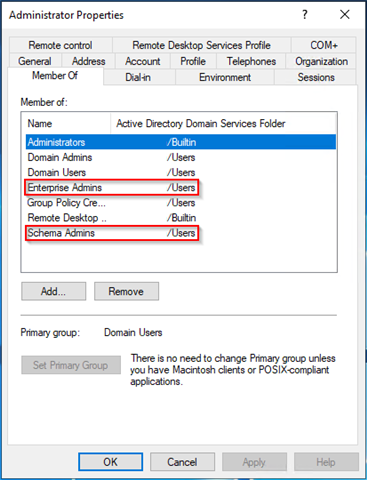
Note: Before adding a new role and feature, please ensure that the server administrator user is a member of the enterprise and schema admins group.
These settings are tested in windows server 2019.
Configuration
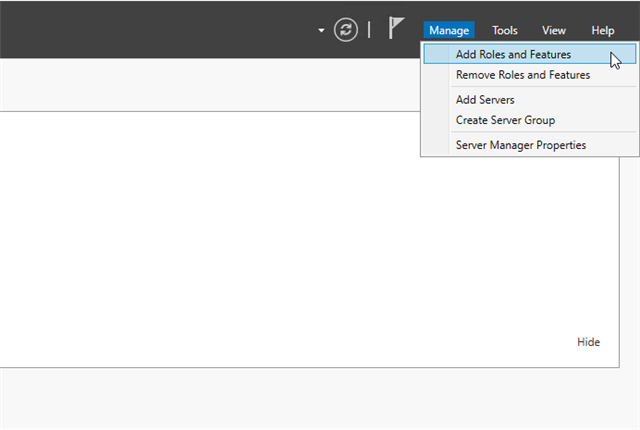
- In Server Manager, click Manage, then Add Roles and Features. The Add Roles and Features Wizard is open.
- Follow the steps below, choosing default settings.
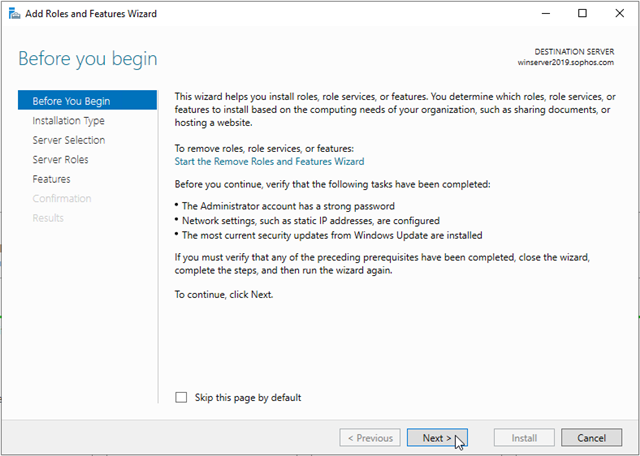
In Before You Begin, click Next.
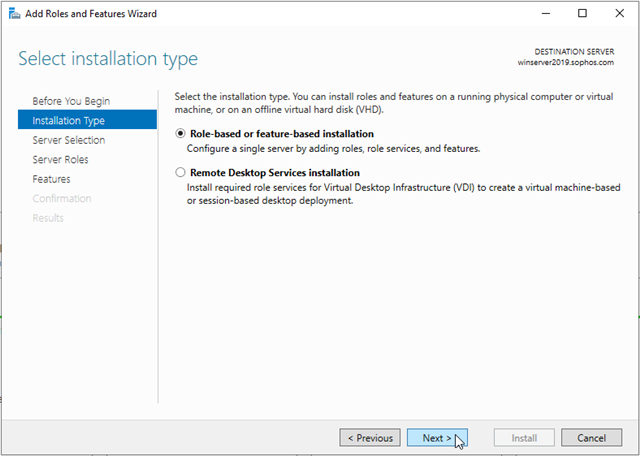
In Select Installation Type, ensure that Role-Based or feature-based installation is selected, and then click Next.
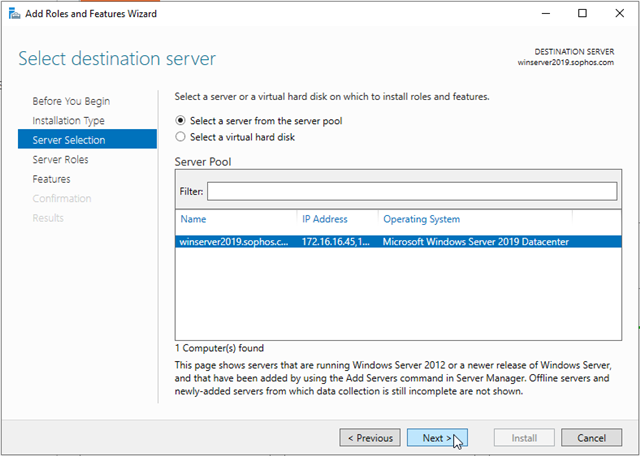
In Select Server Selection, ensure that Select a server from the server pool is selected. In the Server Pool, ensure that the local computer is selected. Click Next.
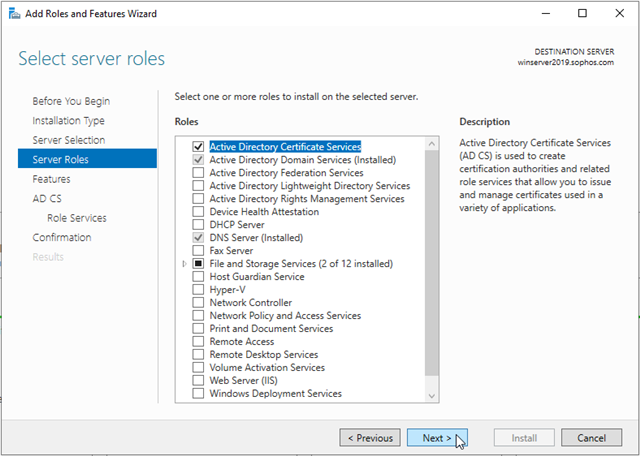
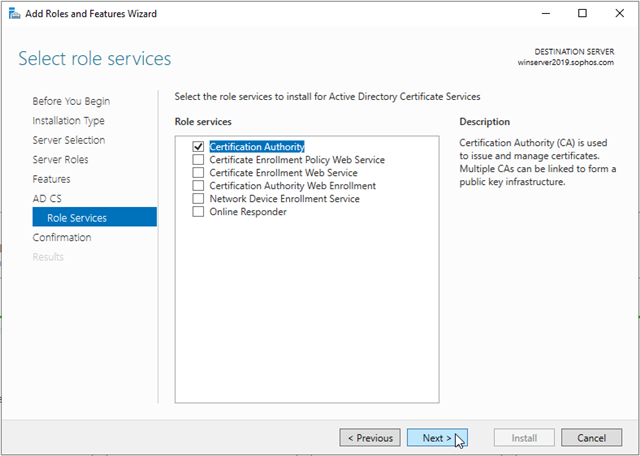
In Select Server Roles, in Roles, select Active Directory Certificate Services.
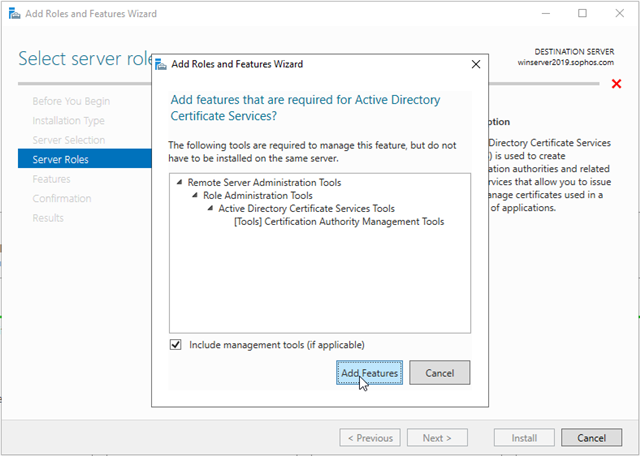
When you are prompted to add required features, click Add Features and then click Next.
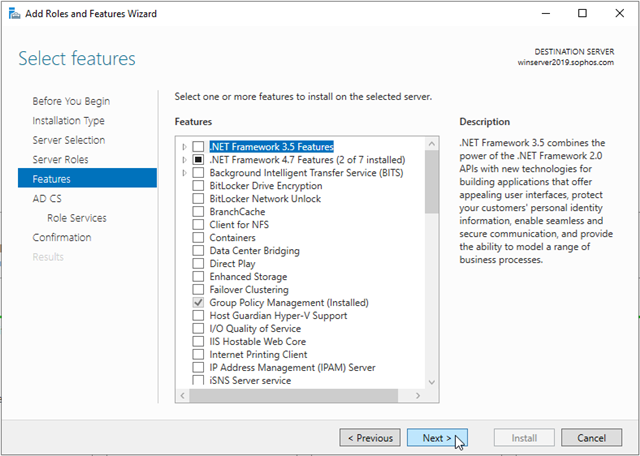
In Select Features, click Next.
In Active Directory Certificate Services, read the provided information, and then click Next.
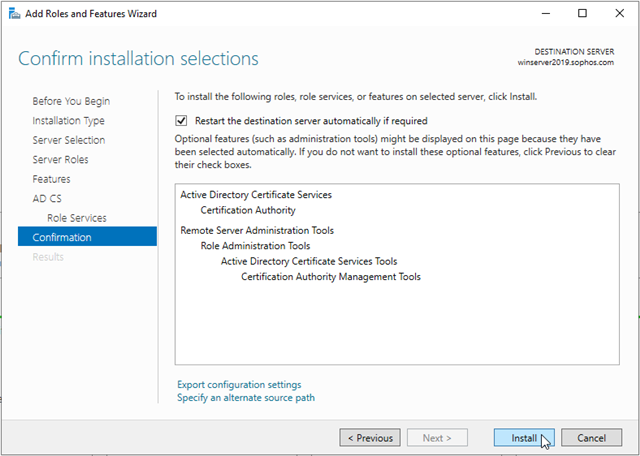
In Confirm installation selections, click Install. Don’t close the wizard during the installation process.
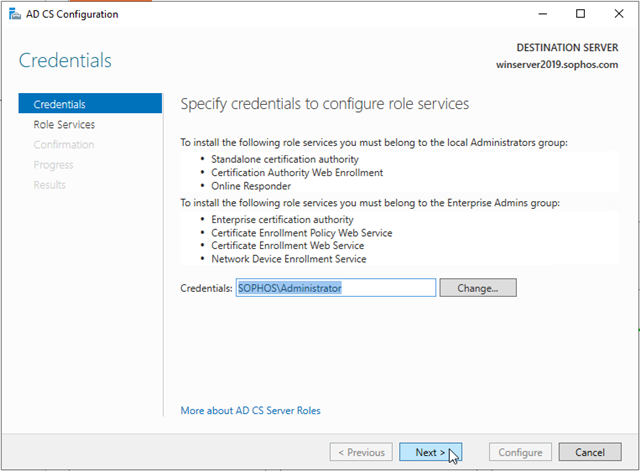
When the installation is complete, click Configure Active Directory Certificate Services on the destination server. The AD CS Configuration wizard opens. Read the credentials information and, if needed, provide the credentials for an account that is a member of the Enterprise Admins group. Click Next.

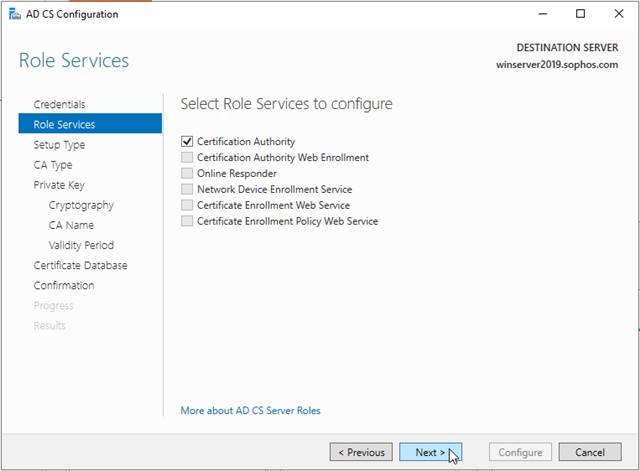
In Role Services, click Certification Authority, and then click Next.
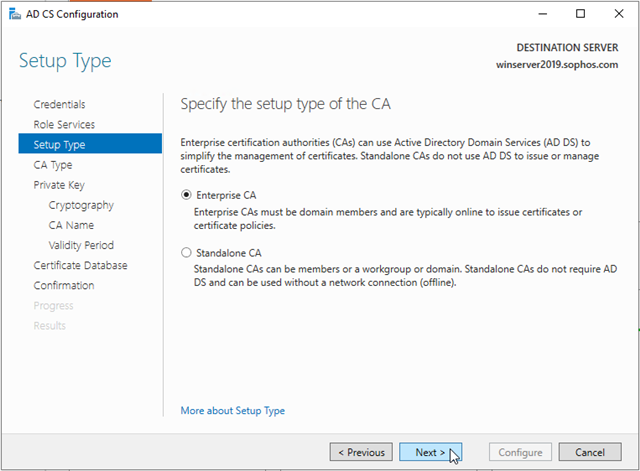
On the Setup Type page, verify that Enterprise CA is selected, and then click Next.
Note: If the Enterprise CA option is grayed out, confirm that the administrator user is a member of the enterprise and schema admins group. A reboot might also be required.
On the Specify the type of the CA page, verify that Root CA is selected, and then click Next.

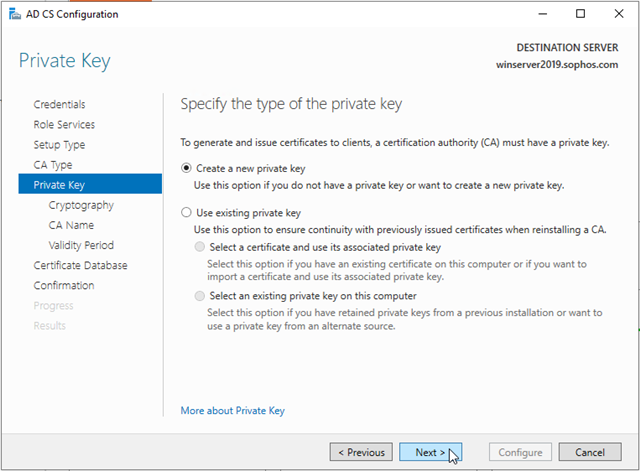
On the Specify the type of the private key page, verify that Create a new private key is selected, and then click Next.
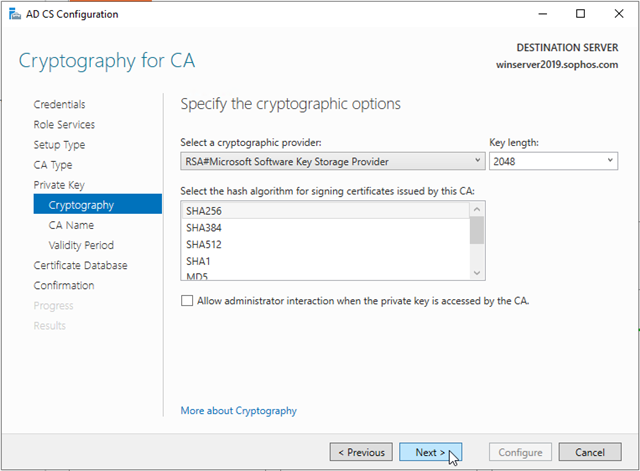
On the Cryptography for CA page, keep the default settings for CSP (RSA#Microsoft Software Key Storage Provider) and the hash algorithm (SHA2), and determine the best key character length for your deployment. Large key character lengths provide optimal security; however, they can impact server performance and might not be compatible with legacy applications. It’s recommended that you keep the default setting of 2048. Click Next.
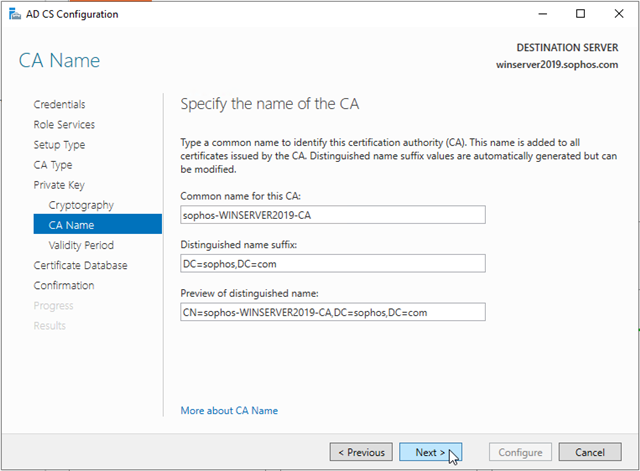
On the CA Name page, keep the suggested common name for the CA or change the name according to your requirements. Ensure that you’re certain the CA name is compatible with your naming conventions and purposes because you can't change the CA name after you have installed AD CS. Click Next.
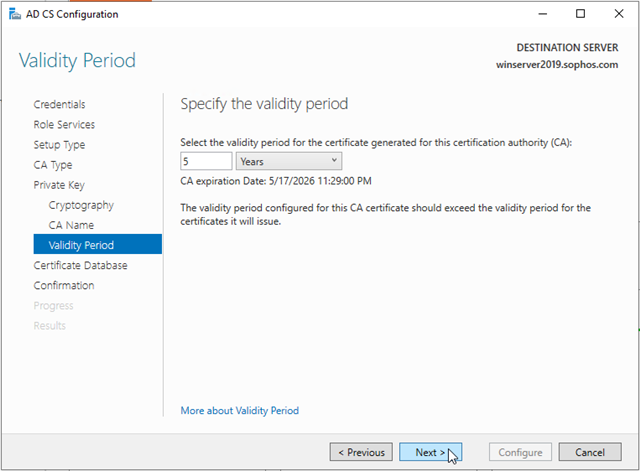
On the Validity Period page, in Specify the validity period, type the number and select a time value (Years, Months, Weeks, or Days). The default setting of five years is recommended. Click Next.
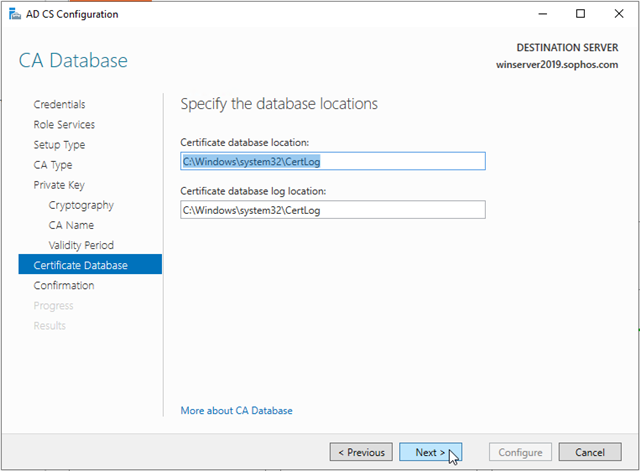
On the CA Database page, in Specify the database locations, specify the folder location for the certificate database and the certificate database log. If you specify locations other than the default locations, ensure that the folders are secured with access control lists (ACLs) that prevent unauthorized users or computers from accessing the CA database and log files. Click Next.
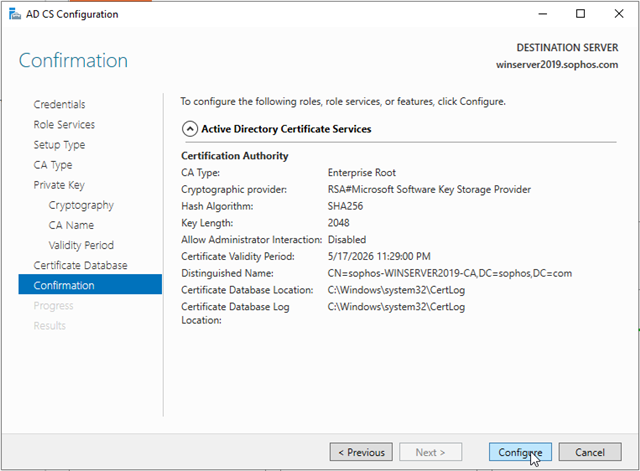
In Confirmation, click Configure to apply your selections, and then click Close.
- Login to WebAdmin, go to Authentication > Server and change ‘Connection security to SSL/TLS or STARTTLS and click Test connection to validate the user credentials.
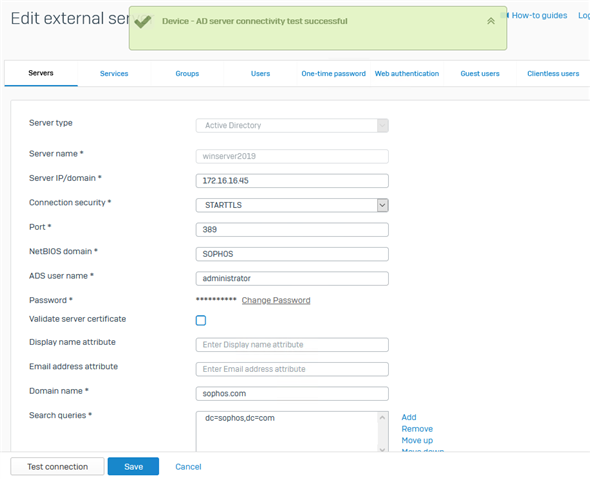
Note: You might need to restart your AD if the connection still fails after the test.
Added Note
[edited by: emmosophos at 11:09 PM (GMT -8) on 18 Dec 2024]

