Disclaimer: This information is provided as-is for the benefit of the Community. Please contact Sophos Professional Services if you require assistance with your specific environment.
Table of Contents
- Overview
- Requirements
- Configurations
- Step 1. Adding of Domain in Sophos Central
- Step 2. Getting TXT Value
- Step 3. Adding DNS to Godaddy
- Step 4. Domain Verification
- Step 5. Configuring Inbound Direction
- Step 6. External Dependencies
- Step 7. GoDaddy MX Record
- Step 8. Publishing of MX Records
- Step 9. Copying Sophos Delivery IPs for Inbound Gateway
- Step 10. Configuring Sophos Delivery IP's
- Step 11. Add User
- Step 12. Adding User MailBox
- Step 13. Testing
- Additional Notes
Overview
This Recommended Read describes configuring Sophos Central email with Zoho Mail for Inbound Emails.
Requirements
- Sophos Central Cloud Account with email Advanced Licenses.
- Domain (in this configuration, we’re using "yardley.live" as an example).
- Domain hosting service for publishing TXT/MX (GoDaddy is used as an example)
- Zoho Mail admin account for configuring the routing in Sophos Central email.
Configurations
Step 1. Adding of Domain in Sophos Central
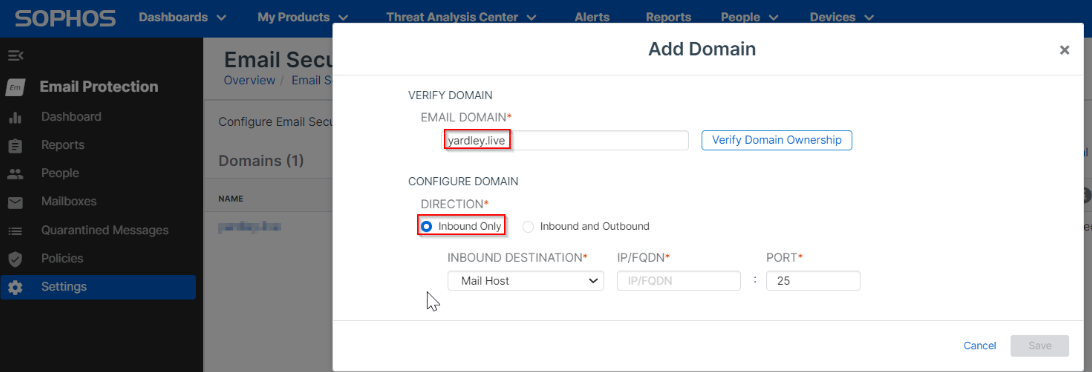
Go to My Product> Email Protection> Settings> Domain> Add Domain
Step 2. Getting TXT Value
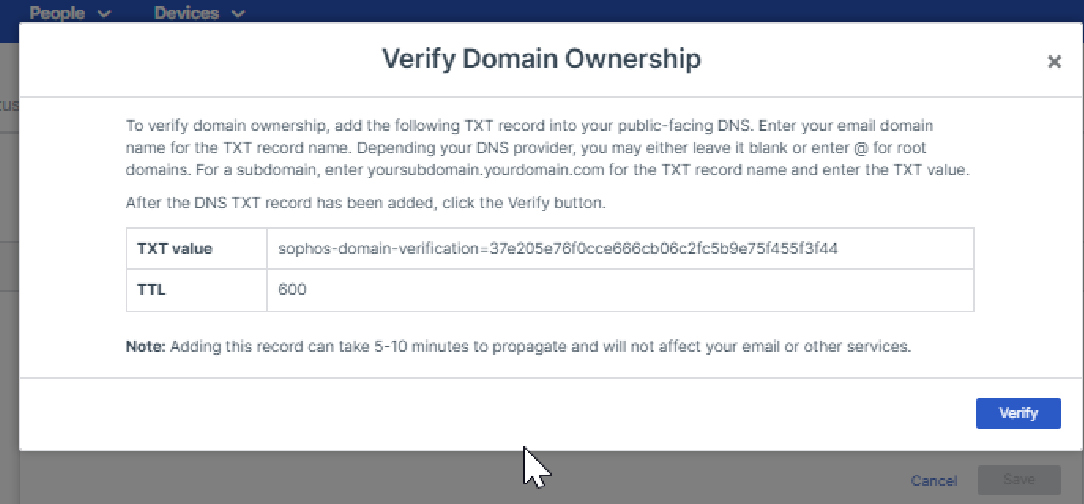
Upon clicking the "Verify Domain Ownership," this will show the "TXT Value" that we need to publish in the domain ( yardely.live) under the DNS record as shown below:
Step 3. Adding DNS to Godaddy
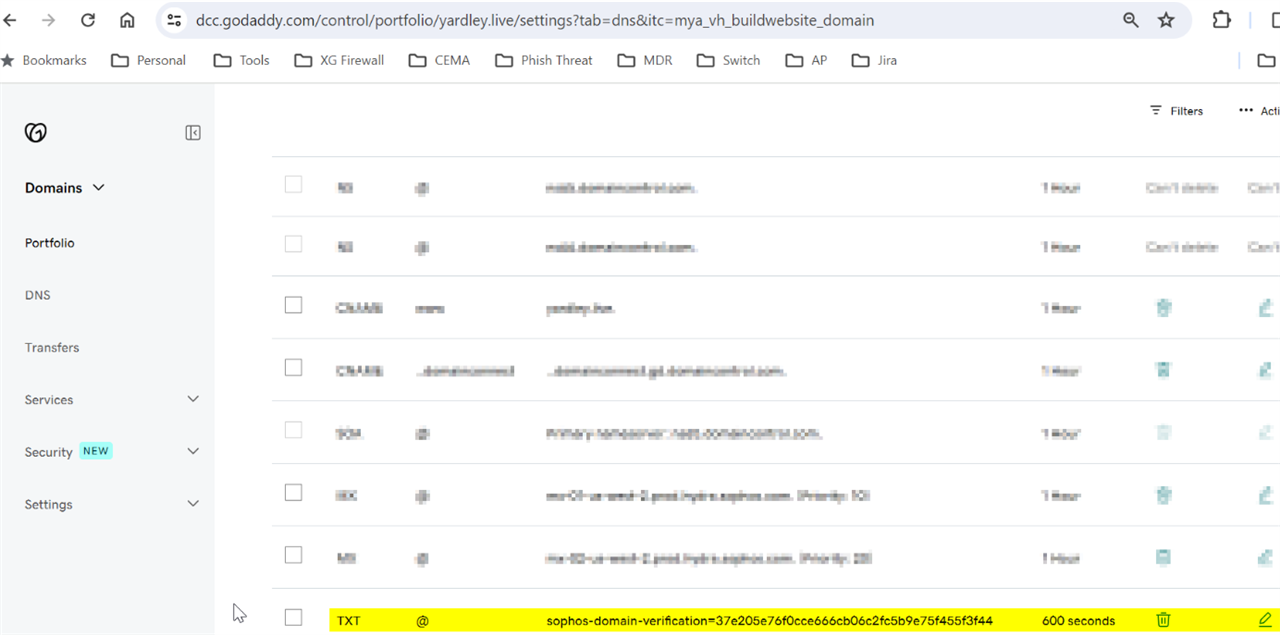
On the GoDaddy Dashboard, go to Domains> Manage DNS> Add New Record, then add the "TXT" value" that you got from Central.
Step 4. Domain Verification
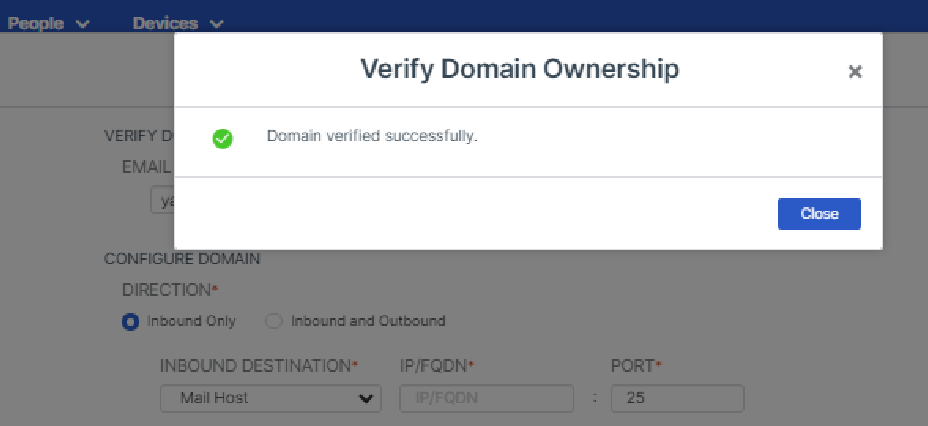
After adding the TXT Value on GoDaddy, go to Central and verify the Domain ownership.
Once it's verified, you’ll see a prompt, as seen below.
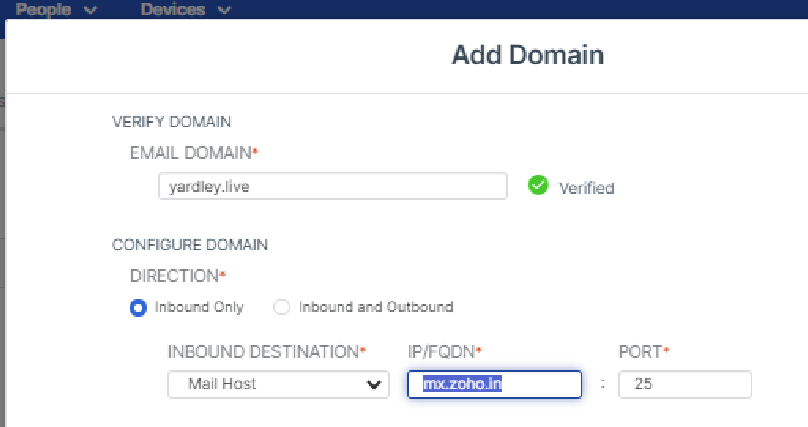
Step 5. Configuring Inbound Direction
To Configure the Inbound direction, we must enter "mx.zoho.in" with Port 25 in IP/FQDN option and save it under the Configure Domain.
Step 6. External Dependencies
Go to My Product> Email Protection> Settings> Domains> Configure External Dependencies, and you'll see the "MX Record" of Sophos Central that is needed to publish the domain (yardley.live) under the DNS record on GoDaddy.

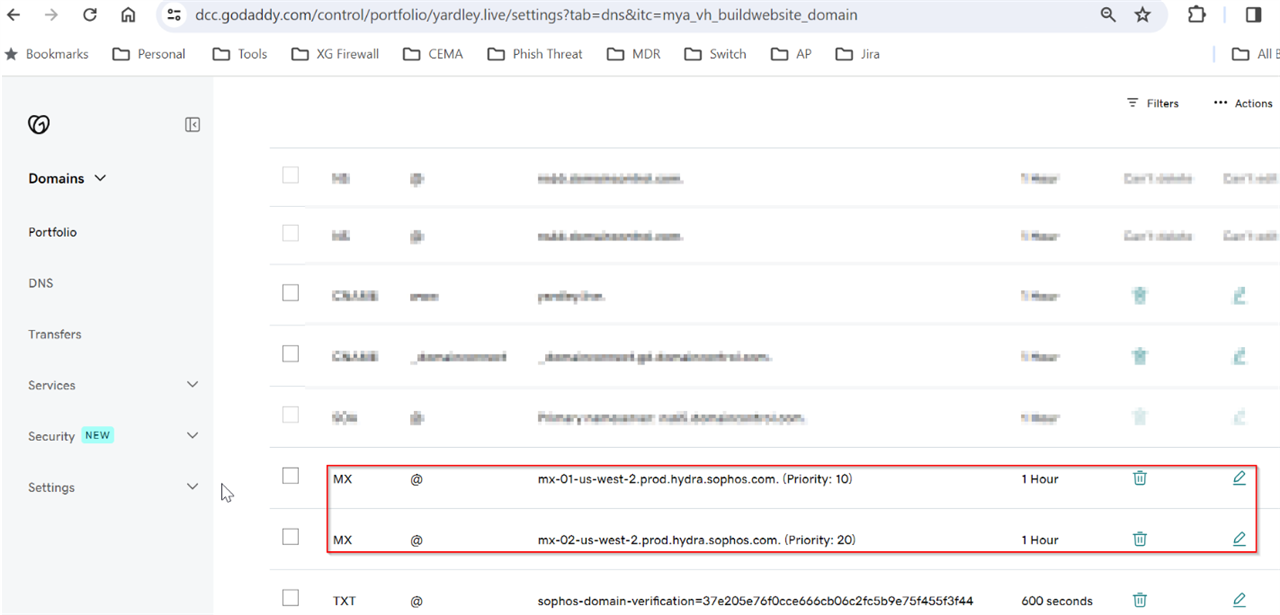
Step 7. GoDaddy MX Record
Now, go back to the GoDaddy dashboard, under Domains>Manage DNS> Add New Record, and add the MX Record.
Step 8. Publishing of MX Records
Once done adding the MX Record, go to MXToolBox for mxlloopup of the domain and paste it, then click MX lookup, and you’ll see that the MX got published.
Note: Publishing will take a couple of Minutes.

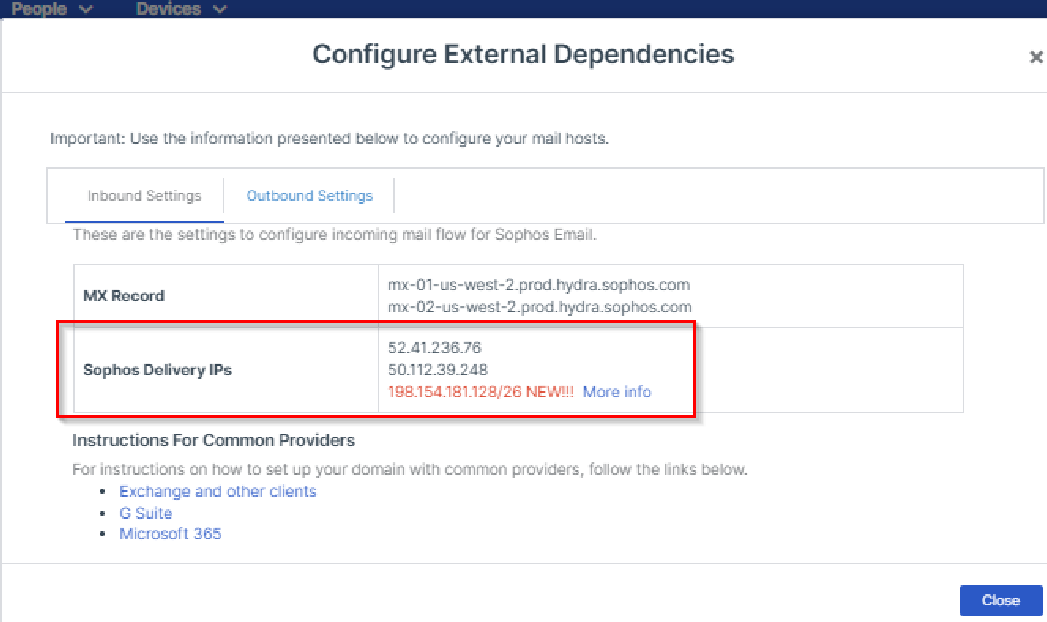
Step 9. Copying Sophos Delivery IPs for Inbound Gateway
Go to My Products> Email Protection> Settings> Domains> Configure External Dependencies to view your Sophos Delivery IPs for Inbound Gateway and copy them.
Step 10. Configuring Sophos Delivery IP's
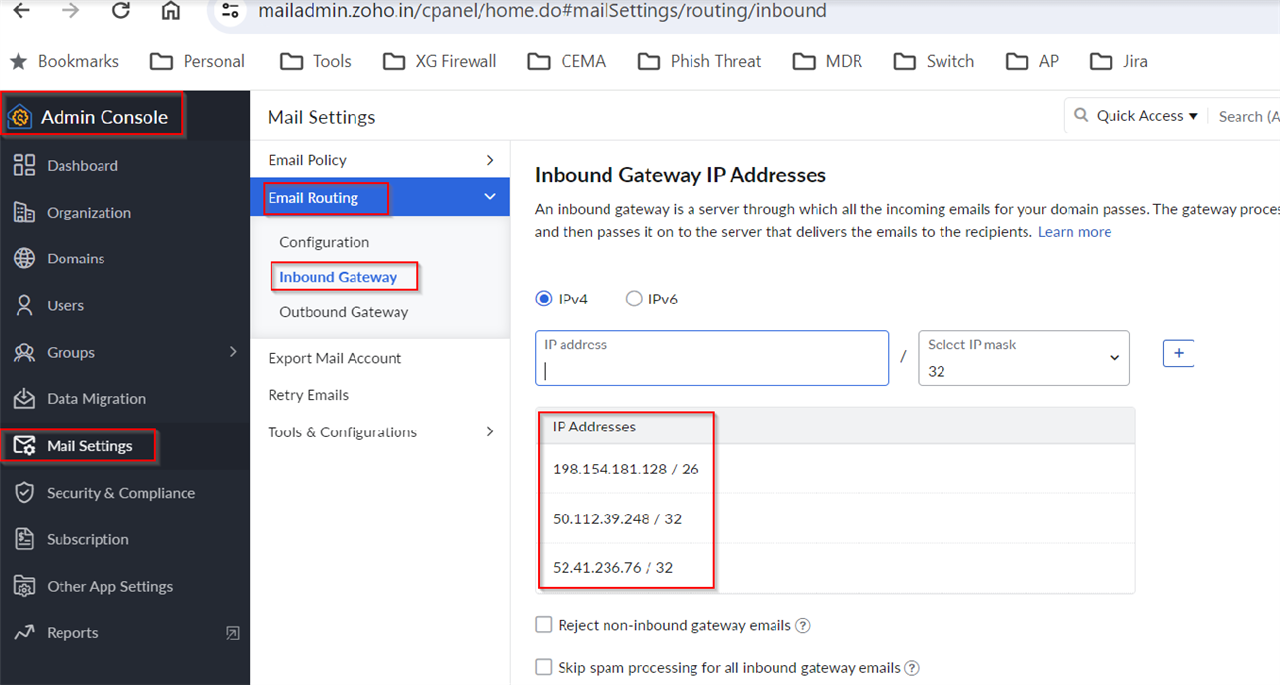
Afterward, you need to go to Zoho Mail admin console> Mail Setting> Email Routing> Inbound Gateway and configure as shown below.
Step 11. Add User
Open your Zoho Account and "Add user" from Admin console> Users> + Add

Step 12. Adding User MailBox
On Sophos Central, go to My Products> Email Protection> Mailboxes> Add
Step 13. Testing
Once done with step 12, log in to your Zoho user account and test the Inbound email
Additional Notes
- Any domains can be use
- MX Record and Sophos Delivery IPs might differ depending on Sophos Central Account Country/Data Centre.
Corrected Horizontal Lines
[edited by: Erick Jan at 5:54 AM (GMT -8) on 1 Feb 2024]
