Installation
- Install Splunk in your local machine
- Download the Sophos Central Add-on from Splunkbase
- Copy TA-sophos-central-addon-for-splunk directory to splunk/etc/apps/ directory
- Restart Splunk.
- After installing the Splunk, Switch to /splunk/bin directory
- By following command user can generate SPL file :
- MAC/Linux: ./splunk package app your_app_name (TA-sophos-central-addon-for-splunk)
- Windows: splunk package app your_app_name (TA-sophos-central-addon-for-splunk)
- User will get location of spl like this:
- User can install add-on with this SPL file into Splunk

Authentication & Configuration
- Authentication uses a Client ID and Secret pair from a Tenant or Enterprise admin account.
- Once you have created your API Client ID and Secret pair from the instructions above
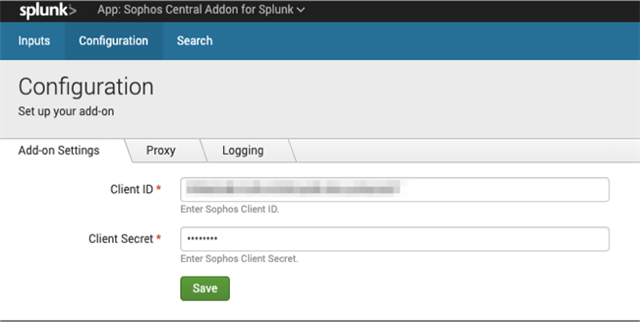
- From within the Splunk interface, navigate to: Apps → Sophos Central Addon for Splunk → Configuration → Addon Settings
- Enter the "Client ID" and "Client Secret" in the fields and press "Save"
- From within the Splunk interface, navigate to: Apps → Sophos Central Addon for Splunk → Configuration → Addon Settings
- Next navigate to the "Inputs" tab to configure settings for sync intervals, default indexes, and to enable or disable a specific input.
- Recommended sync intervals are following
- Tenants - Daily
- Endpoints - Hourly
- Alerts - Hourly
- Events - Hourly
- Recommended sync intervals are following
Note: Depending on the default sync times it may take up to 24 hours for the initial sync to occur and the data to display in your Splunk instance.

- Once you have configured your initial sync settings, we recommend viewing the options for Events as you have additional configuration options to exclude specific event types as shown in the below example.

Help & Troubleshooting
Logs can be found on the Splunk server at: $SPLUNK_HOME/var/log/TA-sophos-central-addon-for-splunk/
For feedback and support please post to our Splunk forum or email: apis @ sophos.com