

Disclaimer: This information is provided as-is for the benefit of the Community. Please contact Sophos Professional Services if you require assistance with your specific environment.
Table of Contents
- Overview
- Product and Environment
- Step 1: Creating a firewall rule for the known users
- Step 2: Creating a firewall rule for the DNS service
- Step 3: Ensure the captive portal service is enabled
- Step 4: Enabling the Multi-factor authentication
- Step 5: The user is required to sign in to the user portal for the OTP enablement
- Step 6: Login Process
- Step 7: Debugging logs
Overview
This recommended read explains how to turn on multi-factor/OTP authentication for captive portal service.
Product and Environment
Sophos Firewall – All Supported versions.
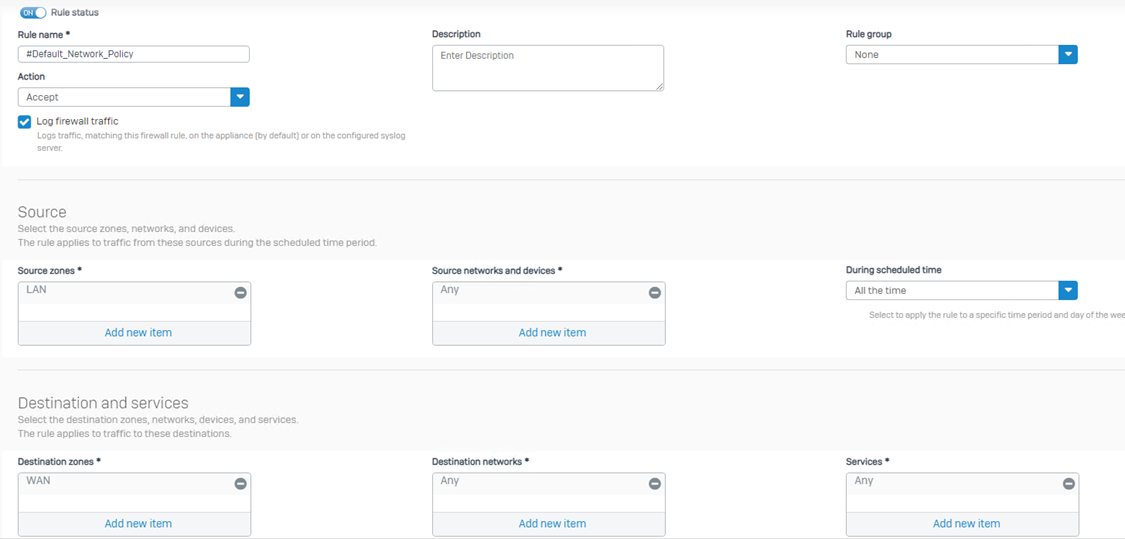
Step 1: Creating a firewall rule for the known users
Here, I’ll be creating a rule for a single user only. You can use groups or specified users.
I’ll also be editing the firewall's default rule. You can create a new rule separately and give it a desired name.

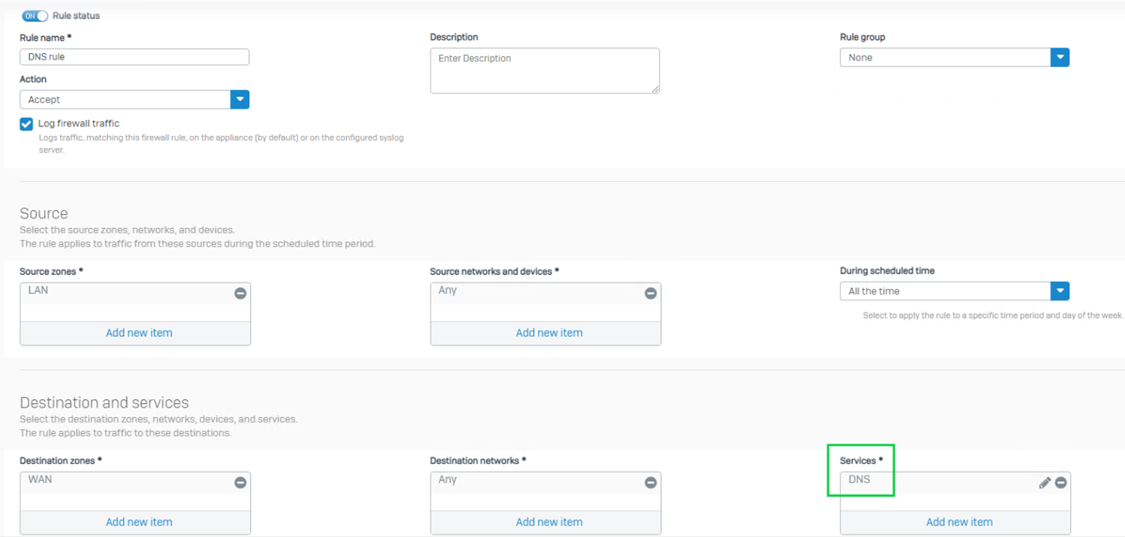
Step 2: Creating a firewall rule for the DNS service
On most networks, DNS settings are inherited on the WAN port from the internet service provider. When you’re blocking WAN access for unknown users, they can't reach the DNS server that is out on the WAN.
Therefore, a user trying to access the internet where authentication is required won’t be redirected to the captive portal. A separate firewall access rule that does not require authentication is needed for WAN DNS access.
Step 3: Ensure the captive portal service is enabled
Generally, the captive portal service is, by default, turned on in the LAZ zone. But if you’re deploying the captive portal service in another custom zone, you must ensure to turn it on.

Step 4: Enabling the Multi-factor authentication
- Third-party authenticator support
- Configure MFA with an authenticator app
- Manually configure OTP tokens
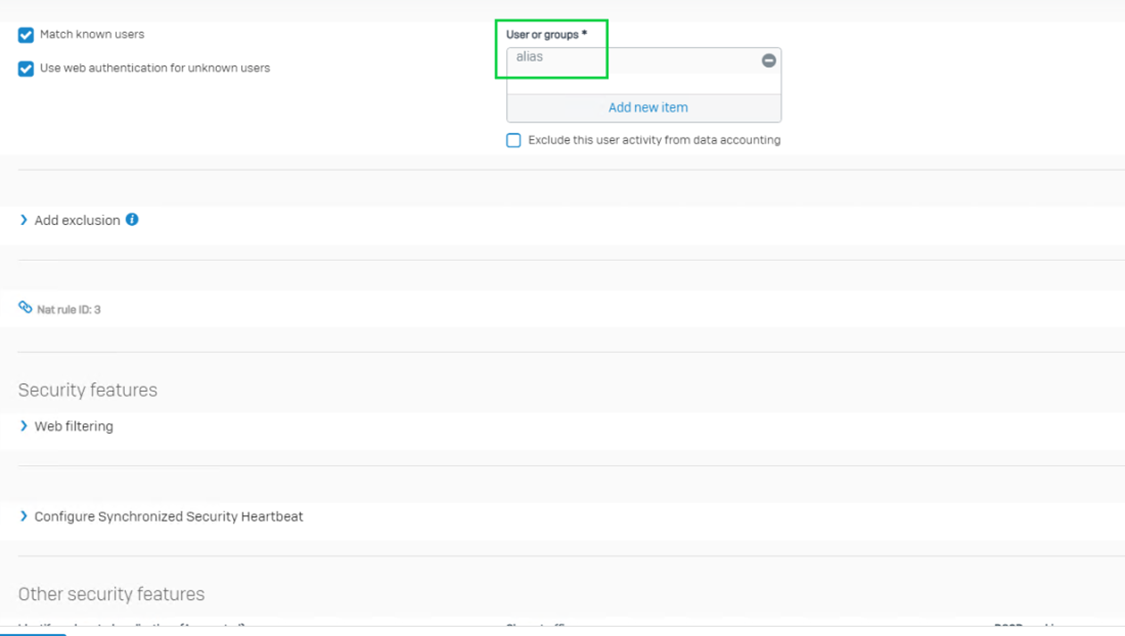
As we’re using a single user here, we’ll demonstrate the steps below:
We have one user locally created under the Authentication > Users > Add

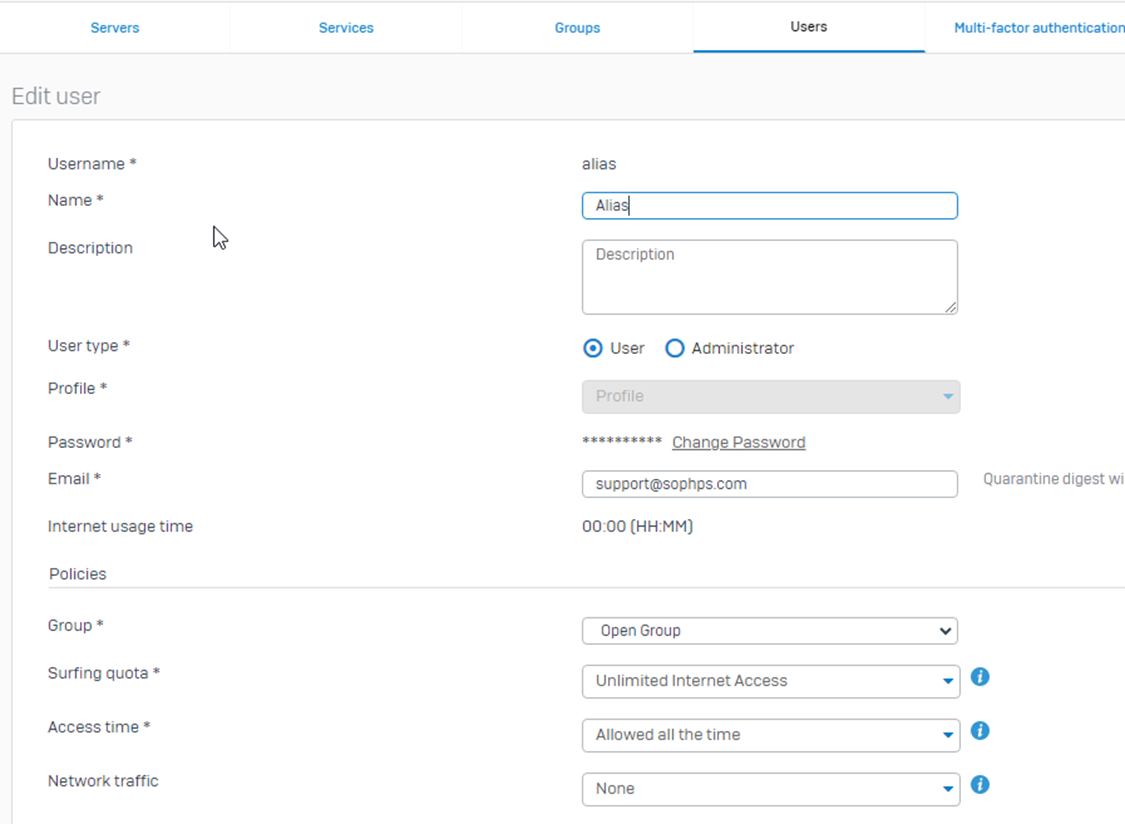
Users can either be locally created or AD-SYNCD users. Refer to Servers & Configure Active Directory authentication.
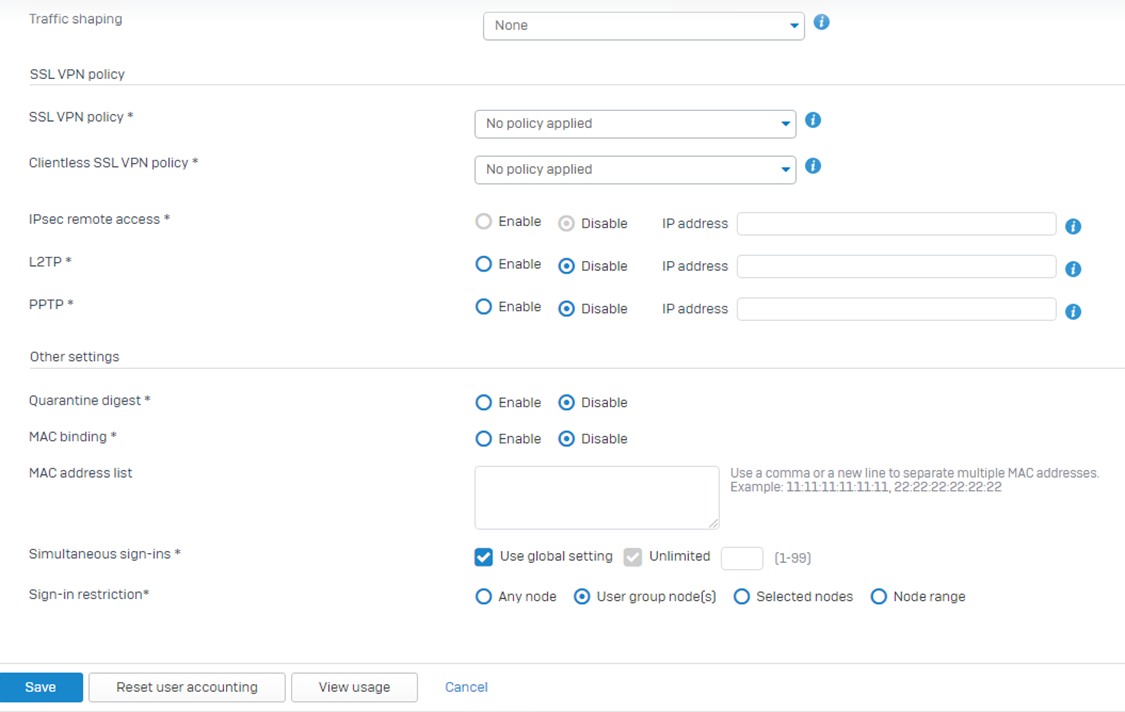
Here, as we’re using a single user, we’ll opt for the option to use specific users and groups:
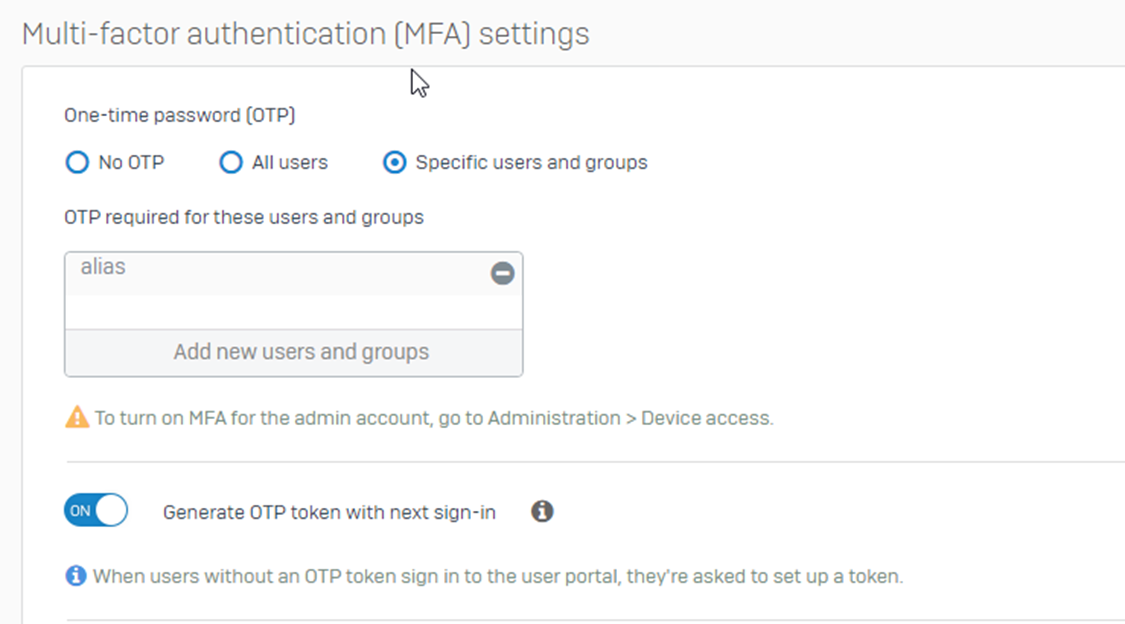
Once turned on, kindly refer to the recommended read - - How to configure Multi-factor authentication and understanding the OTP timestep settings
Step 5: The user is required to sign in to the user portal for the OTP enablement
Now login to the user portal page: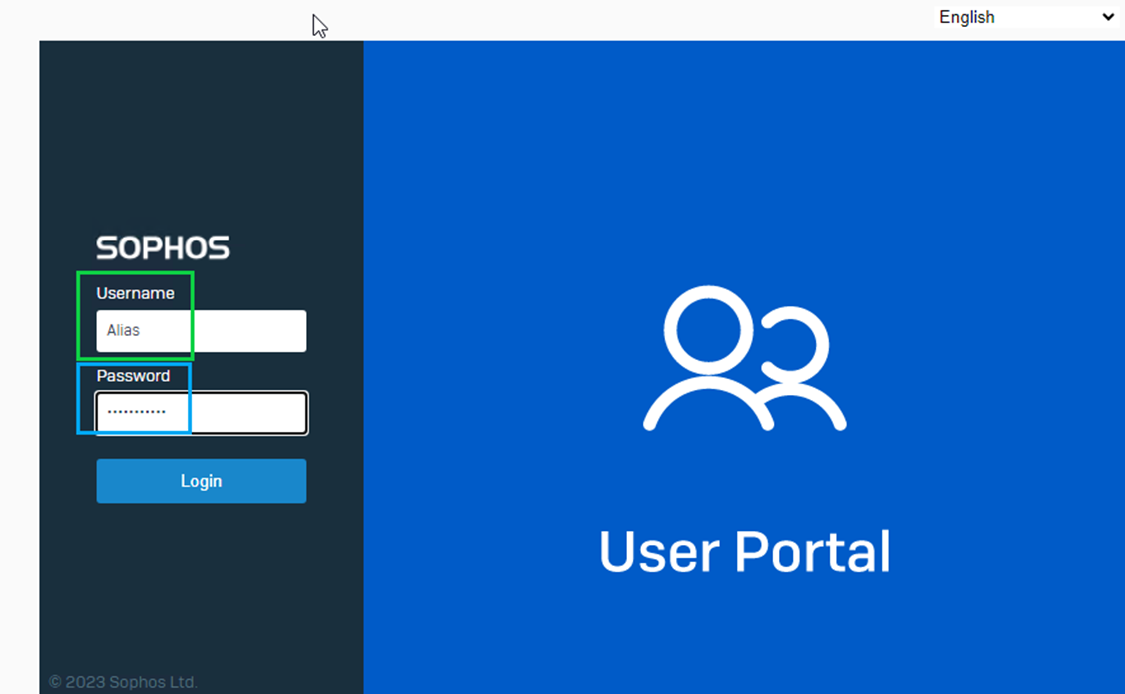
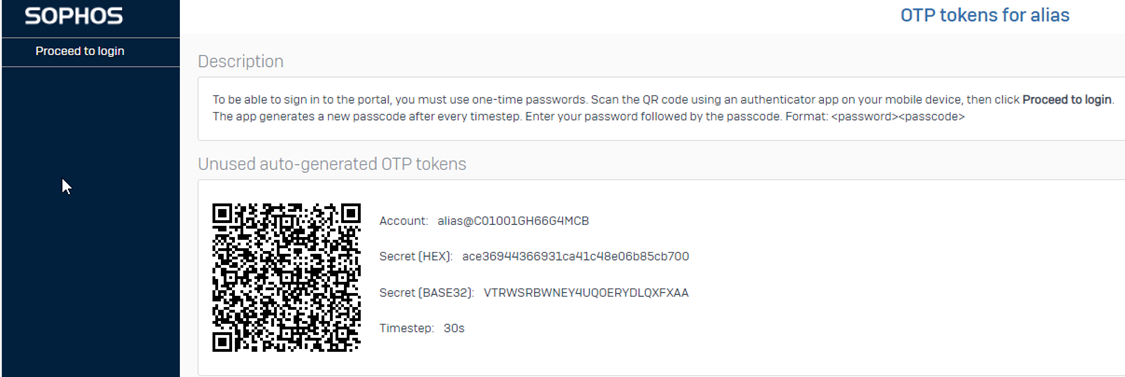
You’ll see a page where you can scan the QR code or manually add the data in your supported authenticator app. Once scanned, proceed to log in, which will log you out from the user portal.
Once scanned from your authenticator app, you’ll be able to see the Issued token under the Authentication > Multi-factor authentication > Issued tokens:

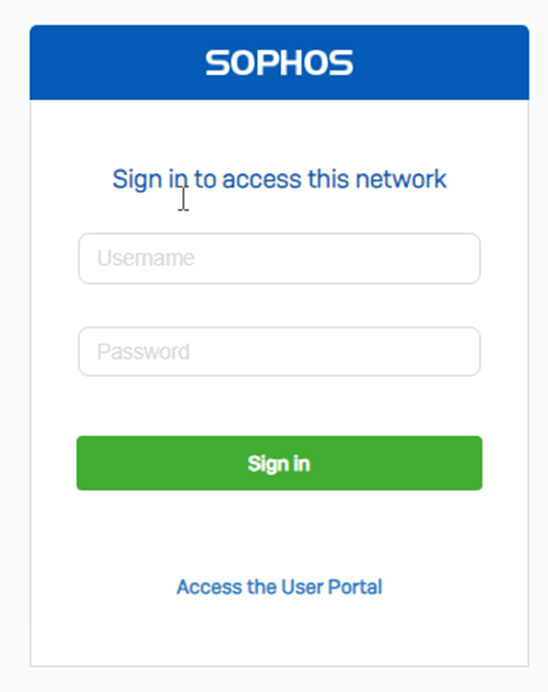
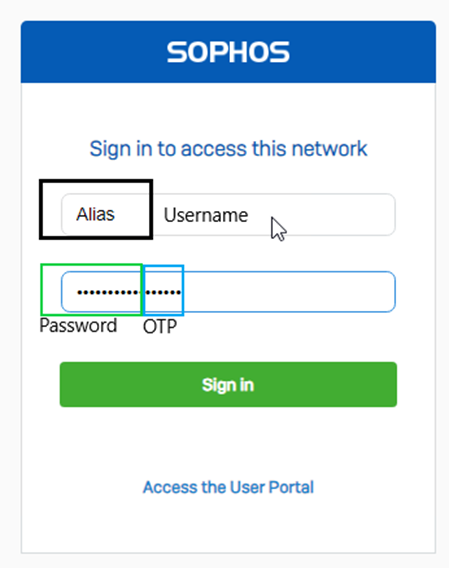
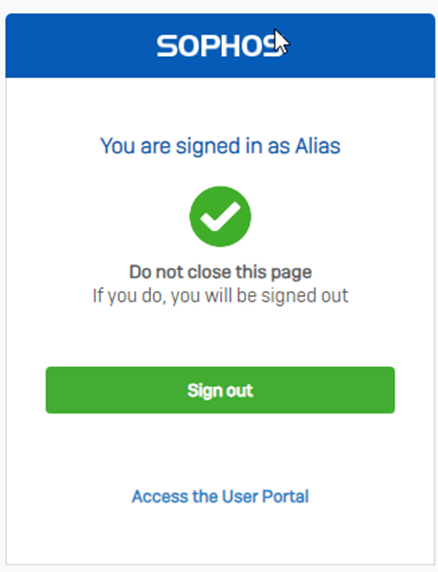
Step 6: Login Process
Now try to access the user from the client device, open a browser, try to browser, and it’ll pop-up with the captive portal page just like illustrated below:
- All customization of the web authentication can be found under the path: Authentication > Web authentication.
- To remove an insecure error connection, refer to the documentation guide - Insecure connection to the webadmin and captive portal pages.
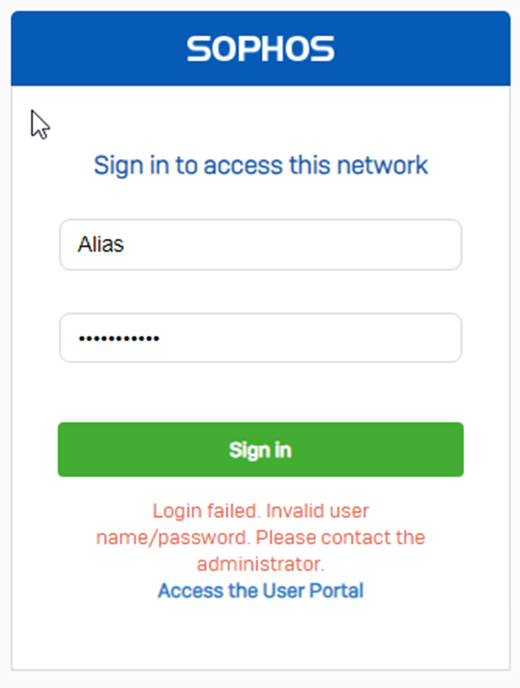
- And if you don’t type the OTP, it’ll throw an error as follows:
Step 7: Debugging logs
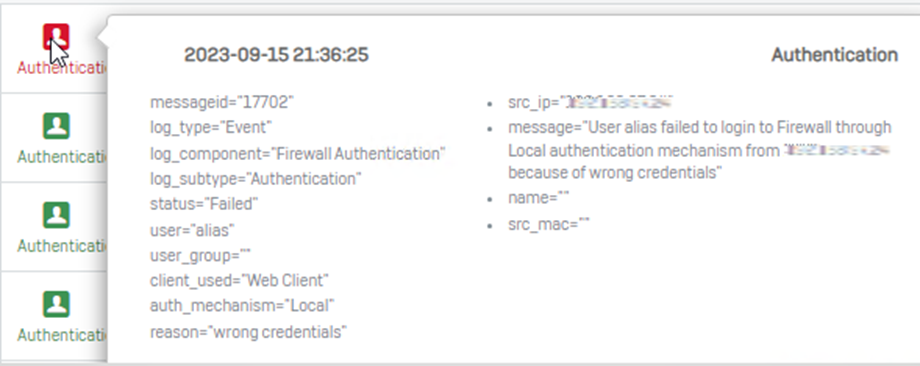
To check authentication logs, open a log viewer > select down the drop-down menu > select authentication:
These are the log viewer details when the authentication was successful when using a combination of password+otp

- And when we don’t use the combination of password+otp

- On the CLI, select option 5. Device Management, then option 3. Advanced Shell. Now, the service used for the authentication is access_server debug. You can find out more about the services used in the firewall in the log file details.
- To enable/disable the debug of the service, use the following commands: service access_server:debug -ds nosync
If successfully enabled it’ll show a result 200 ok. - To check the status of the service, use the following command: service -S | grep access
This will show whether the services are just RUNNING or RUNNING, DEBUG - To check the logs in the debug while logging in, execute the following command: tail -f access_server.log
- To check the logs in the debug and grab the user information, then type the following: tail -f access_server.log | grep “username” in our case, the example will be as follows: tail -f access_server.log | grep Alias
When you can successfully log in, you’ll see the following lines in the debug logs:
DEBUG Sep 15 16:12:15.853818Z [POSTGRES_DB]: pg_db_handle_get_userinfo: column:'name', value:'Alias'
DEBUG Sep 15 16:12:15.854355Z [SQLITE_DB]: (check_sqlite_bind_text_result): sqlite3_bind_text(INSERT_LIVEUSER, Alias) succeeded
When you logout successfully, you’ll see the following lines in the debug logs:
DEBUG Sep 15 16:14:19.756089Z [access_server]: (_sqlite_db_handle_get_liveuserinfo): GET_LIVEUSER_INFO_TO_LOGOUT retrieved: liveuserid=1 userid=6 groupid=1 liveuser_name_by_ip='alias' name='Alias' attr.starttime=2609601 attr.lastlivetime=2609601 isactive=1 groupid=1 policyid=1 accesspolicyid=1 bwpolicyid=0 datatransferpolicyid=0 lastusedtime=1694794335 used_minutes=15 cycleused_minutes=15 renewdate='2023-09-15' upload=164 download=676 cycleupload=164 cycledownload=676 message='NULL' macaddress='' clienttype=2 addr_family=2 authserver_id=0
DEBUG Sep 15 16:14:19.759695Z [access_server]: fill_logout_garner_data: UPLOAD:0,DOWNLOAD:0,starttime:1694794334, Groupid:1, MAC:'', NAME:'Alias'
I hope this recommended read helped you meet your requirements and clarify your doubts.
updated links to latest
[edited by: Raphael Alganes at 11:03 AM (GMT -8) on 19 Dec 2024]
 Quote
Quote