
Disclaimer: This information is provided as-is for the benefit of the Community. Please contact Sophos Professional Services if you require assistance with your specific environment.
This Recommended Read describes how to connect Cloudflare Magic WAN and Sophos Firewall via route-based VPN (RBVPN) IPsec and GRE tunnel connections.
Note: Only RBVPN IPsec connection using IPv4 is supported. IPv6 traffic selectors aren’t supported on Cloudflare.
Magic WAN provides secure, performant connectivity and routing for your entire corporate network, reducing cost and operational complexity. Magic Firewall integrates smoothly with Magic WAN, enabling you to enforce network firewall policies at the edge, across traffic from any entity within your network.
With Magic WAN, you can securely connect any traffic source, such as data centers, offices, devices, and cloud properties, to Cloudflare’s network and configure routing policies to get the bits where they need to go, all within one SaaS solution.
Magic WAN supports a variety of on-ramps, including Anycast GRE or IPsec tunnels, Cloudflare Network Interconnect, Cloudflare Tunnel, WARP, and a variety of Network On-ramp Partners.
| Compatible parameters | |
| IPsec phase 1 | Encryption:
|
|
Integrity (Authentication):
|
|
|
Diffie-Hellman group:
|
|
|
Pseudorandom function (PRF):
|
|
| IPsec phase 2 |
Encryption:
|
|
Integrity (Authentication):
|
|
|
PFS group (Phase 2 Diffie-Hellman Group):
|
|
| Other required IPsec parameters |
|
| Optional IPsec parameters |
|
Steps
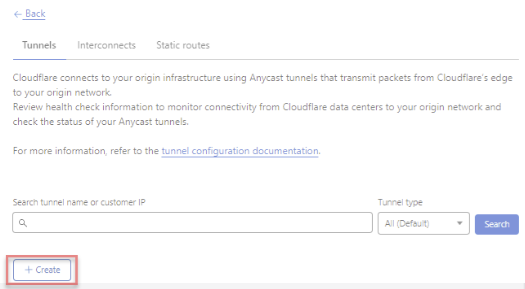
From the main Navigation Tree, find Magic WAN.
Note: If Magic WAN isn’t present in the menu, it may mean your account does not have the required entitlements yet, or the account you’ve signed in does not have the correct privileges.

Customer endpoint: This subnet represents each side of the configured tunnel’s Customer endpoint (an available static IP address from your ISP).
Cloudflare endpoint: One of the 2 Anycast IP addresses your Cloudflare account team provided to you.
Preshared key (PSK): An alphanumeric string used to authenticate the site-to-site IPsec VPN. As a security best practice, we recommend generating a strong PSK with over 32 characters.
An example of a configured tunnel is as follows: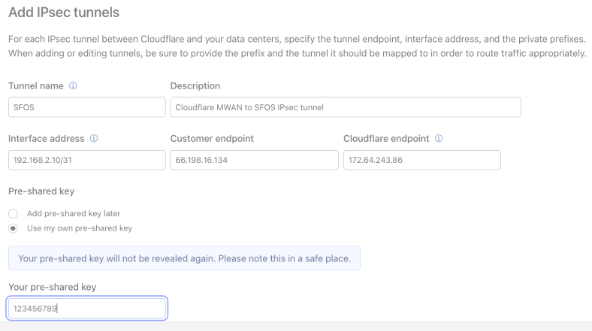
You can add additional tunnels using the same or the second Anycast IP address provided by your Cloudflare account team.
Static route configuration is required for the Cloudflare network to route outbound traffic between your configured Magic WAN sites, consisting of branch offices, data centers, or cloud locations. For an example, see the diagram below:
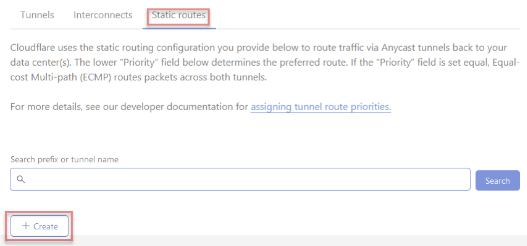
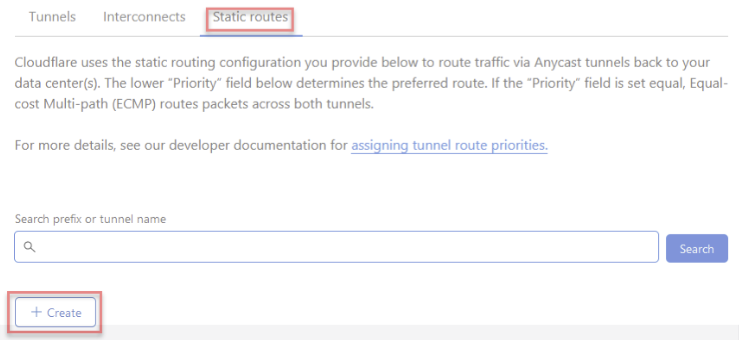
Select the Static Routes tab from the Magic WAN UI and click +Create to add a static route configuration for the tunnels you created in step 6.
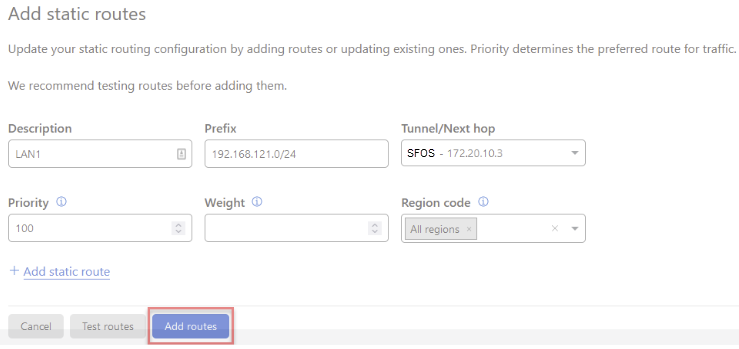
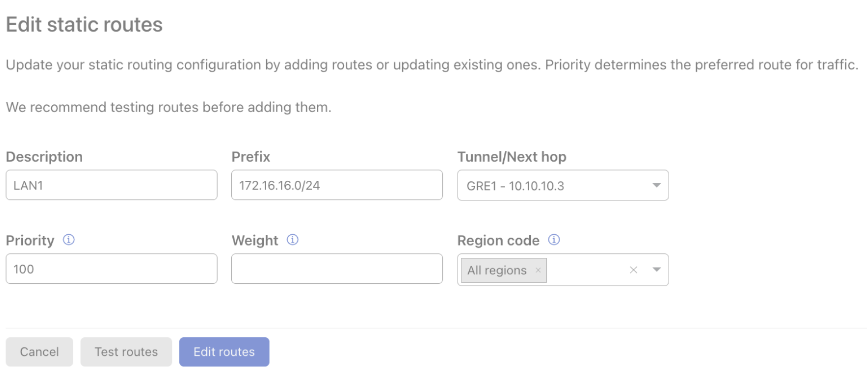
(Optional) You can enter the Priority (default: 100), Weight, and Region code for each route.
Priority influences how traffic is routed to the customer network from Cloudflare. A lower value has higher priority.
You can use the weight to send a certain amount of traffic over one tunnel rather than over another. For example, if you have two tunnels, a weight of 2 will send twice as much traffic through one tunnel versus the other. You may prefer this if one ISP connection has more bandwidth than the other.
Add any other applicable static routes for LAN segments on your network.
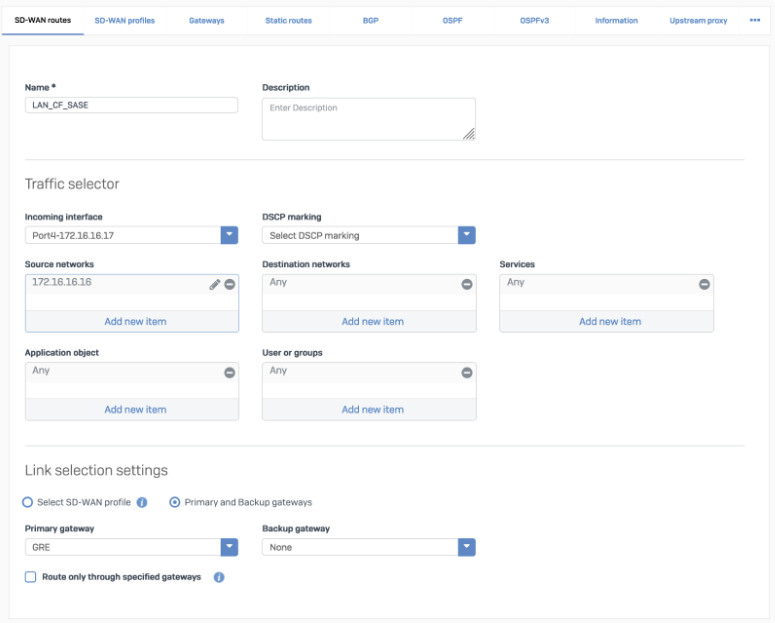
Note: You must configure a route on Sophos Firewall. We recommend using SD-WAN routes to ensure tunnel health checks can route back to Cloudflare through the public internet rather than the tunnel.
Steps
From the main Navigation Tree, find Magic WAN.
Note: If Magic WAN isn’t present in the menu, it may mean your account does not yet have the required entitlements or the account you’re signing in does not have the correct privileges.

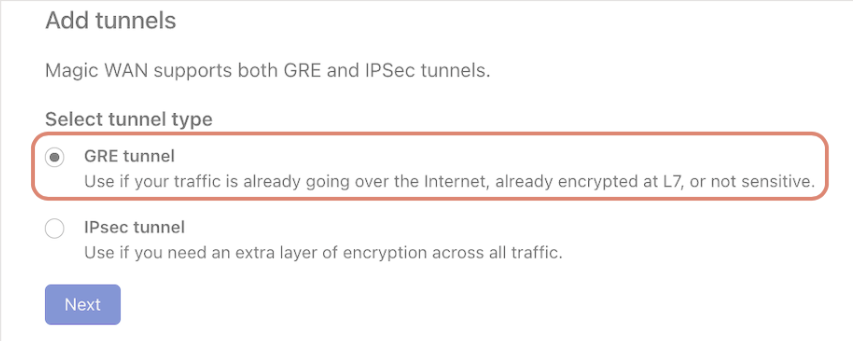
To configure your first GRE tunnel, you need the following information:
Interface address: A 31-bit subnet (/31 in CIDR notation) supporting two hosts must be specified as the Interface address from the following private IP address space:
Customer endpoint: This subnet represents each side of the configured tunnel’s Customer endpoint (an available static IP address from your ISP).
Cloudflare Endpoint: One of the 2 Anycast IP addresses your Cloudflare account team provided to you.
An example of a configured tunnel is as follows: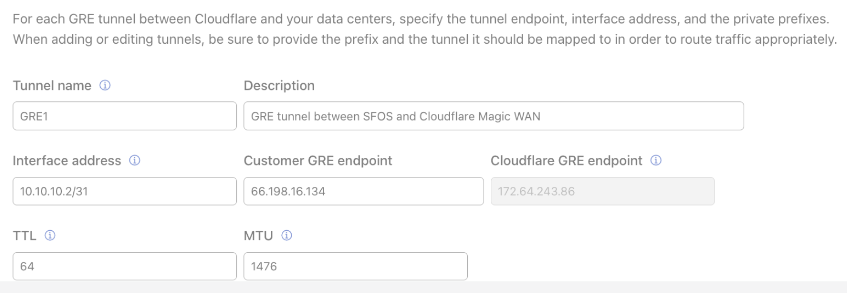
You can add additional tunnels using the same or the second Anycast IP address provided by your Cloudflare account team.
Static route configuration is required for the Cloudflare network to route outbound traffic between your configured Magic WAN sites, consisting of branch offices, data centers, or cloud locations. For an example, see the diagram below:
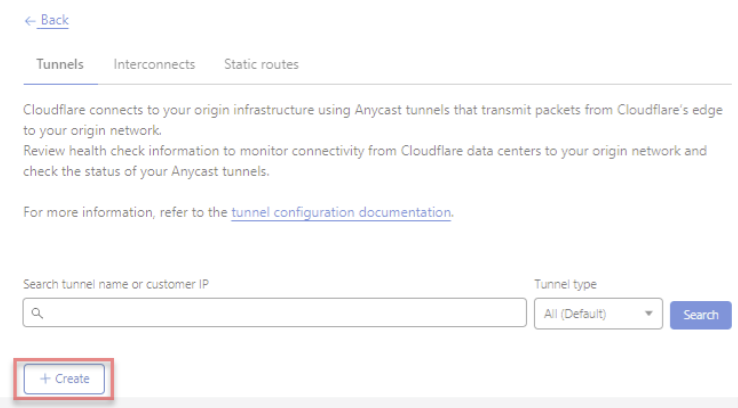
Select the Static Routes tab from the Magic WAN UI and click +Create to add a static route configuration for the tunnels you created in step 6.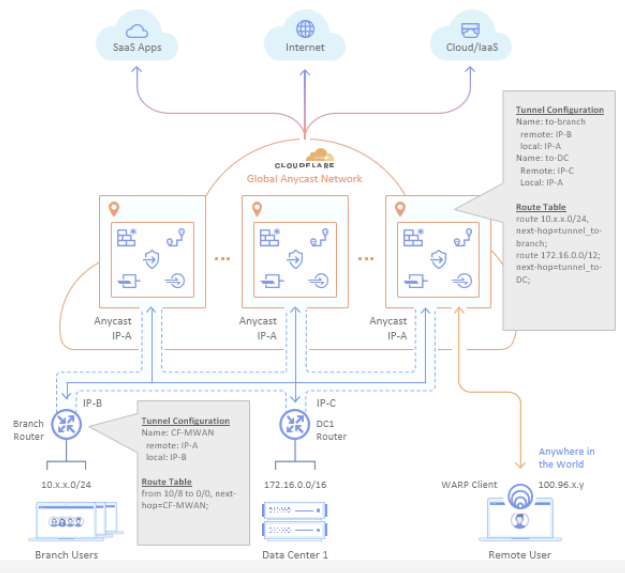
(Optional) You can enter the Priority (default: 100), Weight, and Region code for each route.
Priority influences how traffic is routed to the customer network from Cloudflare. A lower value has higher priority.
You can use the weight to send a certain amount of traffic over one tunnel rather than over another. For example, if you have two tunnels, a weight of 2 will send twice as much traffic through one tunnel versus another. You may prefer this if one ISP connection has more bandwidth than the other.
Add any other applicable static routes for LAN segments on your network.
Note: You must configure a route on Sophos Firewall. We recommend using SD-WAN routes to ensure tunnel health checks can route back to Cloudflare through the public internet rather than the tunnel.


set vpn ipsec-performance-setting anti-replay window-size 0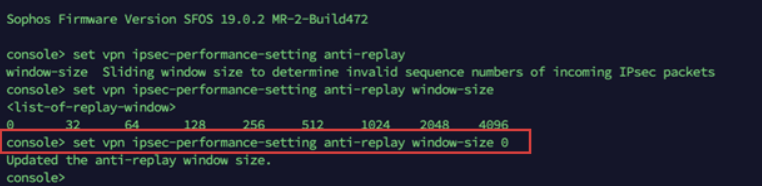
system gre tunnel add name <NAME_OF_YOUR_GRE_TUNNEL> local-gw <WAN_PORT> remote-gw <REMOTE_GATEWAY_IP_ADDRESS> local-ip <LOCAL_IP_ADDRESS> remote-ip <REMOTE_IP_ADDRESS>

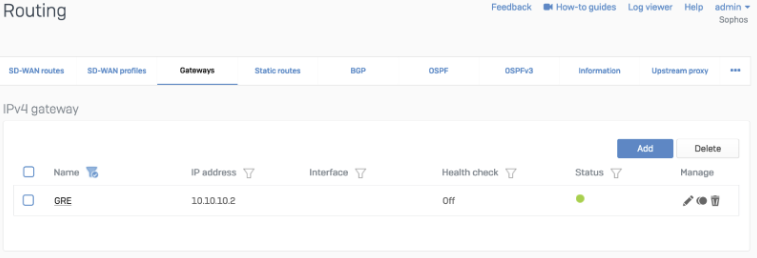
To redirect traffic, add a static or SD-WAN route.
Static route
Cloudflare_MWAN from the example above.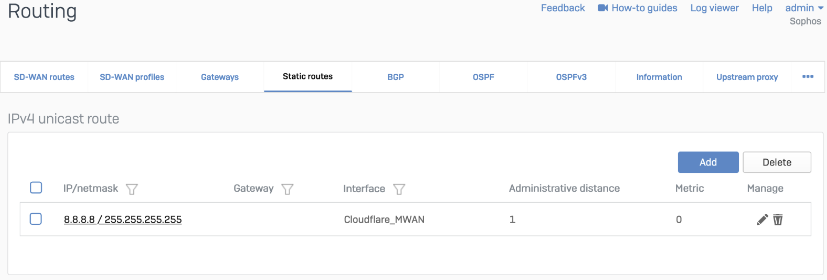
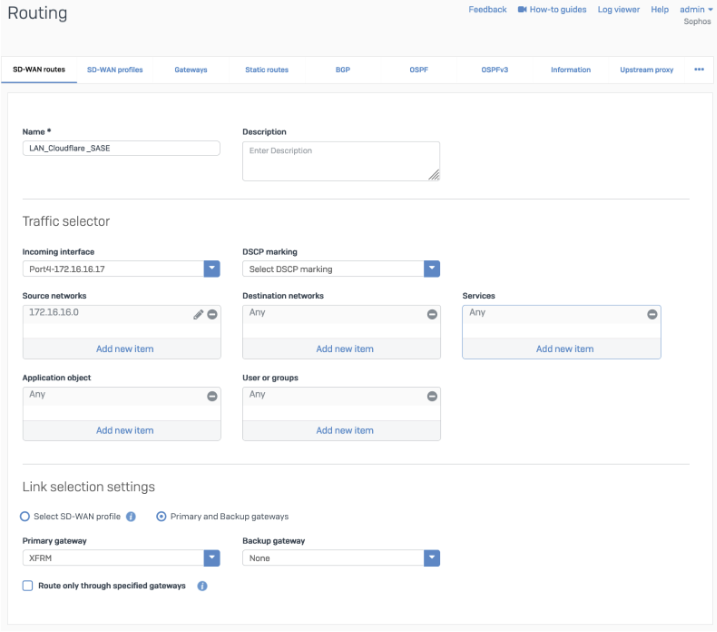
SD-WAN route
Cloudflare_MWAN from the example above.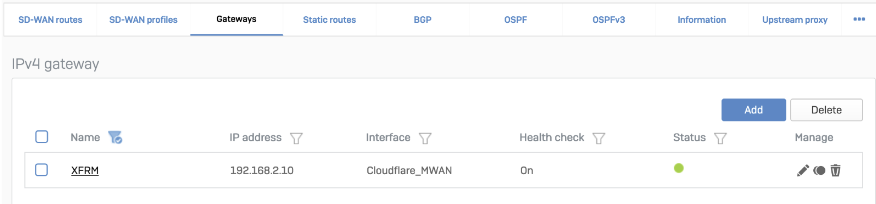
Add a GRE or SD-WAN route or both.
GRE route
system gre route add net <network/subnet> tunnelname <tunnel name>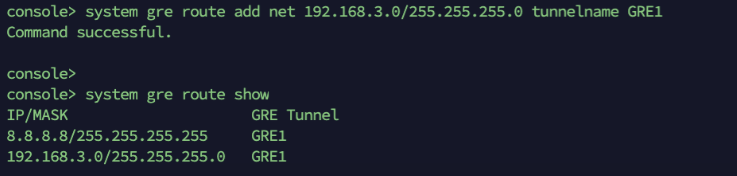
SD-WAN route
You can check if your tunnels are healthy on the Cloudflare dashboard.
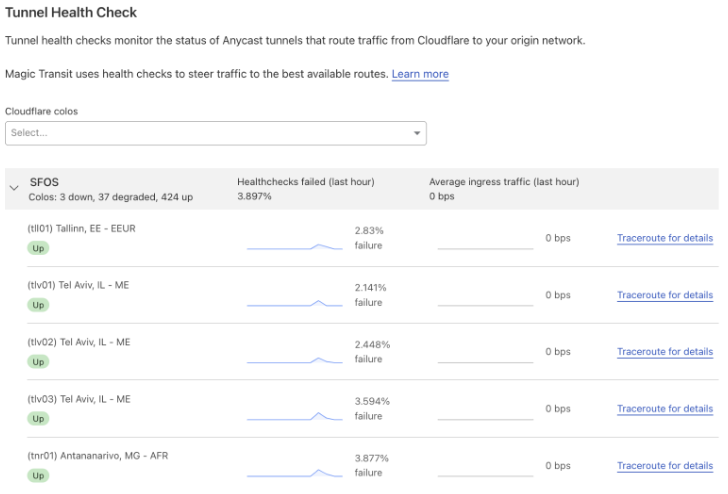
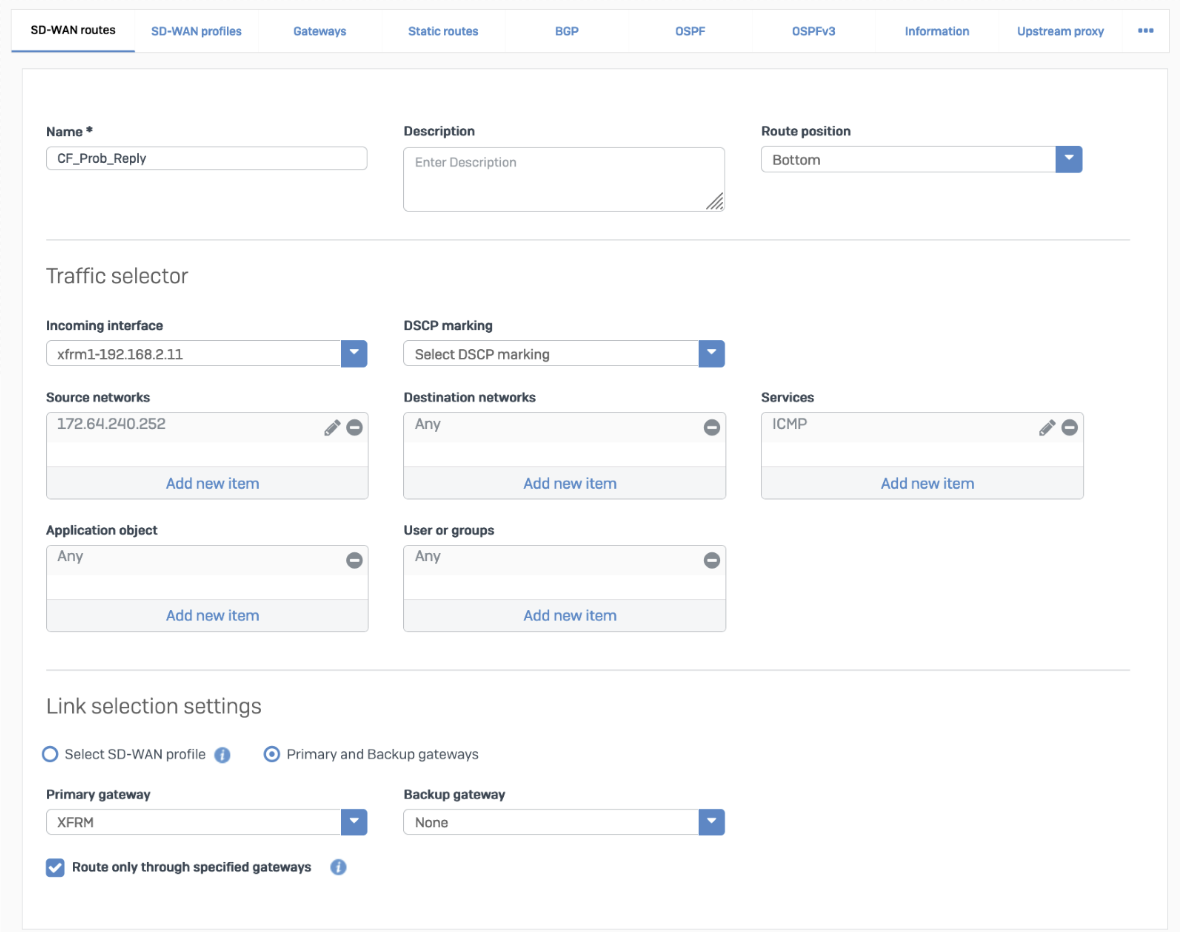
To make Cloudflare health checks work:
curl --request PUT \ --url api.cloudflare.com/.../<account_identifier>/magic/ipsec_tunnels/<tunnel_identifier> \ --header 'Content-Type: application/json' \ --header 'X-Auth-Email: <YOUR_EMAIL> ' \ --data '{ "health_check": { "enabled":true, "target":"172.64.240.252", "type":"request", "rate":"mid" }}'
SF01V_SO01_SFOS 19.5.0 GA-Build197# tcpdump -nn proto 1
tcpdump: verbose output suppressed, use -v or -vv for full protocol decode
listening on any, link-type LINUX_SLL (Linux cooked v1), capture size 262144 bytes

13:09:55.500453 xfrm1, IN: IP 172.70.51.31 > 172.64.240.252: ICMP echo request, id 33504, seq 0, length 64
13:09:55.500480 xfrm1, OUT: IP 172.64.240.252 > 172.70.51.31: ICMP echo reply, id 33504, seq 0, length 64

13:09:55.504669 xfrm1, IN: IP 172.71.29.66 > 172.64.240.252: ICMP echo request, id 60828, seq 0, length 64
13:09:55.504695 xfrm1, OUT: IP 172.64.240.252 > 172.71.29.66: ICMP echo reply, id 60828, seq 0, length 64The tunnel status is green.
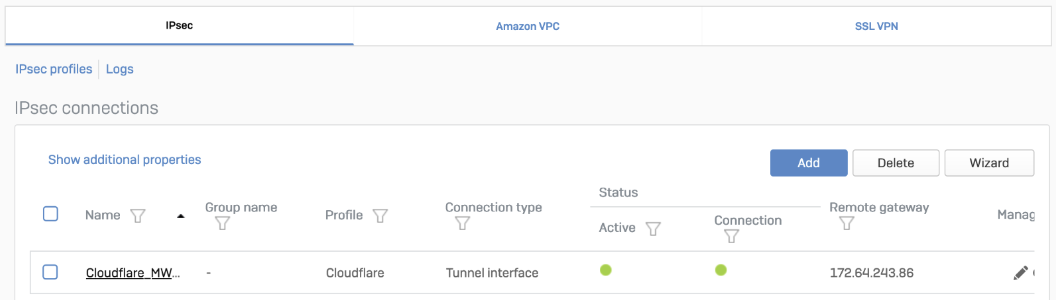
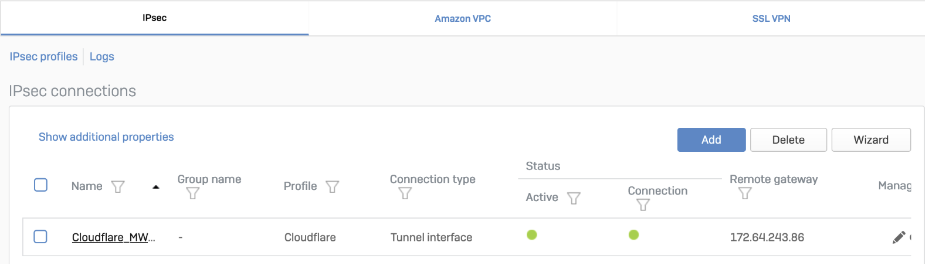
The corresponding XFRM interface shows a Connected status.

Status is Enabled.
TCPDUMP to see if packets are going through the VPN or GRE tunnel as expected.Related information


 Quote
Quote