

Overview
Note: Please contact Sophos Professional Services if you require direct assistance with your specific environment.
This recommended read outlines the steps to configure Sophos Central email for Gsuite/Goole Workspace.
This article covers the usage of 3rd Party DNS Provider (Namecheap) to Validate the domain on central, Configure MX records, and Publish SPF and DKIM.
In this article, we've covered,
- 1. Validate your Domain
- 2. Configure Mail Direction and Outbound Gateway
- 3. Add a Mailbox manually to test Email flow
- 4. Confirm working of outbound traffic flow
- 5. Change your MX records to point to Sophos Central Email
- 6. Test and confirm Inbound Email flow
- 7. Update SPF record for your domain
- 8. Update DKIM record for your domain
1. Validate your Domain
In Central, Navigate to Configure > Settings > Domain Settings/Status > Add Domain
Enter your domain and click Verify Domain Ownership. A new pop-up window will show up with the TXT Value, which you need to publish through your DNS Provider.

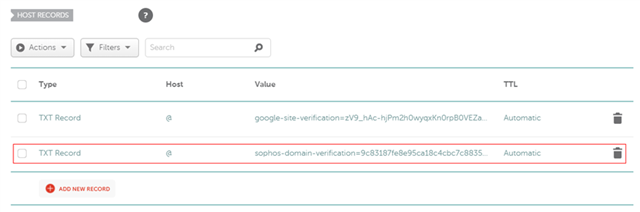
After this, open your DNS Provider and publish the TXT record with the given value.
Type = TXT Record | Host = @ | Value = TXT Value from Sophos Central Verification | TTL = Automatic
After adding the values, move over to Sophos Central and click Verify. Usually, it reflects instantly, but depending on your DNS provider, it may take up to 10 to 15 minutes or, in some cases, up to 60 minutes.p

2. Configure Mail Direction and Outbound Gateway
In this step, we'll configure Sophos Central to Forward the accepted emails (Inbound) to the Gsuite.
As a Gsuite/Google Workspace domain usually requires 5 MX records published for delivery and redundancy as per Google Workspace MX Setup steps, we'll create a subdomain "routing-mx" and publish all 5 of these MXs.
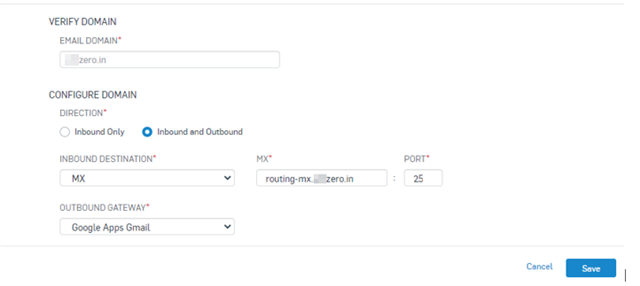
Go to your DNS Provider and set up DNS records as shown below.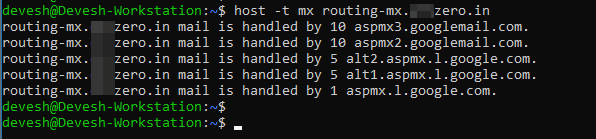
Once these records are published under and visible for the subdomain 'routing-mx', we'll need to add 'routing-mx.yourdomain.com' as the inbound destination in Central email when central receives the inbound mail; It'll look up the MX for routing-mx.yourdomain.com to further forward/deliver that email.
Keep Outbound Gateway as "Google Apps Gmail"
Note: You can use any other subdomain instead of 'routing-mx' but then make sure to use the same one throughout the setup
So far, we've setup central to handle inbound and outbound email traffic. In the following steps, we'll configure and test the outbound email traffic.
3. Add a Mailbox manually to test Email flow
Add a user that has a mailbox created in Gsuite/Goole Workspace.
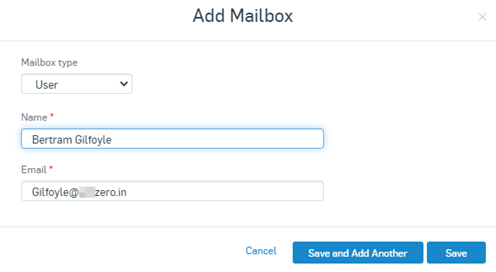
In Sophos Central, Navigate to Email Gateway > Mailboxes > Add > Add Mailbox
Type : User | Name : Name of the User | Email : Valid email address according to the Gsuite/Google Workspace.
After saving the Mailbox, the user will be visible under 'People Menu', and the Mailbox will be available under the 'Mailbox Menu.'


4. Confirm working of outbound traffic flow
Note: This step is only required when you want to use Central Email as your outbound gateway. If not, then you can skip this section. If you're using SPF and DKIM to authenticate emails, Then that needs to be set up on the Central email
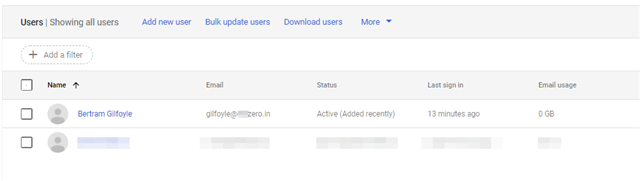
A) Confirm that the user's mailbox exists in Gsuite/Google Workspace
Google Admin Home Page > Directory > Users
B) Create outbound routing on Gsuite/Google Workspace
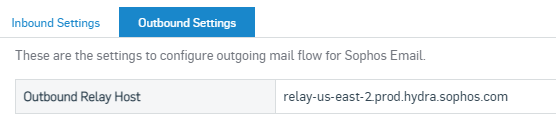
First, you need to find the outbound relay host on central where Gsuite/Google Workspace can forward all the outbound email. For that Navigate to Central Email Gateway > Configure > Settings >> Domains Settings / Status > Configure External Dependencies > Outbound Settings
In Google Admin Console, Go to Apps > Google Workspace > Gmail > Routing > Outbound Gateway. Hit the Edit button on the right. Copy the Outbound Relay host from Central email, Paste it here and Save.
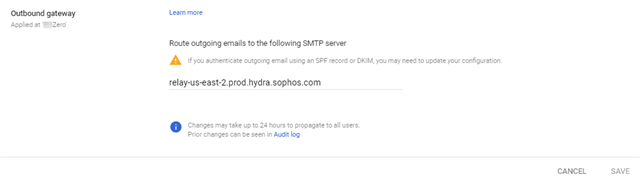
It should look something like this, and these changes may take up to 24 hours to reflect.

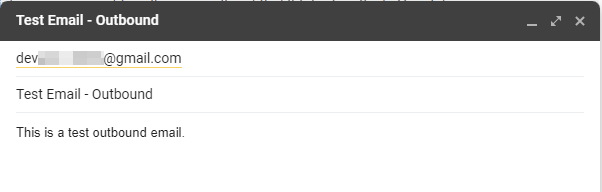
C) Send an Outbound email from the mailbox registered on the Sophos Central
-> I will be sending the mail to a Gmail address for this test
Check the recipient mailbox to verify the email

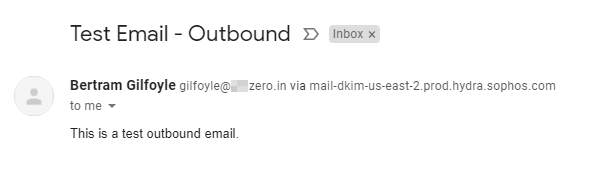
To verify that the email was relayed through central, Check the Mail header [For Gmail, Click on … (3)dots from the right side of the message and click 'Show Original']
You should be able to find the following line in the header : Received: from mail.delivery-213-us-east-2.prod.hydra.sophos.com (mail.delivery-213-us-east-2.prod.hydra.sophos.com. [18.216.23.27])
This can also be checked in the Message History in central. Go to email Gateway > Logs & Reports email Security Logs > Message History.

Note: If you send email from a Mailbox not added in Sophos Central, you’ll receive a "Mail Delivery System bounce message" in the sender mailbox. This is because Central only relays/accepts outbound emails from Mailboxes added in Sophos Central.
5. Change your MX records to point to Sophos Central email
Note: This will cause downtime during the testing. You can import or sync all mailboxes that need email flow before changing your MX records to minimize downtime.
Changing your domain's MX records to point to Sophos email is crucial to successful deployment and ensures all email is filtered and delivered. After Changing the MX Records for your domain, All the inbound mails will hit Sophos central first, get filtered and scanned, and then get delivered to Gsuite/Google Workspace.
When you created your Sophos Central account, you selected a region where you wanted to store your data. Your MX records are dependent on this region.
To find out which MX records you need to set up, Navigate to email Gateway > Configure > Settings > Domain Settings / Status > Configure External Dependencies > Inbound Settings.
Copy these 2 MX Records and head over to your DNS Providers to change the MX record to point to Central email.
Note: Please keep the Central MX Records only. If you use the previous (Gsuite's) MX records, some emails may not flow through central and will be directly delivered to Gsuite/Google Workspace.
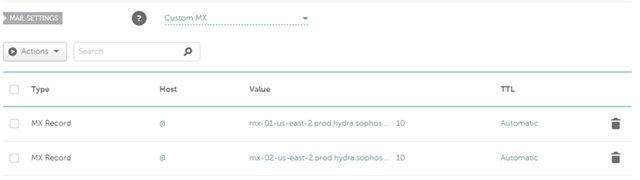
To confirm if your MX records are updated, visit https://mxtoolbox.com/ and enter your domain. If the MX records are correctly propagated, then you’ll be able to see the following,

Alternatively, You can also run the command in CMD or Linux Terminal : "nslookup -q=mx yourdomain.com"

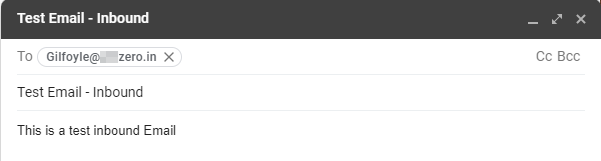
6. Test and confirm Inbound Email flow
We'll use the same Gmail ID that we used for outbound mail flow to test the inbound mail.
Check the 'Message History' on Central from Logs & Reports Menu, and It'll show the entry for the inbound email after 2-3 minutes.

Check the Mailbox of the test user of the domain, and you should see the Mail.
(The banner you're seeing is related to the Smart Banners feature; you can find more information about it at this link).

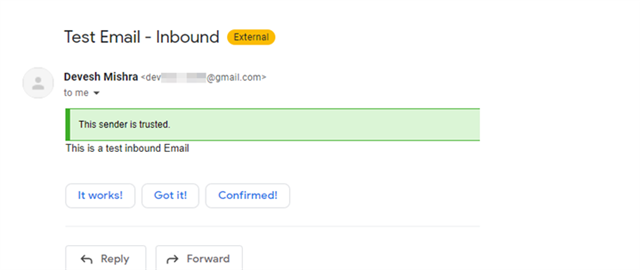
To double confirm that email went through Sophos Central email, Check the mail header by clicking on 'Show Original' from the options, and you should be able to see the line: Received: from inbound-18-220-12-142-us-east-2.prod.hydra.sophos.com (inbound-18-220-12-142-us-east-2.prod.hydra.sophos.com. [18.220.12.142])
If you don't see this line in the Mail header or the Mail entry in the 'Message history' section on Central email, this email didn't pass through Central. It could be for many reasons like your MX records aren't propagated correctly, Sender still has an old entry for your Domain's MX, or you might have additional MX records.
7. Update SPF record for your domain
If you've followed Step-4 to configure Central email as the outbound gateway, your emails will be delivered by Central, and you need to update your SPF records.
If your outbound email is only routed through Sophos email and not from anywhere else, you can use the Sophos email SPF record.
The SPF record used by Central is v=spf1 include:_spf.prod.hydra.sophos.com
You need to add it to your DNS provider's portal as a TXT Record. Here is how it should look like:
Type : TXT Record
Host : @
Value : v=spf1 include:_spf.prod.hydra.sophos.com -all

Note : This SPF records mark Central email as the only allowed-sender for your domain. Suppose you have any additional way of sending outbound email from your domain, like any third-party mail server that doesn't relay outbound mails through central. In that case, you need to add their Delivery IPs or domains in this SPF Record.
For example, a public IP (100.1.2.3) that doesn't route your mails via Central. The SPF record should look something like: v=spf1 ip4:100.1.2.3 include:_spf.prod.hydra.sophos.com -all
Still, If you're unsure about it, then you can use a soft fail at the end ('~all' instead of '-all') : v=spf1 include:_spf.prod.hydra.sophos.com ~all.
8. Update DKIM record for your domain
DKIM should be added in the last relay hop before the mail goes out. DKIM allows you to sign and authenticate outbound emails.
To add a DKIM Key, Navigate to Email Gateway > Settings > Domain Settings/Status > Select the Domain > DKIM Keys > Add
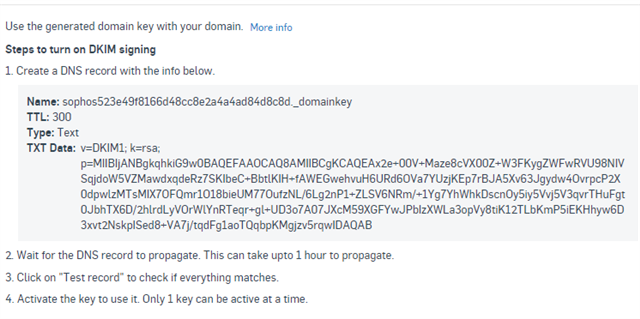
Go to your DNS provider, and add a TXT Record for it
Type : TXT Record
Host : sophos523e49f8166d48cc8e2a4a4ad84d8c8d._domainkey
Value : v=DKIM1; k=rsa; p=MIIBIjANBgkqhkiG9w0BAQEFAAOCAQ8AMIIBCgKCAQEAx2e+00V+Maze8cVX00Z+W3FKygZWFwRVU98NIVSqjdoW5VZMawdxqdeRz7SKIbeC+BbtlKIH+fAWEGwehvuH6URd6OVa7YUzjKEp7rBJA5Xv63Jgydw4OvrpcP2X0dpwlzMTsMIX7OFQmr1O18bieUM77OufzNL/6Lg2nP1+ZLSV6NRm/+1Yg7YhWhkDscnOy5iy5Vvj5V3qvrTHuFgt0JbhTX6D/2hlrdLyVOrWlYnRTeqr+gl+UD3o7A07JXcM59XGFYwJPbIzXWLa3opVy8tiK12TLbKmP5iEKHhyw6D3xvt2NskpISed8+VA7j/tqdFg1aoTQqbpKMgjzv5rqwIDAQAB
TTL: 5 min
Note: Notice the Value is a single line, and it contains a space after the ";".
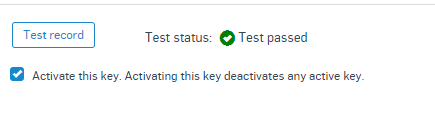
Wait between 5 minutes to 1hr for the DNS records to replicate and click: Test Record.
Added tags
[edited by: Raphael Alganes at 6:17 AM (GMT -7) on 7 Jun 2023]
