

Note: Please get in touch with Sophos Professional Services if you require direct assistance with your specific environment.
Table of Contents
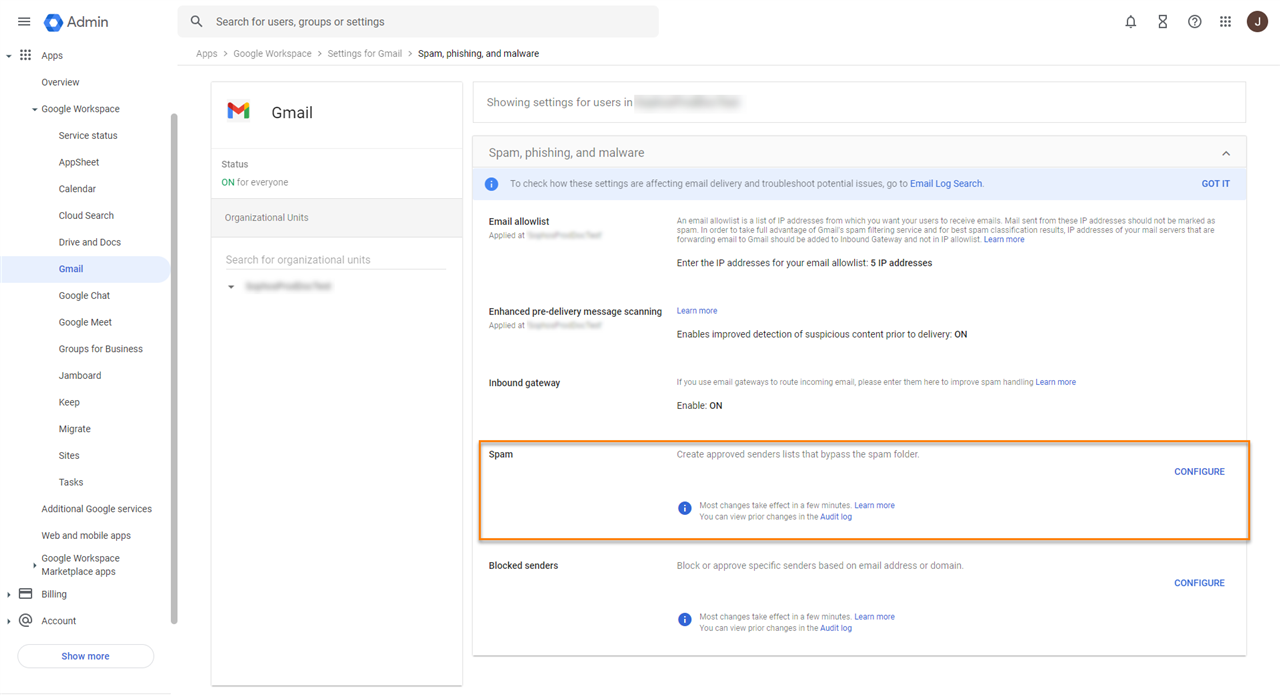
Add IP addresses to the Email allowlist
To add the relevant IPs to the Email allowlist, do as follows:
- Sign in to your Google Admin Console.
- In the Admin console, go to Menu > Apps > Google Workspace > Gmail > Spam, Phishing and Malware.
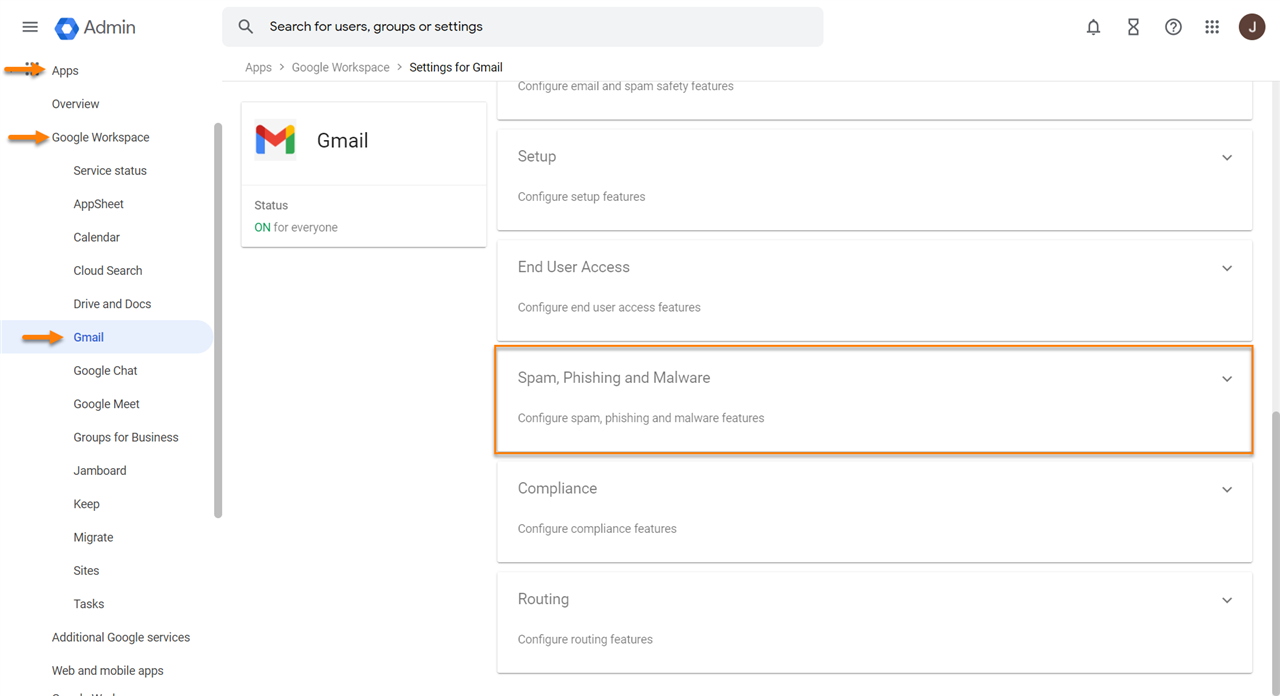
- On the left, select your top-level organization. This is usually your domain.
- In the Email allowlist setting, click Edit Email allowlist.
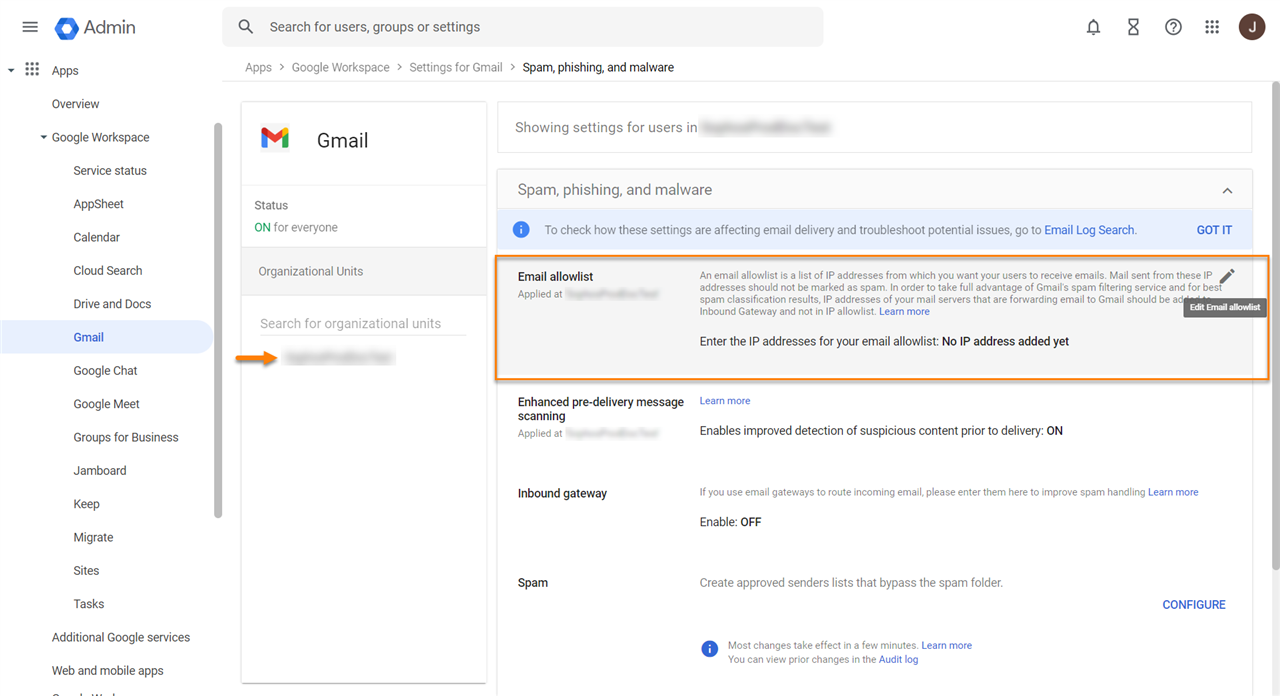
- Add the relevant IPs to the allow list.
Note: IPs are different for Sophos Phish Threat and Sophos Email.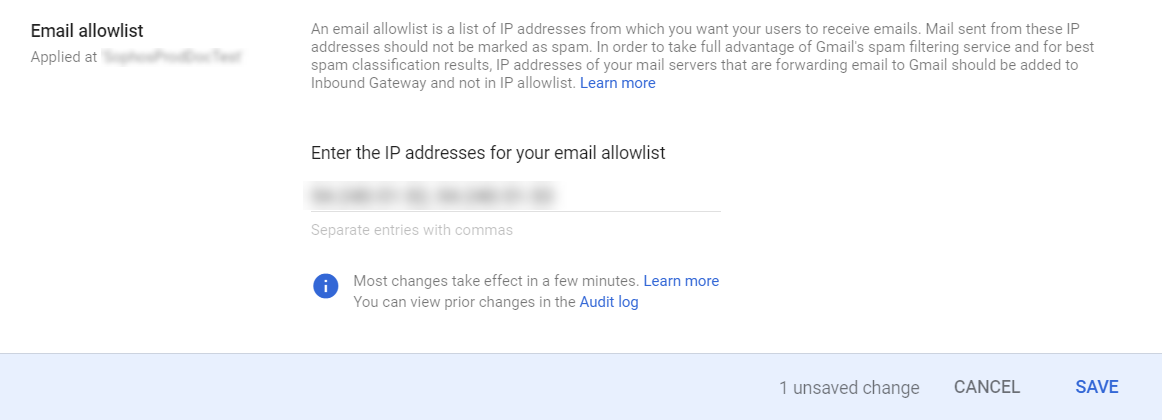
- Click SAVE.
Add IP addresses and other settings in the Inbound gateway
To add the relevant IPs and other settings in the inbound gateway, do as follows:
- Sign in to your Google Admin Console.
- In the Admin console, go to Menu > Apps > Google Workspace > Gmail > Spam, Phishing and Malware.
- On the left, select your top-level organization. This is usually your domain.
- In Spam, Phishing and Malware, scroll to the Inbound gateway setting and click Edit inbound gateway.
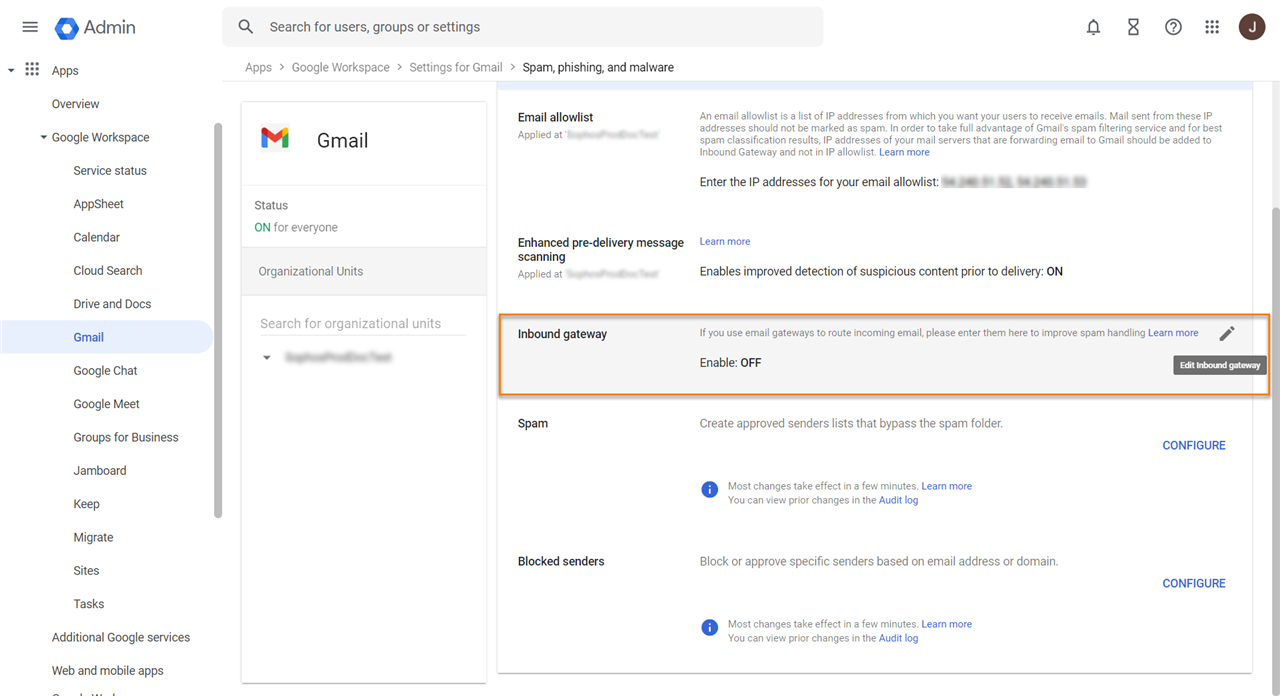
- Turn on the inbound gateway settings.
- Configure Gateway IPs.
- Click Add, then add the Sophos Phish Threat or Email IPs to be allowed.
- Select Automatically detect external IP (recommended).
- Deselect Reject all mail not from gateway IPs.
- Select Require TLS for connections from the email gateways listed above.
- Configure Message Tagging.
- Select Message is considered spam if the following header regexp matches.
- In Regexp, enter a random text that is unlikely to match the header content. For example, 349834hjedjsfkds==-0sdfee3.
- Select Message is spam if regexp matches.
- Select Disable Gmail spam evaluation on mail from this gateway; only use header value.

- Click SAVE.
Add domains and configure spam settings
Note: This procedure is only applicable to Sophos Phish Threat.
To add the relevant domains and configure spam settings, do as follows:
- Sign in to your Google Admin Console.
- In the Admin console, go to Menu > Apps > Google Workspace > Gmail > Spam, Phishing and Malware.
- On the left, select your top-level organization. This is usually your domain.
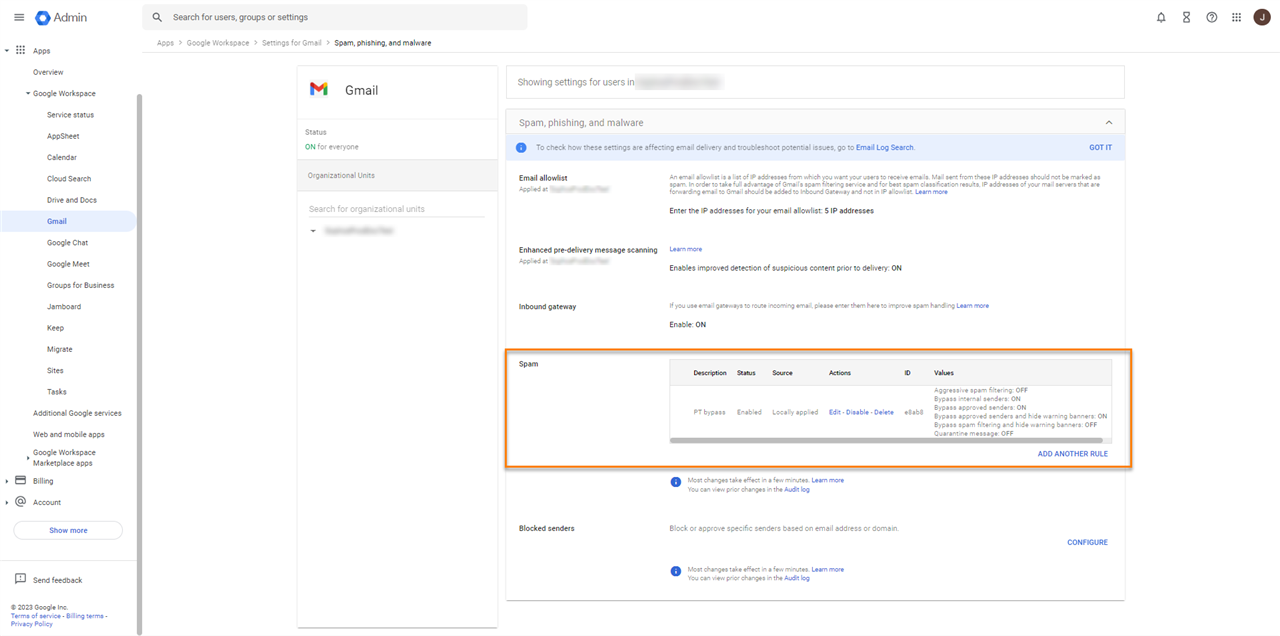
- In Spam, Phishing and Malware, scroll to the Spam setting and click CONFIGURE.
- Enter a name for the spam setting. For example, PT bypass.
- Select Bypass spam filters for messages from senders or domains in selected lists and do as follows:
- Click Create or edit list to create a new list for Sophos Phish Threat domains or modify an existing list.
This will take you to the Manage address lists. - Click ADD ADDRESS LIST.
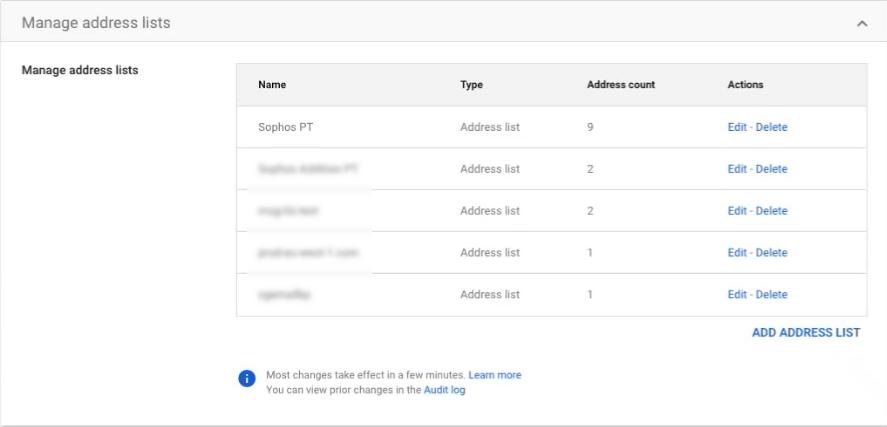
- Enter a name for the address list. For example, Sophos PT.
- Add the domain names.
For more information on the list of sender domains, see Sending domains and IPs. - Turn the authentication requirement off for all the domains, then click SAVE.
- Go back to the Spam settings page.
- Click Use existing list and select the list created for Sophos Phish Threat.
- Click Create or edit list to create a new list for Sophos Phish Threat domains or modify an existing list.
- Select Bypass spam filters and hide warnings for messages from senders or domains in selected lists and do as follows:
- Click Use existing list.
- Select the lists you created for Sophos Phish Threat.
- Click SAVE.
Add IP addresses and turn on whitelisting in the Content Compliance
Note: This procedure is only applicable to Sophos Phish Threat.
To add the relevant IPs and turn on whitelisting in the Content Compliance, do as follows:
- Sign in to your Google Admin Console.
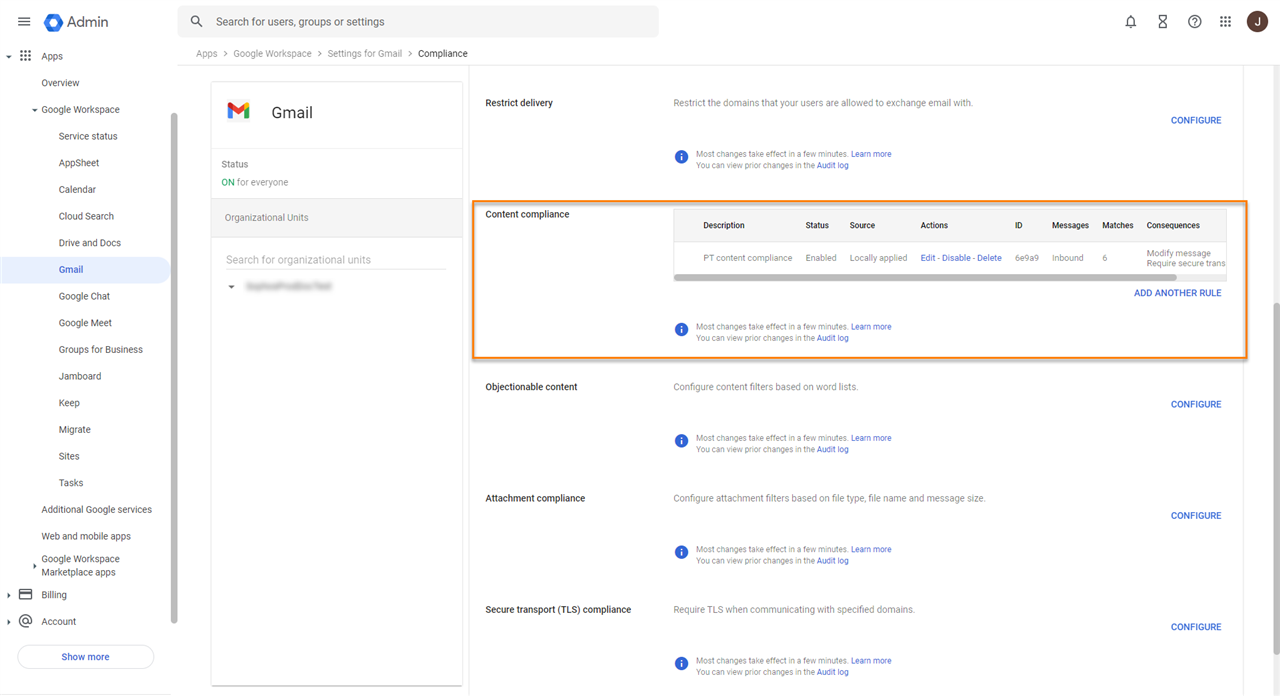
- In the Admin console, go to Menu > Apps > Google Workspace > Gmail > Compliance.
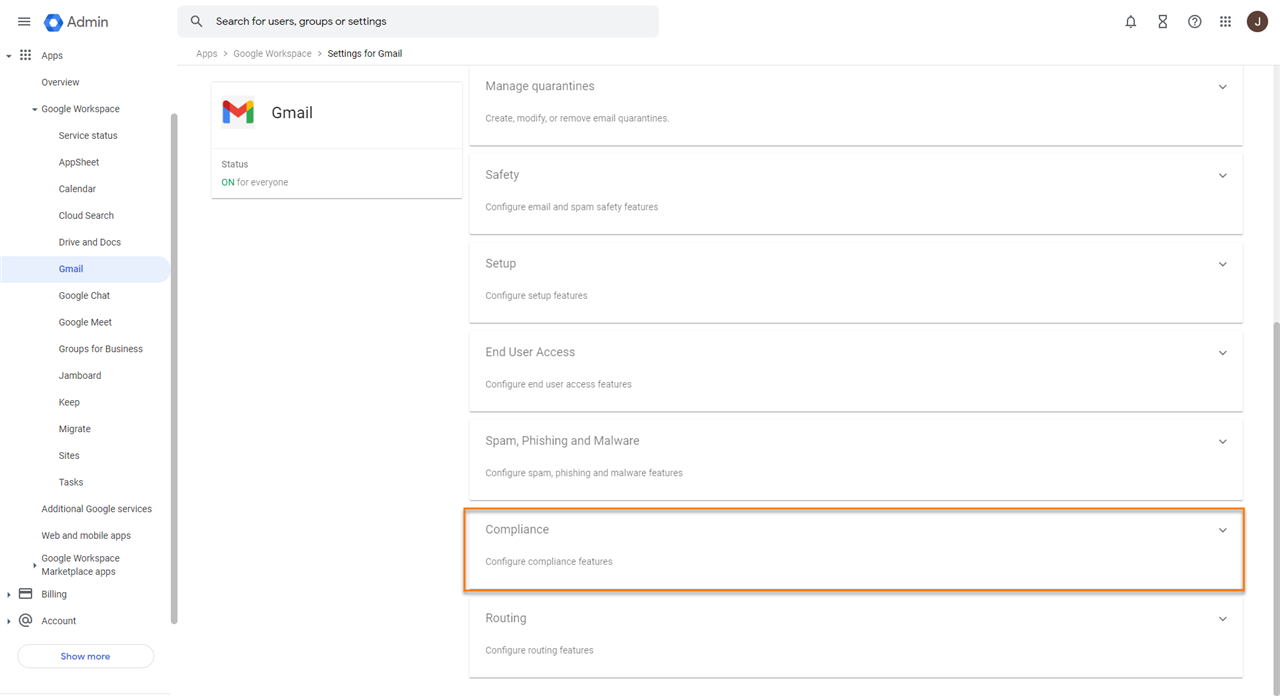
- In Compliance, scroll to the Content compliance setting and click CONFIGURE.
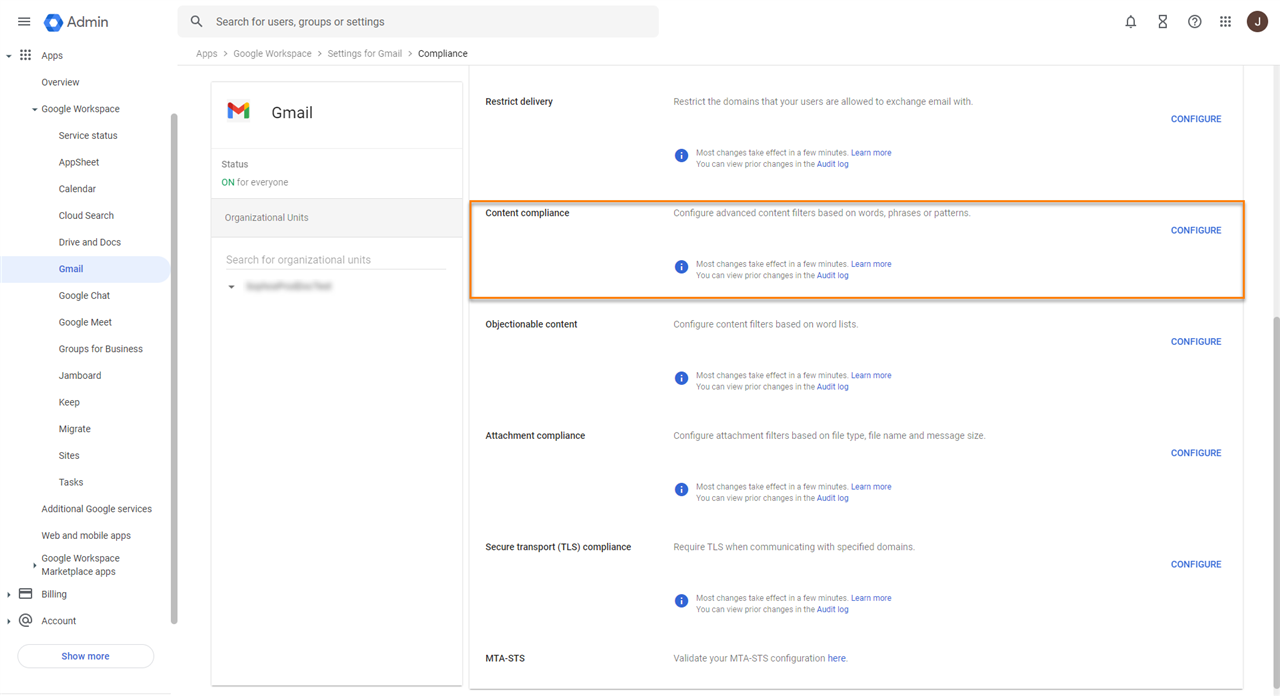
- Enter a name for the Content Compliance setting. For example, PT content compliance.
- Configure your Content Compliance settings.
- In Email messages to affect, select Inbound.
- In the If ANY of the following match the message drop-down list, create an expression with the following steps:
- Click ADD.
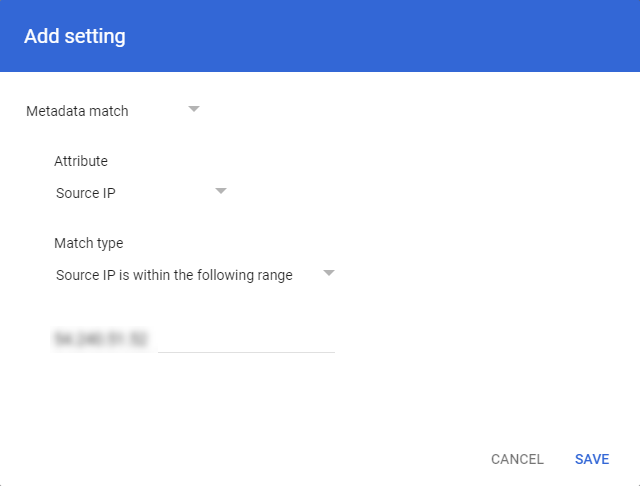
- Select Metadata match from the drop-down list.
- In the Attribute drop-down list, select Source IP.
- In the Match type drop-down list, select Source IP is within the following range.
- In the Source IP is within the following range text field, enter one of the Sophos Phish Threat IPs for whitelisting.
- Click SAVE.
- Repeat the steps above for the other IPs.
- In the If ANY of the following match the message drop-down list, add another expression with the following steps:
- Click ADD.
- Select Advanced content match from the drop-down list.
- In the Location drop-down list, select Full headers.
- In the Match type drop-down list, select Contains text.
- In the Content text field, enter "X-PT-TOKEN".
- Click SAVE.

- In the If the above expressions match section, do as follows:
- In Spam, select Bypass spam filter for this message.
- In Encryption (onward delivery only), select Require secure transport (TLS).
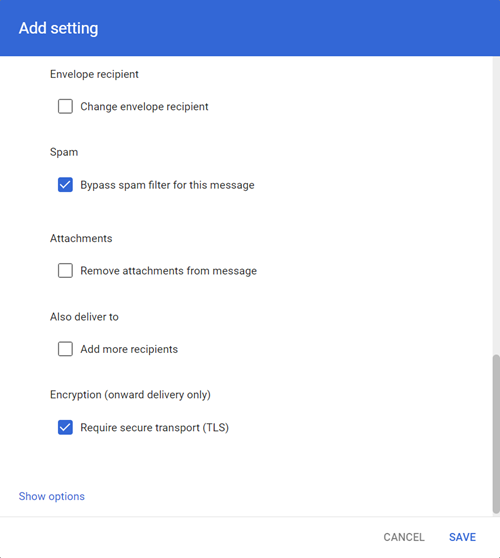
- Click SAVE.
Note: If, during the implementation of the IP/Domain Whitelist, a test email bounces, you would need to remove the email address from the Bounced Mailboxes list (Phish Threat > Settings > Bounced Mailboxes) before testing again, or no emails will be sent. All the Mailboxes where emails failed to be sent can be found here.
Added ingo about Bounced Mailboxes
[edited by: emmosophos at 10:21 PM (GMT -7) on 9 Apr 2024]