

Disclaimer: This information is provided as-is for the benefit of the Community. Please contact Sophos Professional Services if you require assistance with your specific environment.
Overview
This post is going to cover setting up XDR agent and enable the Data Lake Hydration features inside of your Sophos Central dashboard.
If you are a new Sophos Central user or recently purchased the licensing to enhance your Intercept-X agents and want to learn how to deploy the software. Are you neither? If you're new to Sophos entirely you can start a FREE 30-day trial using this sign-up link.
Sophos XDR: Getting Started with XDR and Data Lake Hydration

What is XDR?
Here at Sophos, XDR stands for eXtended Detection and Response - some vendors will refer to the technology as "cross layered" detection and response. The technology will collect data from various sources (endpoint, firewall, etc) like a SIEM but instead consolidates the view to provide correlated event data. XDR is key in any incident response or security plan. Many insurance providers require it. It serves to create a response action - automated with other tools or manual - using the same technology.
See this Sophos TechVid by Karl_Ackerman for the full technical demonstration and potential.
Endpoint Detection and Response: XDR Presentation

Prerequisites
What operating systems support XDR?
XDR is available on Windows, Mac, and Linux. You can find the system requirements for each respective platform below:
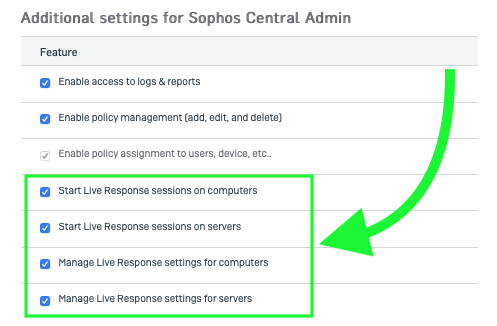
What Central permissions do I need to use XDR?
Sophos Central Admins or Super Admins will have access by default for both Live Discover and Live Response. If you are using a custom role, ensure you have the proper access levels from the Sophos Central Dashboard:
- Click Global Settings
- Click Role Management
- Click your "roleName"
- Click Edit Role
- Scroll to "Additional settings for Sophos Central Admin" and ensure the following are checked:
Install XDR Components
This section will review how to install Sophos Intercept-X with XDR on a new Sophos Central dashboard and an existing Sophos Central dashboard that has only Sophos Intercept-X installed.
New Sophos Central Dashboard
In this section, we are going to assume that you are installing your agents onto a Windows 10 desktop.To be able to use Live Discover and Live response, you need to ensure the XDR software is fully installed on your endpoint and server devices. If you are new to Sophos and purchased the Intercept X with XDR license, simply run the complete installer on your devices. The installer will verify XDR is included in your license and download the required installer files. Here are the steps:
Perform the following in the dashboard landing page:
- Click Protect Devices
- Under Endpoint Protection, select Choose Components from under Download Complete Windows Installer
- NOTE: if you are not licensed for Sophos Central Encryption, this option will not appear
- Verify you see "Sophos Intercept-X Advanced with XDR"
- Click Download Installer
- Run the installer
If you are installing on a Mac:
- Click Protect Devices
- Under Endpoint Protection, select Choose Components from under Download Complete MacOS Installer
- NOTE: if you are not licensed for Sophos Central Encryption, this option will not appear
- Verify you see "Sophos Intercept-X Advanced with XDR"
- Click Download Installer
- Run the installer
If you are installing on a Windows Server:
- Click Protect Devices
- Under Server Protection, click Download Windows Server Installer
- On the new dialog box, save the installer.
- Run the installer
If you are installing on a Linux Server:
- Click Protect Devices
- Under Server Protection, click Download Linux Server Installer
- On the new dialog box, save the installer.
- Run the installer
Existing Sophos Central Dashboard
If you're an existing Intercept X customer just adding XDR to your devices, you'll need to add XDR to your devices software list, so they'll install the file on the next update. Here are the steps:

For applying the new software to your existing Endpoint agents (Windows 7, 8/8.1, 10 or MacOS)
- Click Endpoint Protection
- Click Computers
- Either select ALL of your computers OR selectively choose where you want to deploy the agent
- Click Manage Endpoint Software
- From here, change the first drop down menu under PROTECTION to "Intercept-X Advanced with MTR"
- Click Save
For applying the new software to your existing Server agents (Windows Server 2008 R2 & UP or Linux)
- Click Server Protection
- Click Servers
- Either select ALL of your computers OR selectively choose where you want to deploy the agent
- Click Manage Endpoint Software
- From here, change the first drop down menu under PROTECTION to "Intercept-X Advanced with MTR"
- Click Save
Enable Data Lake Hydration
Sophos Central will not hydrate the Data Lake automatically by default, so you will need to enable hydration for both Endpoints and Servers. This applies to both new customers and existing customers.

To enable hydrating the data lake for endpoint:
- Click Endpoint Protection
- Click Settings
- Scroll down and click Data Lake uploads
- Toggle the switch to enable Upload to the Data Lake
- (OPTIONAL) - if you want to exclude any devices, select them from the available list and move them to the excluded list
To enable hydrating the data lake for server:
- Click Server Protection
- Click Settings
- Scroll down and click Data Lake uploads
- Toggle the switch to enable Upload to the Data Lake
- (OPTIONAL) - if you want to exclude any devices, select them from the available list and move them to the excluded list
Enable Live Response
Just like Data Lake Hydration, Sophos does not enable Live Response by default, so you'll need to enable Live Response for both endpoint and server. This applies to both new customers and existing customers.
To enable live response for endpoint:
- Click Endpoint Protection
- Click Settings
- Scroll down and click Live Response
- Toggle the switch to enable Allow live response connections to computers
- (OPTIONAL) - if you want to exclude any devices, select them from the available list and move them to the excluded list
To enable live response for server:
- Click Server Protection
- Click Settings
- Scroll down and click Live Response
- Toggle the switch to enable Allow live response connections to servers
- (OPTIONAL) - if you want to exclude any devices, select them from the available list and move them to the excluded list
Testing Your Features
Let's verify your settings are working. Keep in mind an in-place upgrade of software can take several minutes to complete depending on bandwidth, if the machine is online, reboot, etc.
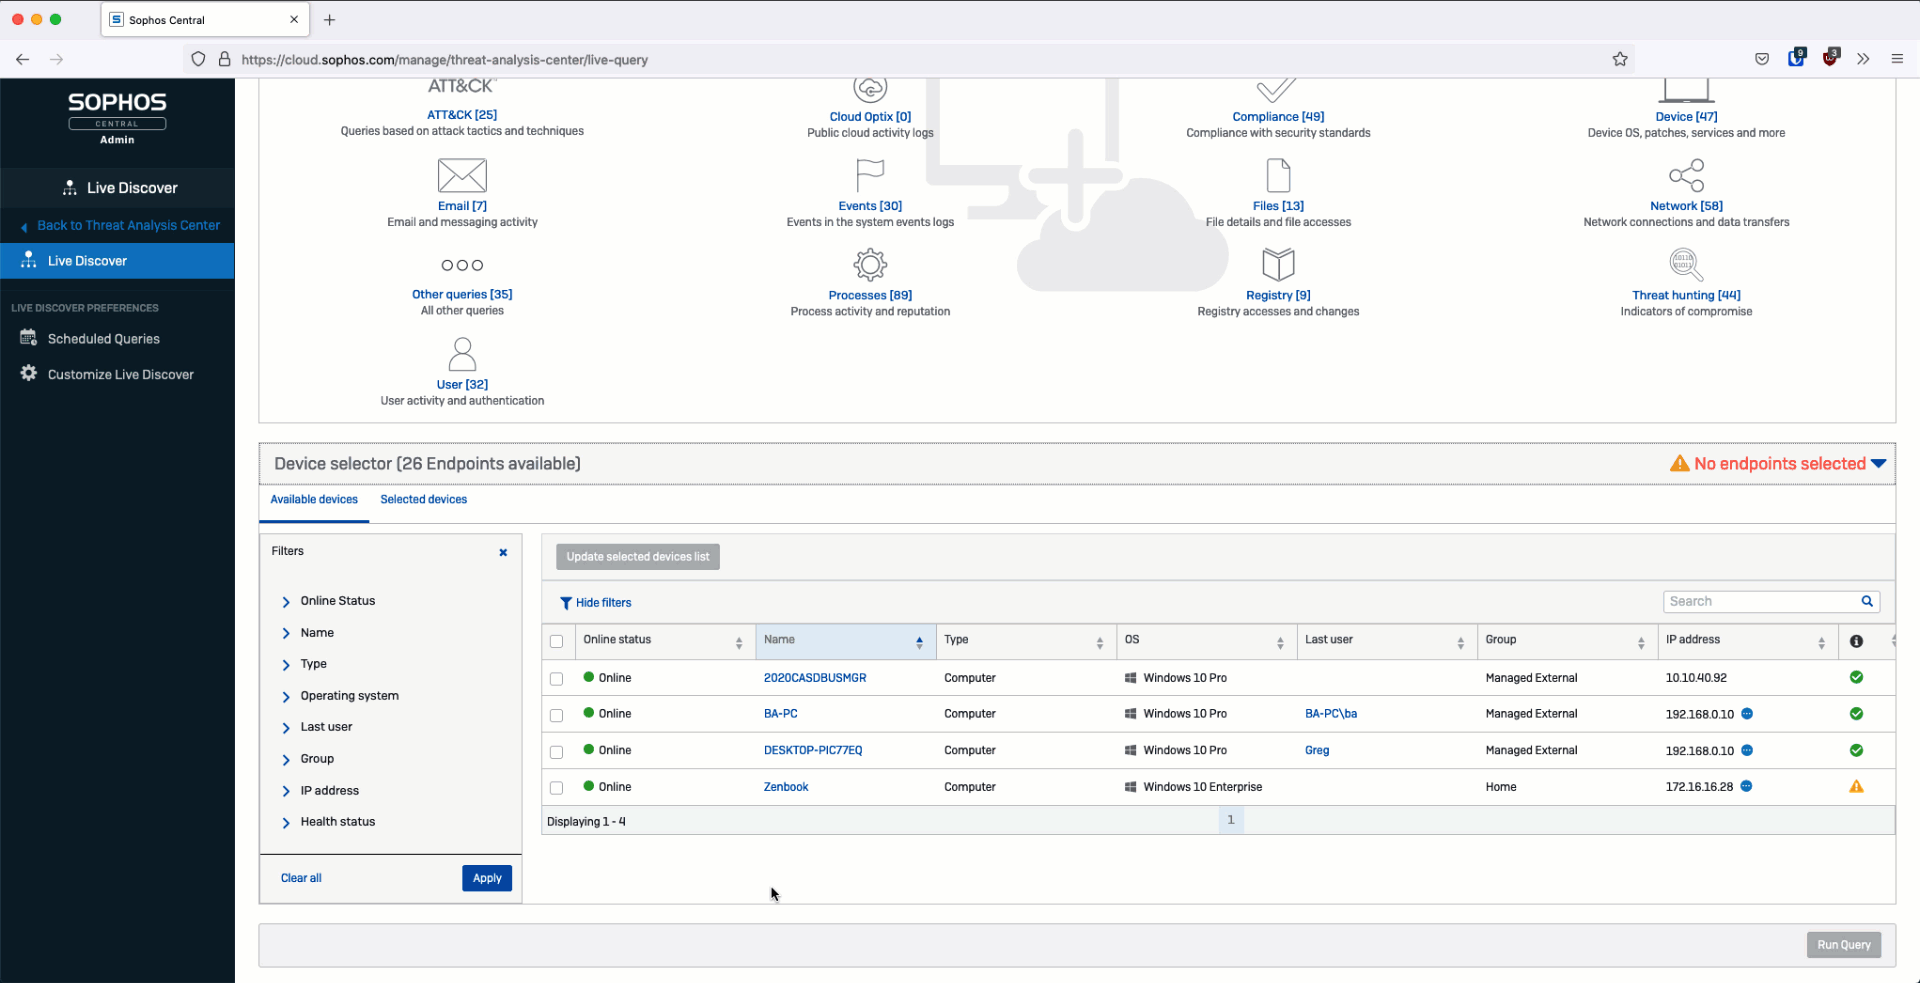
Live Discover
To test your live discover ability, perform the following:
- Click Threat Analysis Center
- Click Live Discover
- Scroll down to Device Selector and see if your devices appear
To test your live response settings (continued from above):
- Click on ANY of the listed devices
- You should see a Live Response button appear now
- Click it and test your connection to the agent
Closing
You are now successfully setup to use XDR to its fullest. Follow along as we are creating content on building out your live discover query, how to schedule data lake queries, and more.
Cheers
-jk
Added Disclaimer
[edited by: GlennSen at 3:25 PM (GMT -7) on 5 Apr 2023]
 Quote
Quote