

Disclaimer: This information is provided as-is for the benefit of the Community. Please contact Sophos Professional Services if you require assistance with your specific environment.
Overview
This article describes setting up Radius with authentication on Windows Server 2016 and configuring it to work with Wireless Protection on the Sophos Firewall.
Table of Contents
Applies to the following Sophos products and versions
Sophos Firewall
Prerequisites
Important: The Microsoft KB articles at the bottom of this document must be followed as well for the certificates to work properly.
This article is based on using a clean install of Windows Server 2016. This procedure has been tested using Windows Server 2016 with Sophos Firewall with the following Wireless Network configuration:
- Encryption Mode: WPA2 Enterprise
- Algorithm: AES (secure)
- Client Traffic: Separate Zone
- Client Isolation: Disabled
- Hide SSID: Disabled
If you already have some of the below steps configured, please use this KB as a starting point for troubleshooting issues you may be experiencing.
Prerequisites:
- Sophos Firewall with Wireless Protection
- Sophos AP
- Windows Server 2016
Windows Server required Roles & Features:
- Active Directory
- Active Directory Certificate Services
- Network Policy and Access Services
This article assumes the following:
- You have Active Directory installed and configured on your network
- You have the Network Policy and Access Services role installed
- You have a configured certificate authority or have a valid certificate you wish to use with NPS (Radius)
- Your AP is connected and functional on your Sophos Firewall
How to configure Wireless Protection with Radius authentication
This procedure consists of the following three sections:
- Wireless Protection Configuration (Sophos Firewall)
- Radius Configuration (Windows Server)
- NPS Certificate Configuration using Certificate Templates (Windows Server)
Wireless Protection Configuration
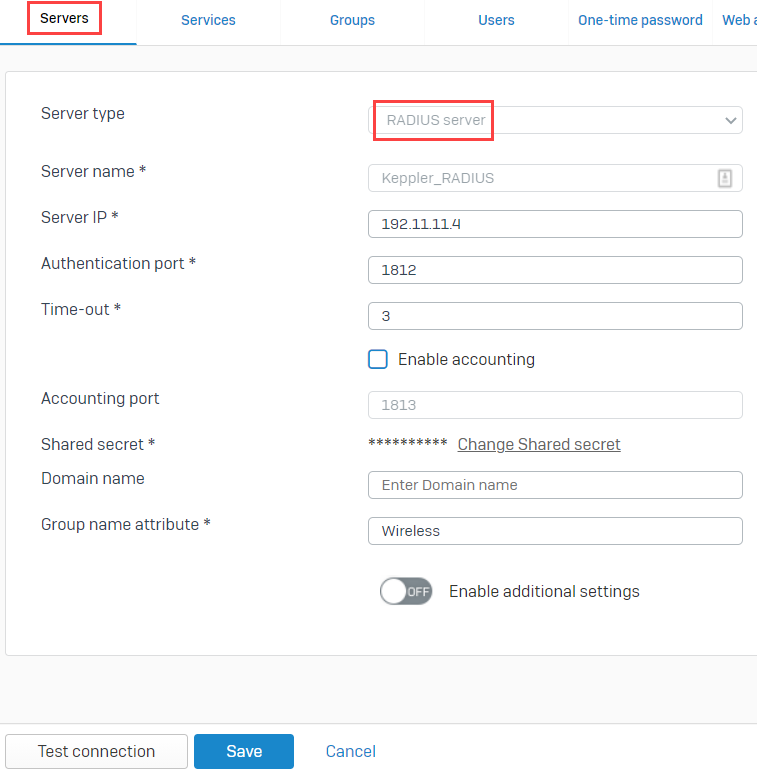
- Add a RADIUS server under Configure > Authentication > Servers > Add. For more detail about adding a RADIUS server see, Add a RADIUS server.
- Ensure you remember the shared secret, as it will be used later when configuring the RADIUS server.
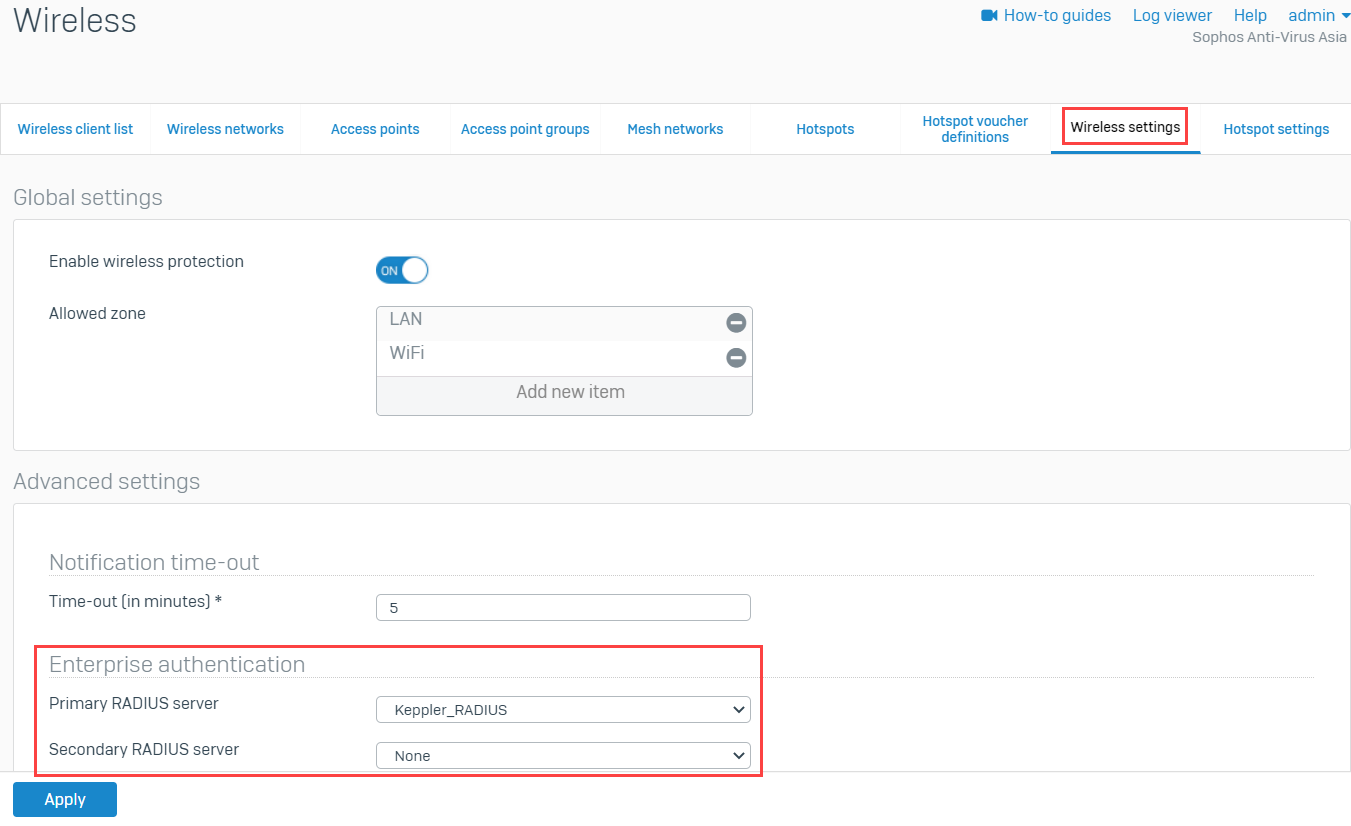
- Select your RADIUS server from the drop down box under Protect > Wireless > Wireless settings.
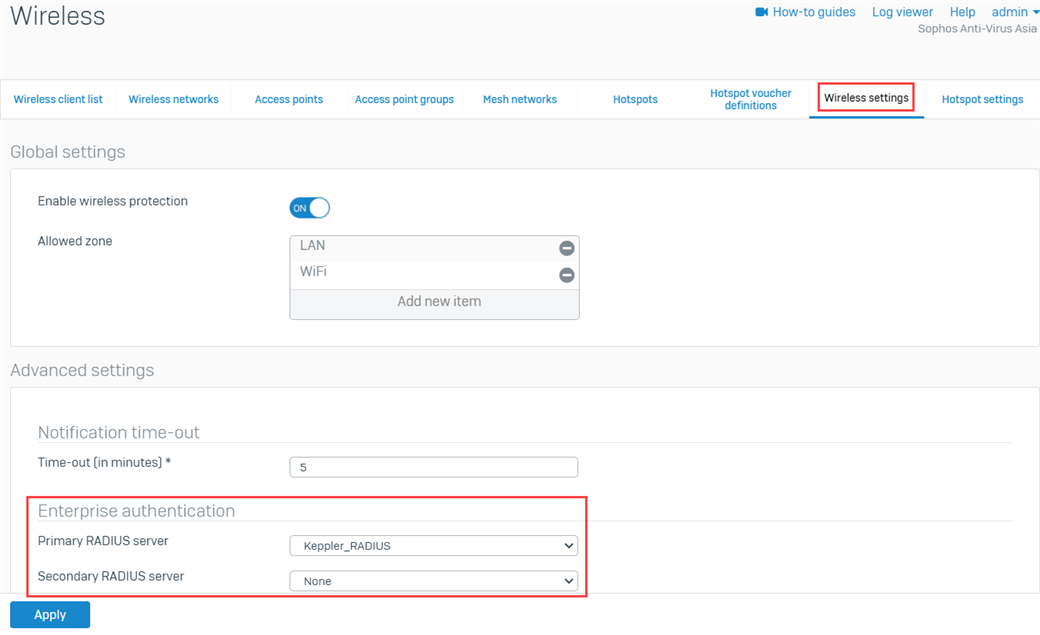
Note: In SFOS 17.5 and above the ability to add a secondary RADIUS server, as a fallback for Enterprise Authentication, has been added. Should the primary RADIUS server fail, the secondary server will be used, granting zero downtime to authenticate.
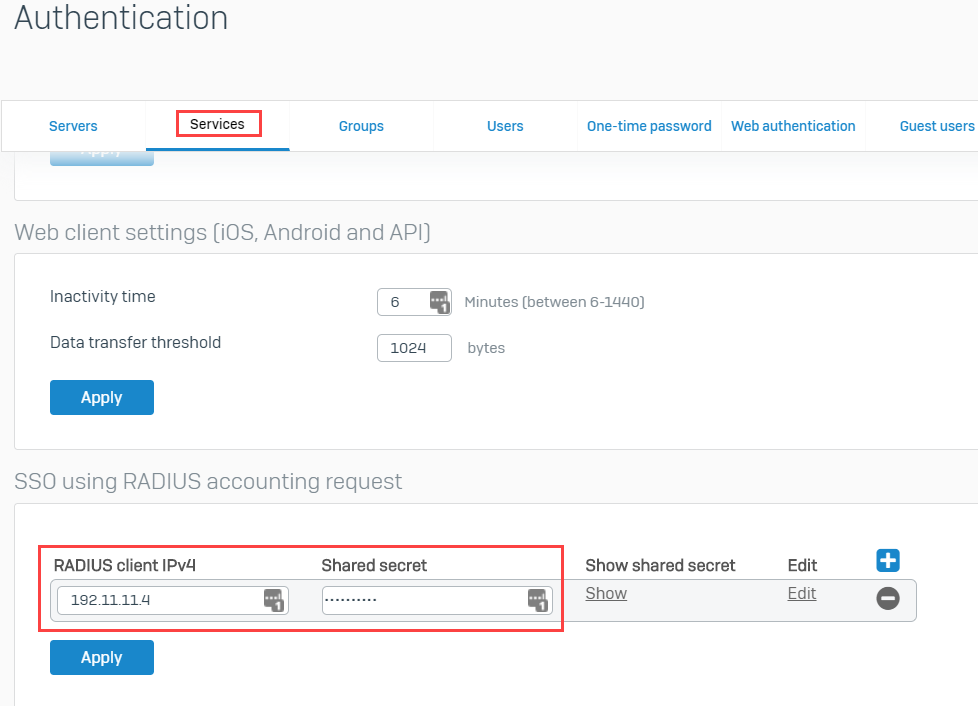
- Go to Authentication > Services and scroll down until the SSO using the radius accounting request section to set the Radius Client IPv4 to the Radius server's IP address and shared secret.

Configuring RADIUS on your Windows Server
Authorize your Network Policy Server with your Active Directory
Radius Client Setup
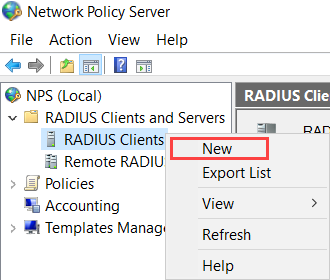
- Run the Network Policy Server (NPS) and go to RADIUS Clients and Servers > RADIUS Clients. Right-click the RADIUS Clients and select New.

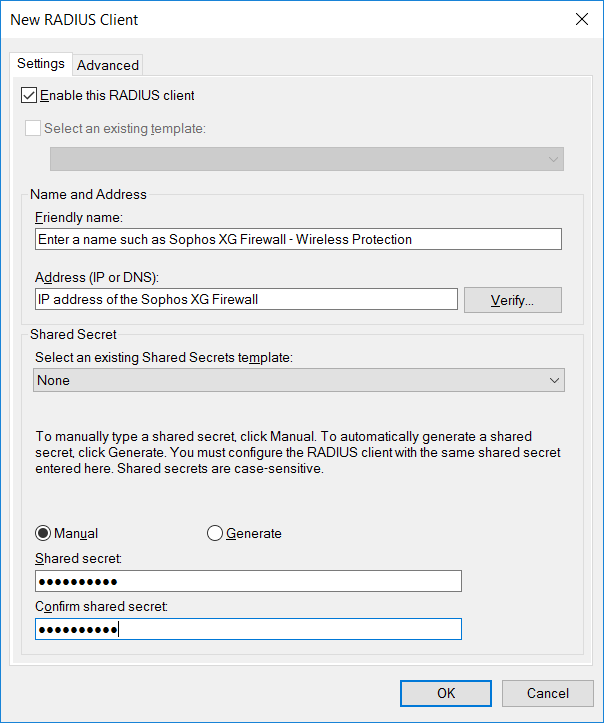
- Under the Settings tab, enter the values as shown below:
- Friendly Name: You may put any name here. You will need to enter the name again in the steps below.
- Address (IP or DNS): Enter the IP Address or internal DNS name of your Sophos Firewall. Click verify and make sure the IP or hostname resolves correctly.
- Shared Secret: Enter the shared secret you entered in Step 1 of the Wireless Protection Configuration above.

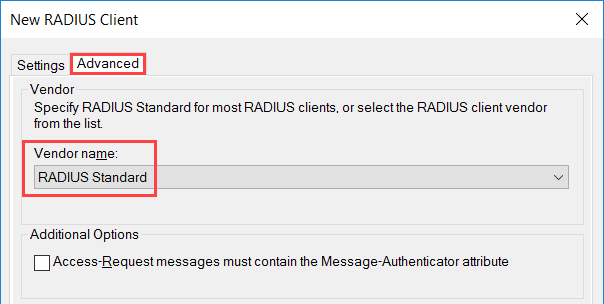
- Under the Advanced tab, enter the value as shown below:
- Vendor name: Radius Standard should be selected.

- Vendor name: Radius Standard should be selected.
- Click Apply.
Policies
Connection Request Policies:
- Run the Network Policy Server (NPS) and go to Policies > Connection Request Policies. Right-click Connection Request Policies and select New.

- Enter a Policy name. In our example, we have called it Wireless.
- Click Next.
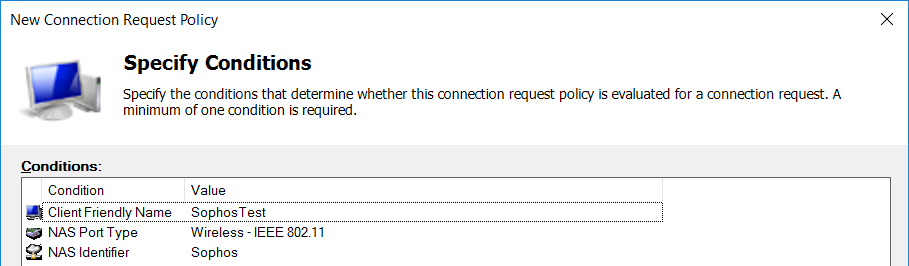
- Add the following conditions:
- Client Friendly Name: Name of the RADIUS client
- NAS Port Type: Wireless – IEEE 802.11
- NAS-Identifier: SSID of your wireless network
- Click Next for the following windows, and then click Finish – The default settings are fine for the rest of the configuration.


Network Policies:
Click Network Policies from the NPS Console
- Right-click Network Policies and select New.
- Enter a name, preferably the same as the Connection Request Policy.
- Click Next.
- Click Add.
- Choose how you want the users to authenticate. For this, we are using User Groups and the group Domain Users.
- Click Next until you arrive at Configure Authentication Methods.
- We will use PEAP. Click Add and choose Microsoft: Protected EAP (PEAP).
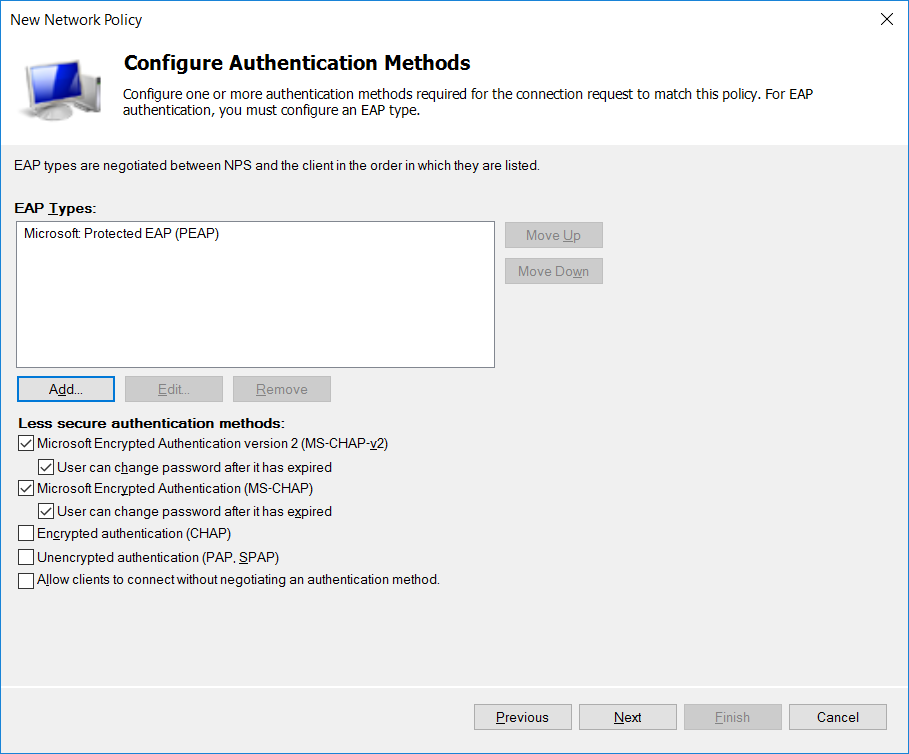
- Choose the authentication methods as shown above.
- Click Next.
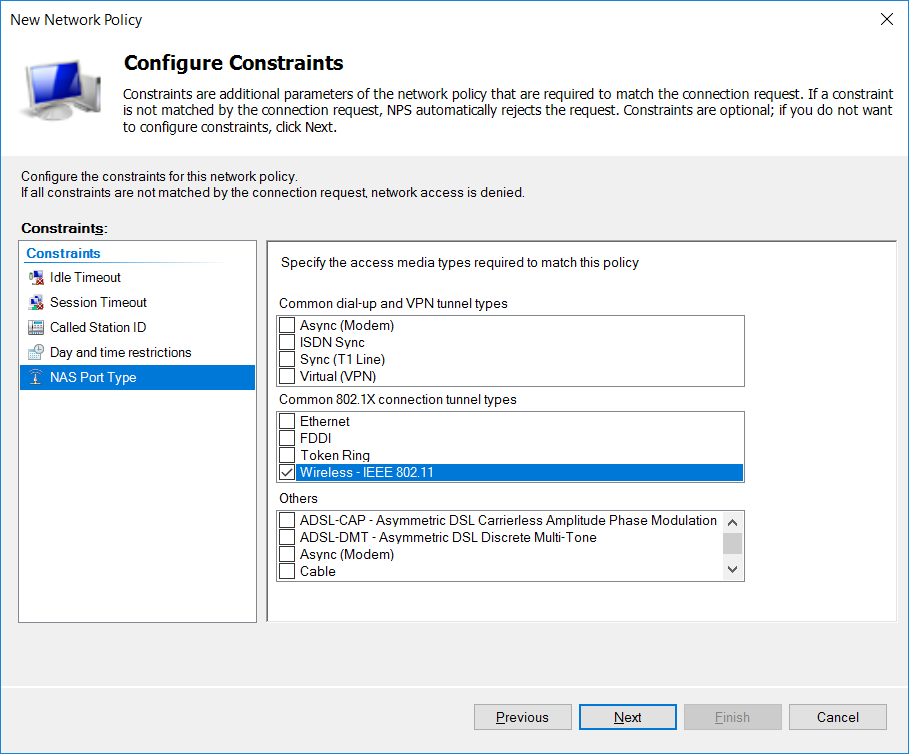
- Under NAS Port Type, choose Wireless – IEEE 802.11.

- Click Next, Next, and then Finish.

NPS Certificates
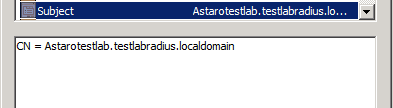
Please make sure the certificate you’re using has a valid subject, as in the following screenshot:
You can use your current certificate, but we recommend creating a separate RAS and IAS certificate template if your Radius server is on the same machine as your Domain Controller. If you renew your Domain Controller cert, it can stop authentication via Radius.
The following links point to a few Microsoft KB articles describing how to deploy a CA and NPS Server-Cert. You must follow the below links in order. Remember, this document outlines a new configuration. Please tailor this section according to how you have your certificates set up.
- Deploy a CA and NPS Server Certificate
- NPS Server Certificate: CA Installation
- NPS Server Certificate : Configure the Template and Autoenrollment
Related information
Horizontal lines, Grammar, substitute XG for Sophos Firewall
[edited by: emmosophos at 6:32 PM (GMT -8) on 16 Nov 2023]