Disclaimer: This information is provided as-is for the benefit of the Community. Please contact Sophos Professional Services if you require assistance with your specific environment.
Table of Contents:
Overview:
This guide will show how to auto-connect a Windows device on start-up to Sophos Firewall SSL VPN Remote access.
The Sophos Connect provisioning file allows you to provision remote access IPsec and SSL VPN connections with Sophos Firewall. It also automatically imports any configuration changes you make later. Users don't need to download the configuration file from the VPN portal.
Also, before proceeding, check your OS Compatibility with Sophos Connect Client: https://docs.sophos.com/nsg/sophos-firewall/21.0/help/en-us/webhelp/onlinehelp/AdministratorHelp/RemoteAccessVPN/IPsecSSL/SophosConnect/RAVPNSConClient/index.html#download-the-client
Further, for more details about the Provisioning File you can refer on this document guide: https://docs.sophos.com/nsg/sophos-firewall/21.0/help/en-us/webhelp/onlinehelp/AdministratorHelp/RemoteAccessVPN/IPsecSSL/SophosConnect/RAVPNSConProvisioningFile/index.html
Configuration:
1. Configure your SSL VPN Remote Access - You may follow this document guide: https://docs.sophos.com/nsg/sophos-firewall/21.0/help/en-us/webhelp/onlinehelp/AdministratorHelp/RemoteAccessVPN/IPsecSSL/SSLVPN/index.html
2. Then, download and install the Sophos Connect client: https://docs.sophos.com/nsg/sophos-firewall/21.0/help/en-us/webhelp/onlinehelp/AdministratorHelp/RemoteAccessVPN/IPsecSSL/SophosConnect/RAVPNSConClient/index.html
Note: Starting V20 onwards, you can download the client in VPN Portal: https://support.sophos.com/support/s/article/KB-000045105?language=en_US
3. Next, we'll configure and import the provisioning file to the Sophos Connect Client: https://docs.sophos.com/nsg/sophos-firewall/21.0/help/en-us/webhelp/onlinehelp/AdministratorHelp/RemoteAccessVPN/IPsecSSL/SophosConnect/RAVPNSConConfigureProvisioningFile/index.html
We can open an editor such as Notepad and configure what we need to perform the auto-connect functionality, you may follow this template:
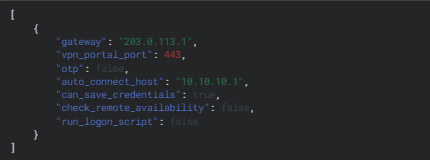
In our scenario, We will fill "gateway": "auto_connect_host": and "can_save_credentials" so when we import the .pro file later the user will have the capability to save username and password upon initial login on the client but the next logins would not require user intervention anymore.
Kindly take note as well of the needed requirements in creating the .pro file

Then, after the configuration, save the file with the .pro extension.
4. Import the .pro file to the Sophos Connect Client
In your Sophos Connect Client > Import Connection
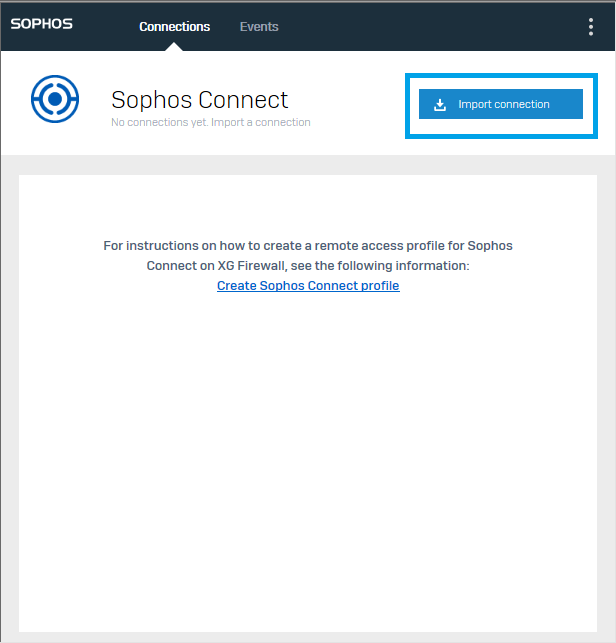
Then Double-click the .pro file. Alternatively, click Import connection in the client and select the file.
![]()
Also, you may import the .pro file using GPO. Kindly refer to this documentation guide: https://docs.sophos.com/nsg/sophos-firewall/20.0/help/en-us/webhelp/onlinehelp/AdministratorHelp/RemoteAccessVPN/IPsecSSL/SophosConnect/RAVPNSConProvisioningFileGPOScript/index.html
5. Once you import the .pro file, it’ll now try to connect, then you'll face a Certificate Warning Error -
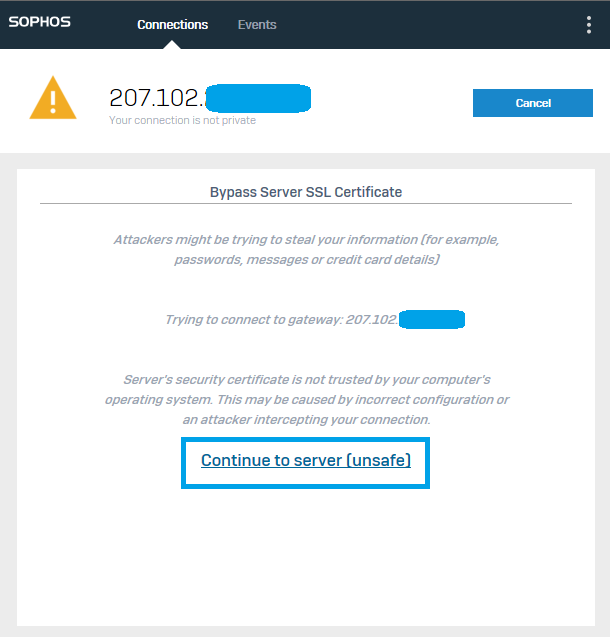
You can "Continue to server" and still be able to connect; the error doesn't indicate a network problem.
To prevent users from seeing a certificate error (allow unsigned certificate) when the file is imported, do as follows:
- Generate a locally-signed certificate.
- Go to Administration > Admin settings > Admin console and end-user interaction > Certificate and select the certificate.
Push the default CA to users.
The easiest way to do this is with Active Directory GPO.
6. Authenticate the user and check on the option to Save username and password, then click Sign In.
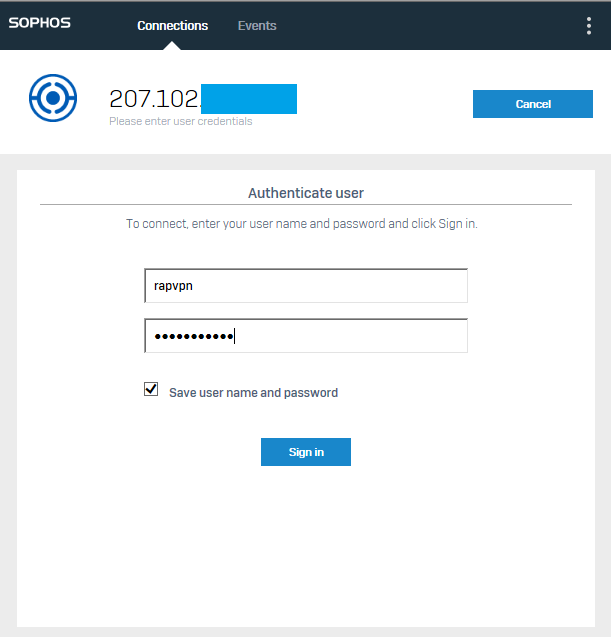
Connection should be established and successful:
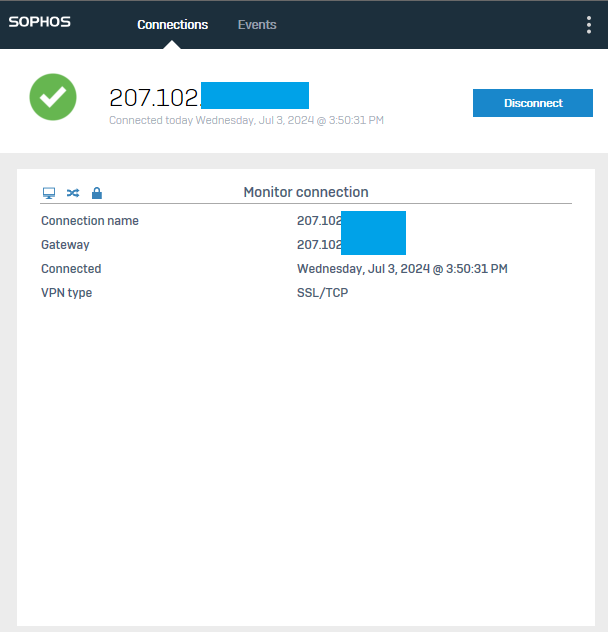
You can also verify on Sophos Firewall > Current Activities > Live User

7. Ensure that Sophos Connect Client is Enabled on your Startup Programs on Windows:
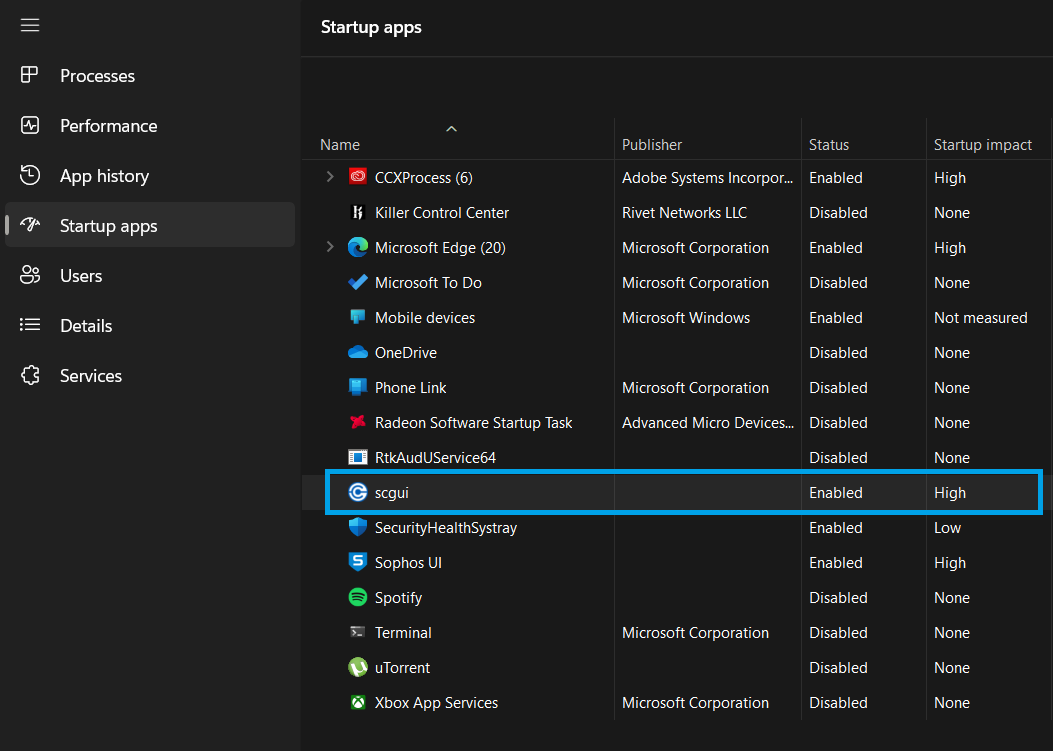
Then, once a restart or startup happened on a device, the client would just connect automatically without user intervention.
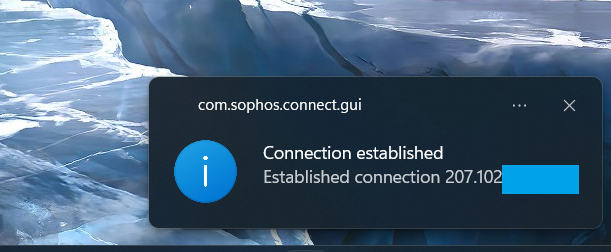
You can verify again under Sophos Firewall > Current Activities > Live User
Related Information:
Setup Remote Access SSL VPN: https://docs.sophos.com/nsg/sophos-firewall/21.0/help/en-us/webhelp/onlinehelp/AdministratorHelp/RemoteAccessVPN/IPsecSSL/SSLVPN/index.html
Sophos Connect Client: https://docs.sophos.com/nsg/sophos-firewall/21.0/help/en-us/webhelp/onlinehelp/AdministratorHelp/RemoteAccessVPN/IPsecSSL/SophosConnect/RAVPNSConClient/index.html
Provisioning File Templates:https://docs.sophos.com/nsg/sophos-firewall/21.0/help/en-us/webhelp/onlinehelp/AdministratorHelp/RemoteAccessVPN/IPsecSSL/SophosConnect/RAVPNSConProvisioningFile/index.html
