

Disclaimer: This information is provided as-is for the benefit of the Community. Please contact Sophos Professional Services if you require assistance with your specific environment.
Table of Contents
Overview
This Recommended Read describes the AWS Environment in Cloud Optix using Windows 10
|
Installing Windows Subsystem for Linux (WSL) on Windows 10
|
1. Open PowerShell as an administrator on Windows 10 and run the following command
Enable-WindowsOptionalFeature -Online -FeatureName Microsoft-Windows-Subsystem-Linux |
2. When prompted to restart your computer, type "Y" for yes and press "Enter"

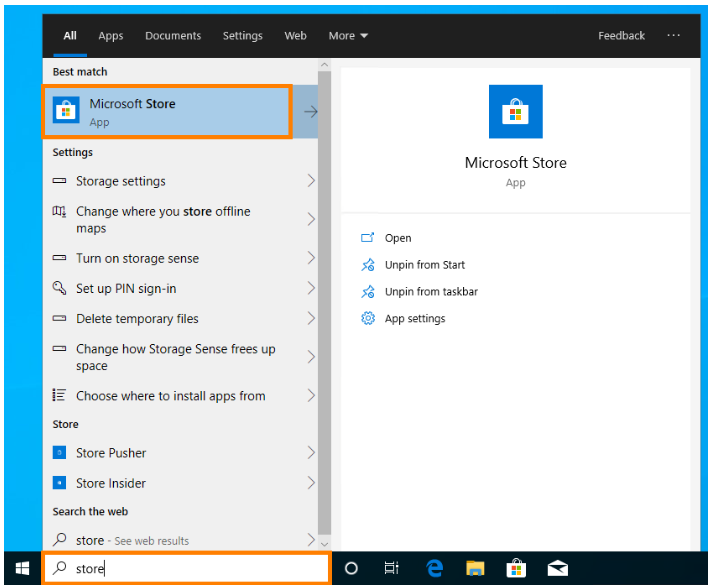
3. Once your system has rebooted, click the start button and search for "Store". Then open the "Microsoft Store."
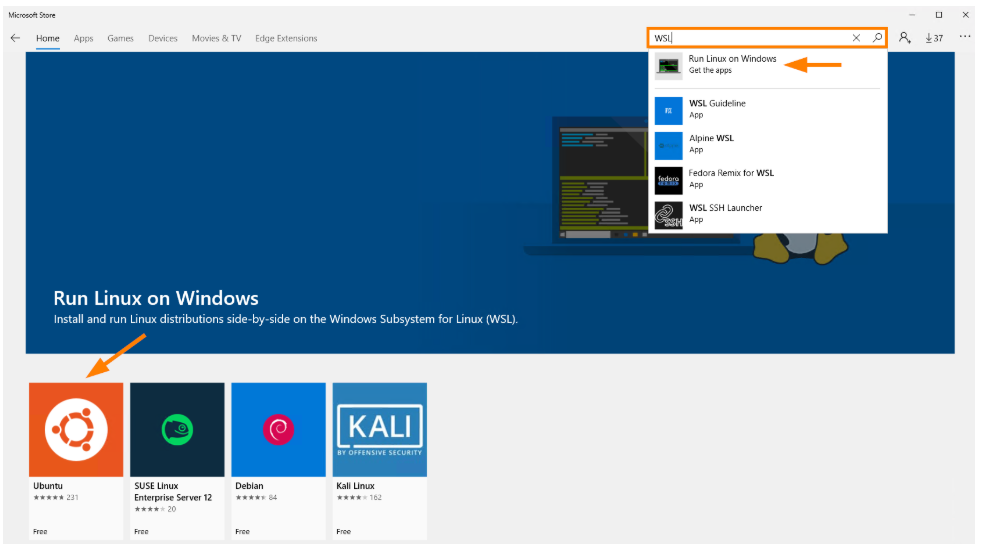
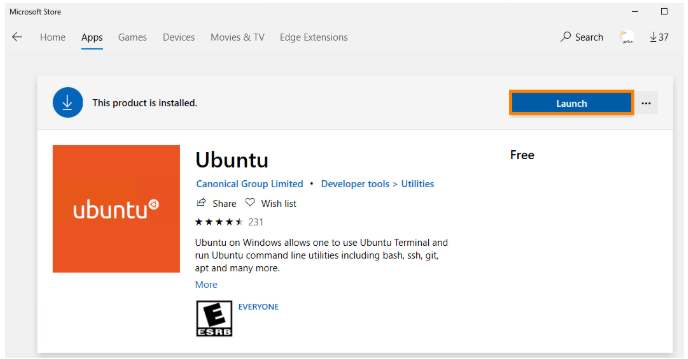
4. In the Microsoft Store, search for "WSL" (means Windows Subsystem for Linux"), click "Run Linux on Windows" and then click the "Ubuntu" option
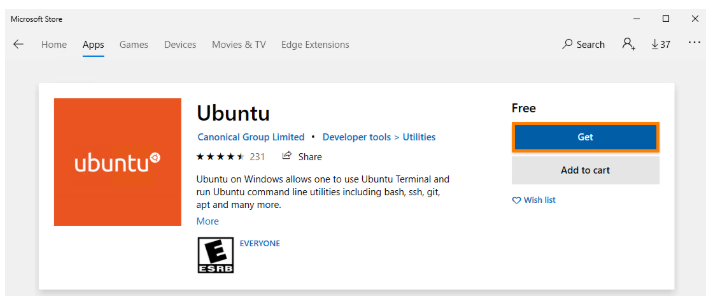
5. Click on "Get"
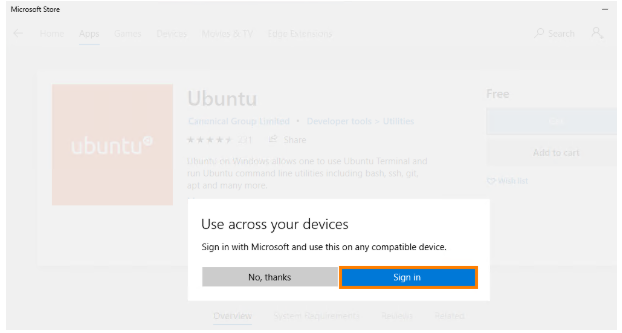
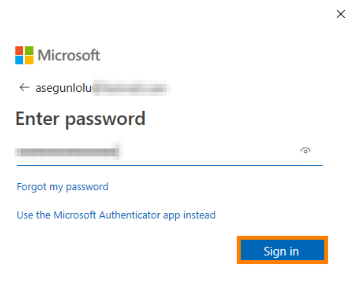
6. If prompted to sign in, go ahead and sign in with a Microsoft, Work, or School account
7. The download must begin. After the download has been completed, click "Launch" to begin the installation
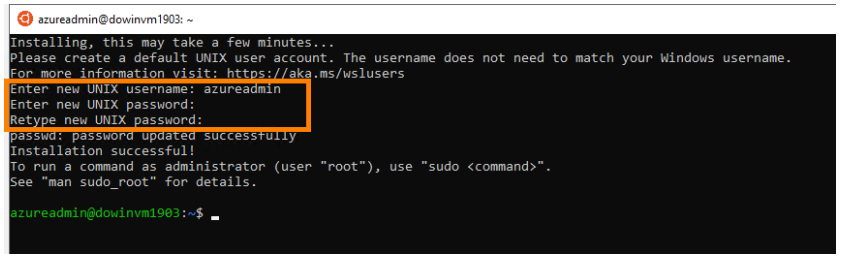
8. When prompted, enter the UNIX username that you want to use and enter and confirm the password that you want to use. After this, you must be on the bash shell on Windows 10
Install and Configure AWS CLI on Windows Subsystem for Linux
|
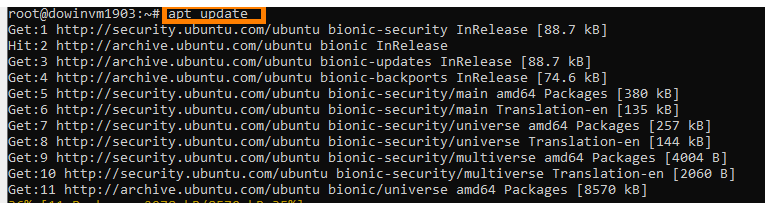
1. Update the package list using the following command:
apt update |
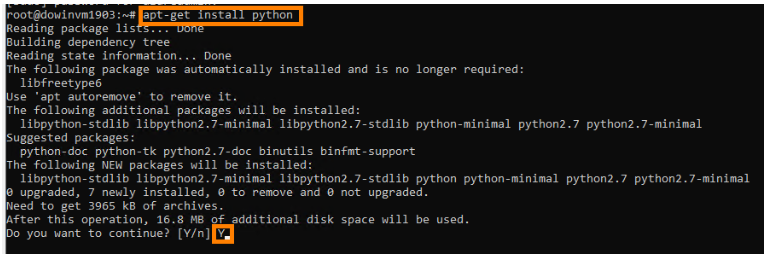
2. Install Python using the following command. Enter "Y" for yes when prompted.
apt-get install python3 |
3. Install pip3 using the following command. Enter "Y" for yes when prompted.
apt-get install python3-pip |

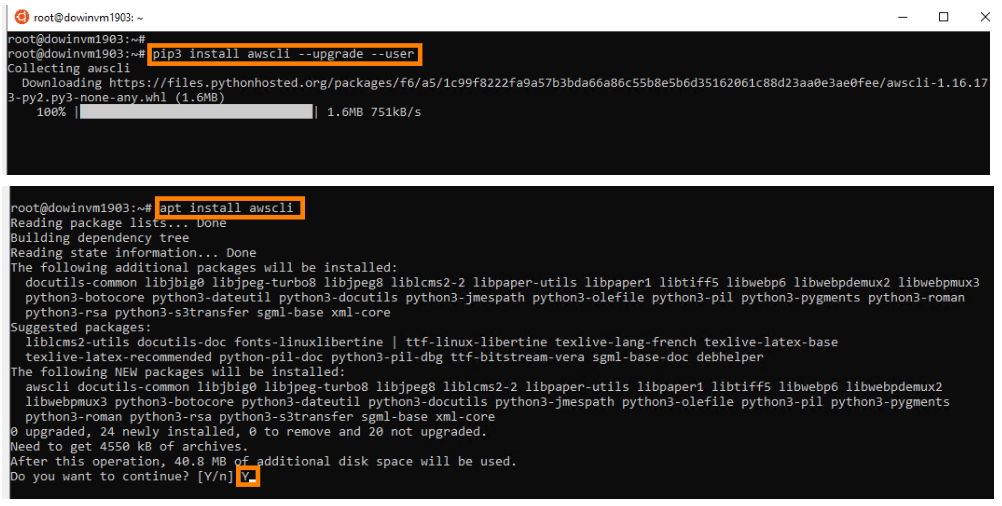
4. Install AWS CLI using the following commands. Enter "Y" for yes when prompted.
pip3 install awscli --upgrade --user apt install awscli |
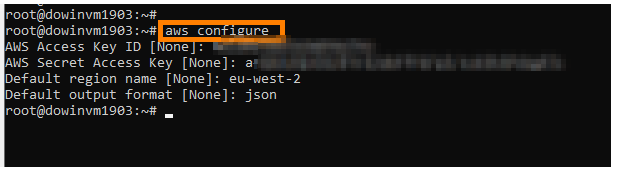
5. Configure access to your AWS environment by using the command below.
aws configure |
6. When prompted, enter the following:
- AWS Access Key ID [None]: YOUR ACCESS ID
- AWS Secret Access Key [None]: YOUR SECRET KEY
- Default region name [None]: The region you want to use as your default region. A list can be found here: https://docs.aws.amazon.com/general/latest/gr/rande.html
- Default output format [None]: json
Onboard your AWS environment into Optix.
1. Open the Cloud Optix console and sign in with your credentials
2. Navigate to the "Settings" item in the left-hand menu and select "Environments", then click "Add New Environment."

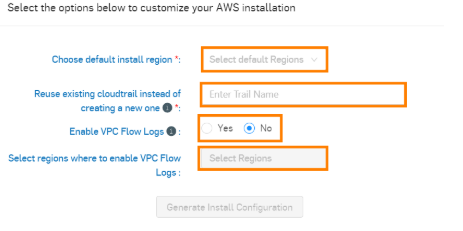
3. (Optional) Customize the deployment by clicking “Click here to customize your AWS installation” under the AWS Account tab
a. Choose an install region from the “Choose default install region” drop-down menu
b. Enter an existing cloud trail if you wish to reuse one in the field below
c. Enabling VPC Flow Logs enables Cloud Optix to perform analysis of traffic inside the AWS account for alerting and topology purposes but will cause increased operational spending on AWS – you can choose to use this service by clicking Yes or No in the “Enable VPC Flow Logs” section
d. Clicking “Yes” will turn on you to further customize the regions in which you wish to turn on flow logs by selecting them from the drop-down menu
e. Click Generate Install Configuration to generate the required steps to apply the desired custom configuration
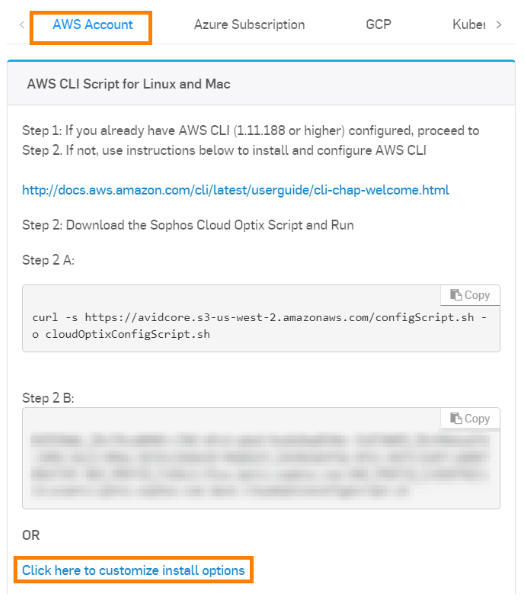
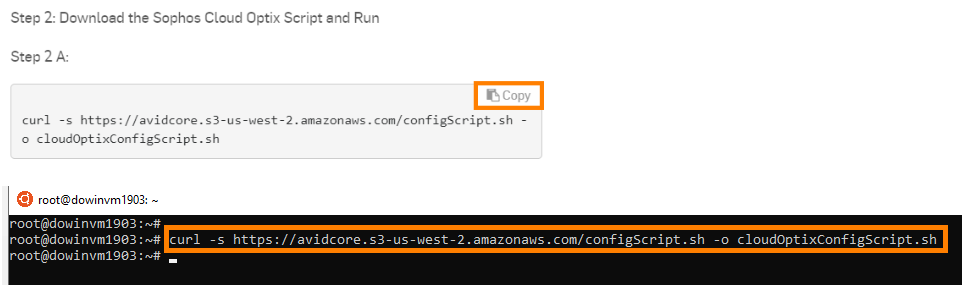
4. Open the Windows Subsystem for Linux and run the commands shown in step 2A on the Sophos Cloud Optix portal
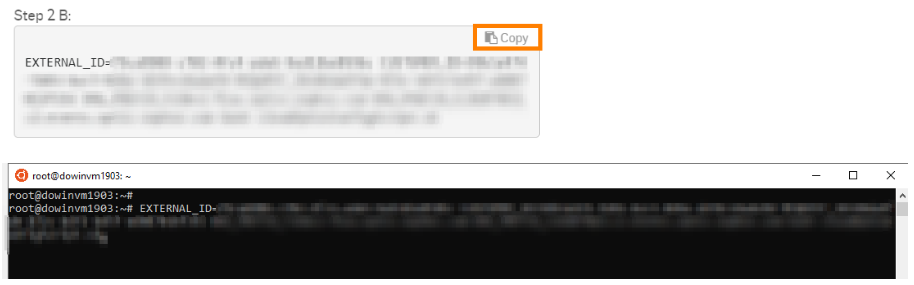
5. Once completed, run the commands shown in step 2B (or the commands received from the customization in step 4)
6. After the script is finished, you’ll see a confirmation message. If no errors exist, your environment will show up in the Sophos Cloud Optix dashboard.
Revamped RR
[edited by: Erick Jan at 6:02 AM (GMT -7) on 18 Apr 2024]